• Blog your pepper progress. The first image in your first post will be used to represent your Glog.

salsalady's first grow log

This whole forum has inspired me to attempt to grow a few peppers. After receiving some seeds from another forum member, I decided to give it a go myself. The original plan was to have a local farmer grow them for me, but I'd feel real bad if they did a ton of work all season and they only produced a few pounds of peppers.

SO~ Here we go!

The seeds I received are-
Red Savina habanero
bhut jolokia
trinidad scorpion
7 pot- homegrown
7 pot- other

I printed out the growing instructions from Peppermania to have something to work with, bought a couple 72-cell starting trays, some germination mix, recruited SalsaNut0.5 to help, and set to work.

We set the seeds to soak in warm bleach water, filled the trays with dry germination mix and poured water over top of the mix and into the bottom tray. Rookie mistake! An hour later and the water was still pooled up on top of the mix, hadn't soaked up at all. So we dumped the mix out into a tray, added more water and mixed it up by hand. Back into the cells and after rinsing the seeds, we were finally ready to plant!

While we had the seeds soaking in little cups, 'Nut0.5 bumped one that was pretty full of water and splashed some of the 7 Pot seeds into the Trinidad Scorpion cup. OH WELL!

We ended up filling both 72 cell trays and putting 28 more seeds in a couple other plastic things I had laying around. OMG! 172 seeds! What Have I Gotten Myself Into?!?!? And the really scary thing is......I have some Aji Amarillo, orange Peter Peppers, Fatali and Peruvian white hab seeds on the way! YIKES!


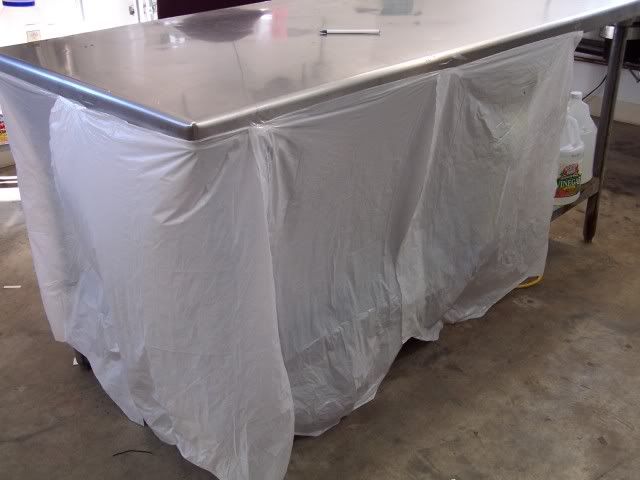
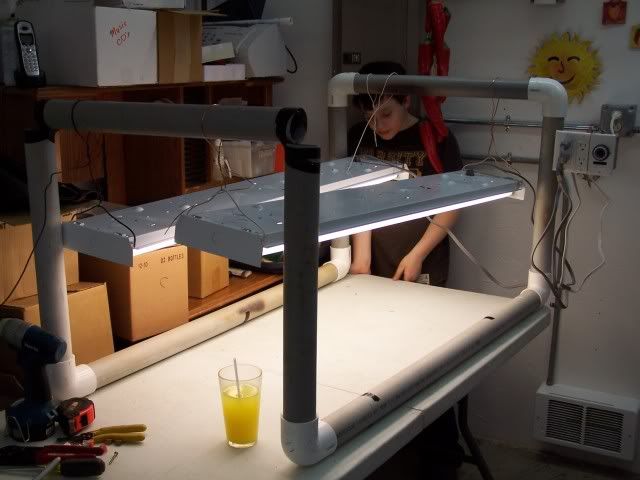
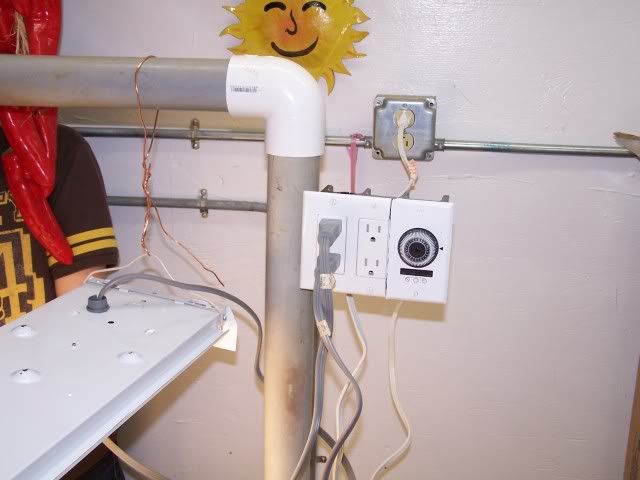
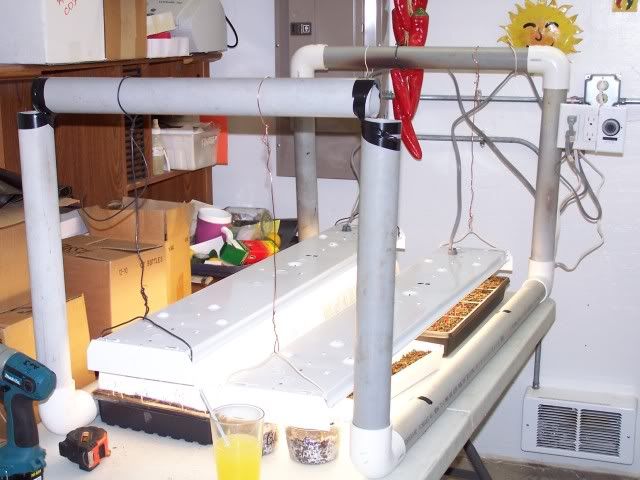
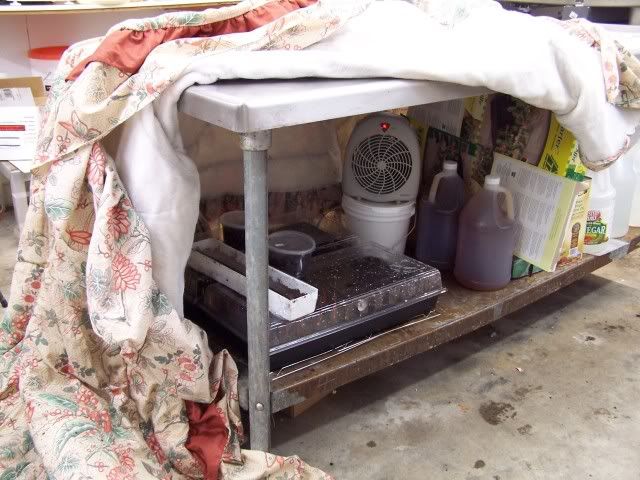
Here's the temporary set up. It's under a SS table out in the salsa kitchen (hope the inspector doesn't pop in for a week or two until I can get the rest of the set up done). There's a space heater to keep thing warm, a blanket to hold the heat in, a thermometer in the tray, and we used colored toothpicks for ID-ing the different varieties.
growstuff.jpg


growstuff003.jpg


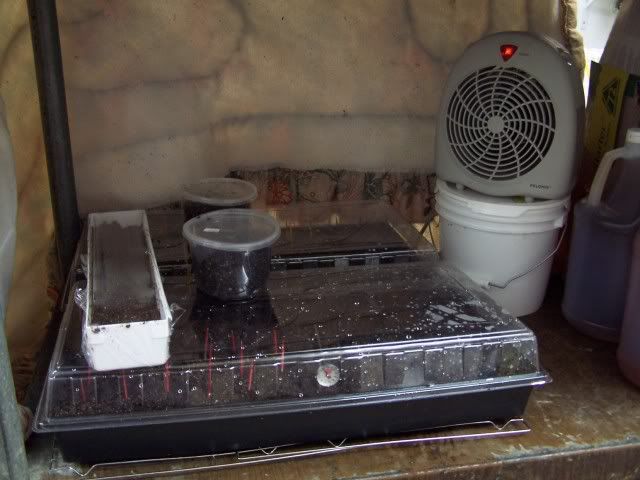
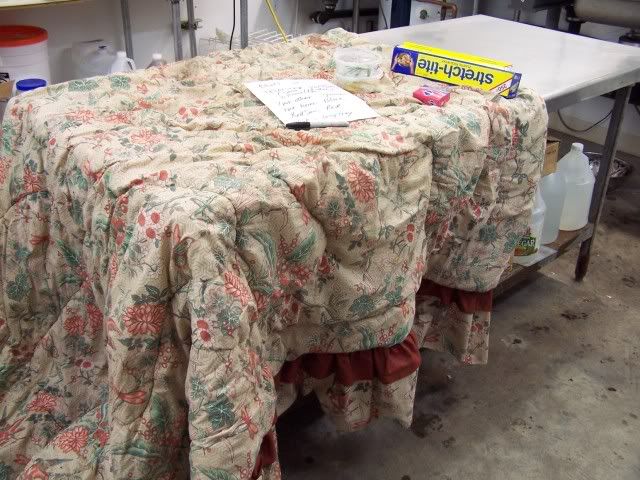
all tucked in for the night-
growstuff004.jpg


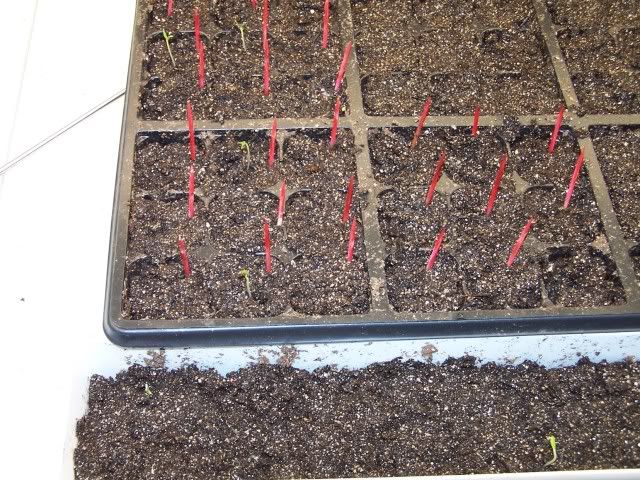
I checked this morning and the temp in the tray is a nice cozy 80F.


And, in trying to find buckets to grow the plants in, I found these-
growstuff005.jpg


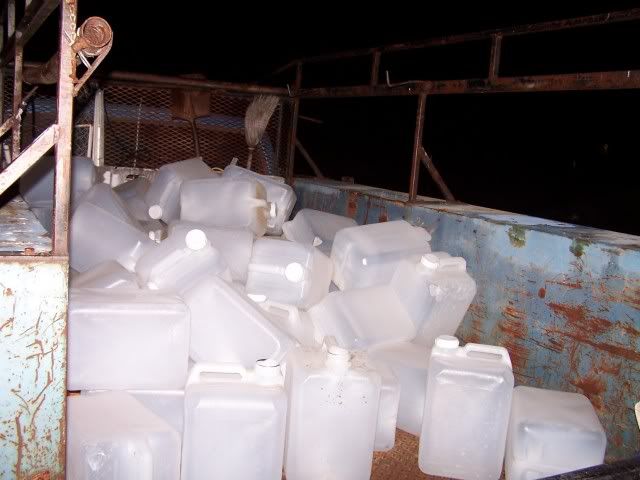
These are 4.5 gallon oil jugs from a restaurant, the kind that fryer oil or salad oil comes in. I picked up about 50 of them at the first place I went. We took the cardboard boxes off them already. I figure we can cut away the tops, but keep the handle, poke some holes in the bottom....what do you think? SCORE or BUST?
 
could be a definite score SL...make sure your holes you poke are plenty big enough (read at least 1/4" dia) for good drainage...and a lot of them
 
roger that, AJ. Thanks-
 
I am recycling also SL, I dut down 9 2-litre pop bottles yesterday and repotted a couple of my larger seedlings that have outgrown their 10 ounce cups already. Just use what you have and make sure you clean them out first, but you know that. :D :D :D
 
Salsalady,

I've seen other members comment about not using clear containers for plants due to roots being exposed to light.
Ive used clear containers before during the early stages of the pants growth, not sure how much it affected the plants.
 
thanks FadeToBlack, anyone else have comments on the clear containers?

Darn! maybe shoulda kept the cardboard around them! I'll be getting a bunch more jugs if folks think they'll work and I can keep the cardboard boxes from them. Should be able to arrange the jugs so the clear ones are in the back. Or maybe just wrap a blue tarp across the front.

I'll keep that in mind for sure.


Not even 24 hours and I'm making changes. I needed to use the table so I taped up trash bags. Still nice and toasty inside! :)
growstuff007.jpg


What do y'all do for massive amounts of soil like I'm gonna be needing? Get a truckload of topsoil and add ferts and peat moss to it? or just use packaged stuff?
 
Not too sure about the soil. I grow most of my plants in pots, but when I plant some in ground I use cow manure and garden soil at a 50/ 50 mix.
I'm sure some more experianced growers can give some advice on composting and making soil etc.

Good luck!
 
I plan on having them in pots too. But it'll take a ton of dirt to fill possibly up to 100 5-gallon buckets. I need to plan ahead to make sure I have the dirt and buckets/jugs ready when needed.

thanks-

and thanks peppermanbaha-
 
About the top soil. You can add peat and compost or chicken manure to it ( rotted chicken manure ) . And that should be good enough., With me i use what ever i find. If theres a dead houseplant seedlings get planted in that soil . My soil is like hand me downs.LOL
 
I would recommend compressed bails of Pro-Mix BX. I have been more than happy with it since I started using it last year.
But I imagine it would be alot more expensive then mixing a potting mix yourself.
I've never made my own potting mix but keep in mind you wanna have a mix with good water drainage so the roots dont get soggy.

BTW check out the sticky at the top of this section of the forum "All about soil" it has alot of valuable info concerning soil.
 
Sounds like you have a really nice growing plan and I think you will be surprised at how well these plants will grow. I can't wait to see your progress.
 
thanks PF, I'm just kinda scared that they might have a descent germination rate and then it will be OOOHHH CHT!!! Now What!!!!!


I feel like the "spoiled brat" in the Willie Wonka movies...."I want it NOWWW!!!!"


Got some cool ideas for the lighting, thank goodness I have a couple weeks to get that together.
 
If there is a local recycle center around, check with them, I use this....

Premium Soil Mix ($20.00/yard)
Silver Creek Materials offers one of the finest soil mixes available. This soil is carefully blended to produce optimum plant growth. Our #1 selling premium soil mix consists of a screened blend of compost (60%) and the purest cushion sand available (40%) to add stability to the blend. This blend is best used in establishing new gardens, flowerbeds and leveling lawns. It also works well in establishing new lawns, spreading a four-inch layer before installing sod. Premium Soil Mix is a good substitute for topsoil and unlike most topsoils, it is 100% free of weed seeds. Our mixes are consistent year in and year out - you always know what you're going to get when you order Silver Creek Soils. Although the soil is rich in organic matter and nutrients, it remains necessary to maintain proper soil fertility through a regular fertilizing program.


it will take somewhere between 2 and 3 yds soil for your 100 containers...so to me it would be cost prohibitive if you use any standard potting soil alone...I mix that composted soil 50/50 with a good standard potting mix...I don't use the premium soil mix from the recycle center by itself because it compacts too much IMO....
 
AJ, would the drainage be ok if you mixed 50% cow compost and 50% pro mix?
I've been thinking about using this mixture but always thought it would make the soil too dense for pots.
 
Well, remember what I said on Feb 21st about having a couple weeks to get things together for the lighting? NOT!

I checked to day and had 4 Red Savina sprouts up and a couple bhuts! YIKES!

growstuff035.jpg


So SalsaNut0.5 and I boogied off to the store for a couple 2" irrigation 90's. Everything else I used was extra stuff we already had.

And just for the record, SalsaDude was not involved in this build! Here's the goods-
growstuff022.jpg


(ignore that really HOT hair-do! I was processing earlier and had to wear one of those really glamorous bouffant food service caps)
growstuff025.jpg


more to come-
 
Here's the rough set up. Notice the top of the posts on the left. The store didn't have the pipe connectors I planned on so I had to change the design while in the store and I didn't buy enough 90's. So I stuck a couple screws partway into the bottom of the top piece, hooked the top piece into the upright piece and temporarily secured it with tape.

growstuff033.jpg


The other end has a 3-gang box with a pigtail out to the wall outlet which supplies power to the timer. The timer controls the 2 outlets in the box. I anticipate adding 2 more lights after potting up. The timer was an extra but of course the single gang timer trim plate didn't fit with the Decora plate, so I trimmed the timer plat and the Decora plate and they all fit nice ans safe now. Looks like doo-doo!!!! But it's all safe. LOL!
growstuff034.jpg


I somehow deleted the picture of 0.5 wiring up the fluorescent lights........AAAARRRGGGH!

And with everything in place.
growstuff038.jpg


There's a thermometer on the table and we'll be checking it this evening and turning up the heat if necessary. Nothing is glued so we can take it apart for storage.

Notice the glass in these last pictures? That's the same drink I started with when we started the project!

Total time with help from SalsaNut0.5- 3 hours
Total time if I'd done it myself- 1 hour
Sharing time with the kid- priceless!


total costs so far-
$42 for 3 trays, 3 bags starter mix, 1 bag potting soil
$10.50 for seeds yet to arrive
$10 (8) 2" PVC irrigation 90's
$32 (8) 6500K fluorescent lamps, arriving Monday

Still less than $100. There will be more, but not bad for a start, and I'll be able to use the trays and the other stuff next year.


OH YEAH! I received some Trinidad Douglah seeds today (THANKS, JOSH), so I set up another 72-cell tray and planted 18 seeds. At least, I THINK there were 18 seeds?!? Some I couldn't tell if it was a seed or not, so I planted it anyway>>>>
 
Back
Top