So I was browsing through 'Cappy's pruning and cloning 2014' thread and noticed he was having a few frustrations with his clones. I made a couple of comments and a couple of people suggested I should do a 'cloning guide' so here 'tis.
I work in the horticulture industry here in Australia and have done 1000's of clones (unfortunately not peppers...ha) but the same basic principles apply. FWIW I've done about 50ish pepper clones over the last couple of years and am running at about 80% success rate.
So what do you need to do cloning?
If you are able to easily bend the stem between your fingers then it's not suitable for cloning.
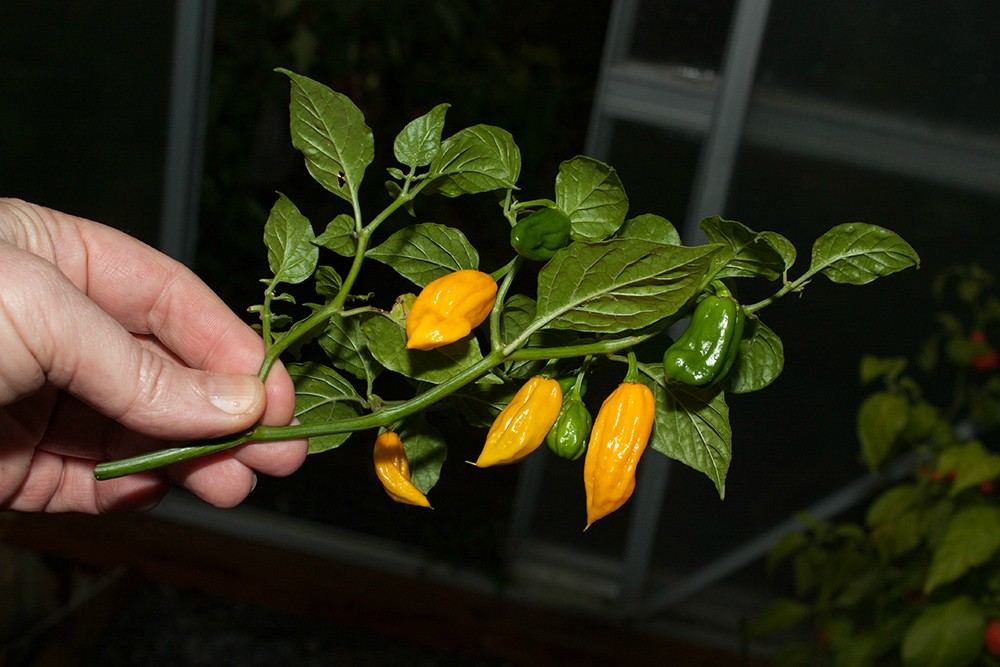
Here in Australia it's the middle of winter so I've still got some late pods on the plants, as in the Fatalii pictured below. Carefully remove any pods, flowers and buds because you don't want the clone wasting any energy on trying to fruit. I'll get 2 clones from the stem I've used.
[SIZE=12pt]
 [/SIZE]
You want the clone fairly short, say less than 6 inches and having 2 - 4 nodes on it. The reason for having 2 - 4 nodes is once the clone has rooted and starts growing you will have multiple growing sites which means you'll have a nice bushy plant. (same principle as topping a small plant to make it bushy)
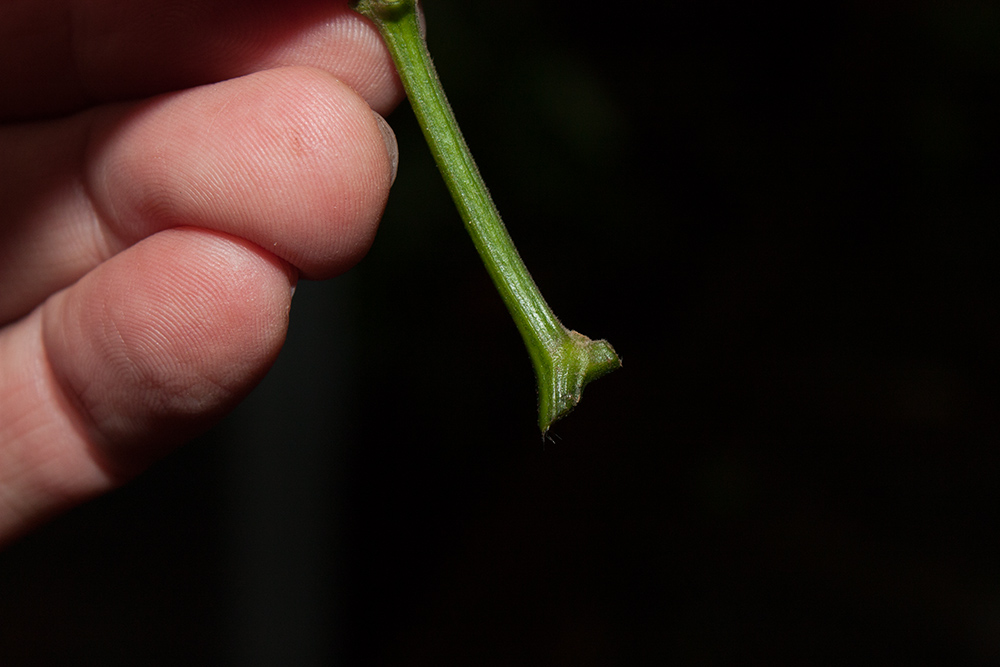
I use the secateurs and cut through the branch on a 45 degree angle. If you cut through at 90 degrees you are more likely to crush the stem instead of actually cutting it.
It's important to make the cut just below a node (like only a couple of mm or 1/8 inch). The reason for this is the node is the area where most of the callus tissue will form which will lead to root development.
[SIZE=12pt]
 [/SIZE]
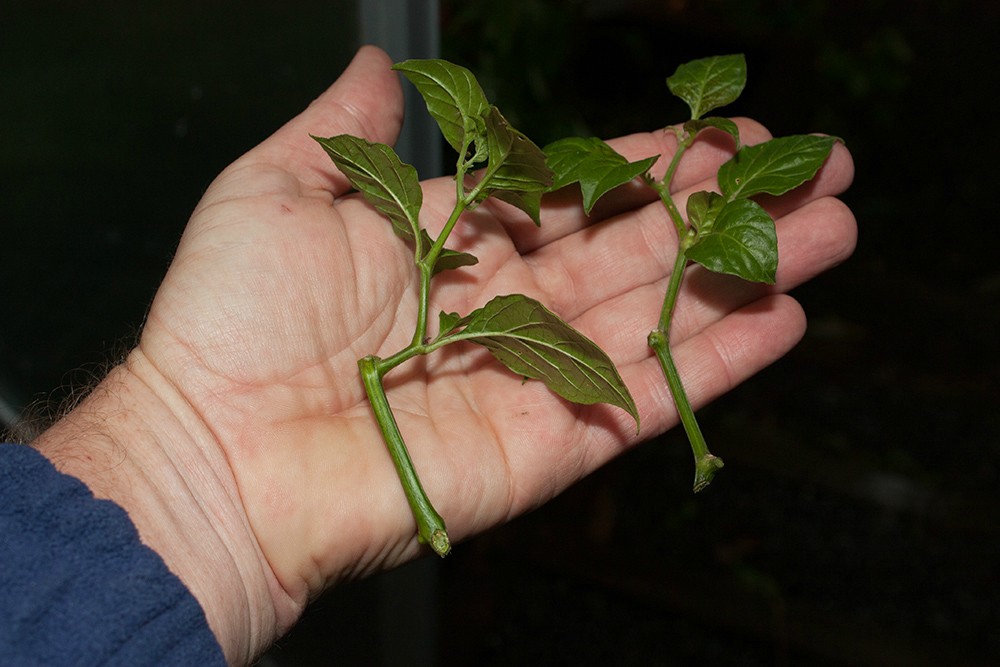
I also remove any big leaves and even cut some leaves in half. Too many leaves remaining on the clone = too much transpiration through the leaves which is just wasted energy and also quicker for the media to dry out.
[SIZE=12pt]
 [/SIZE]
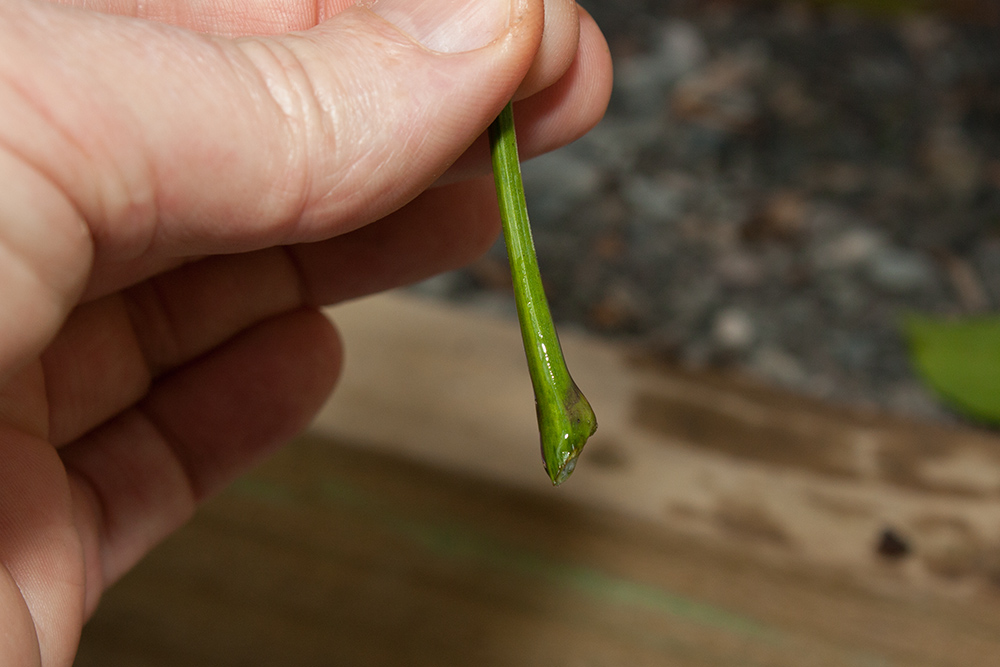
Dip the cutting into the gel so it has about an inch or so of gel on the stem. Let any excess gel drip off, you don't want a massive globule of gel on the cutting. Note: pour the cloning gel into a small lid and dip your clones into that. Don't dip the clone straight into the cloning gel container because you can potentially introduce contaminants into the remaining gel.
[SIZE=12pt]
 [/SIZE]
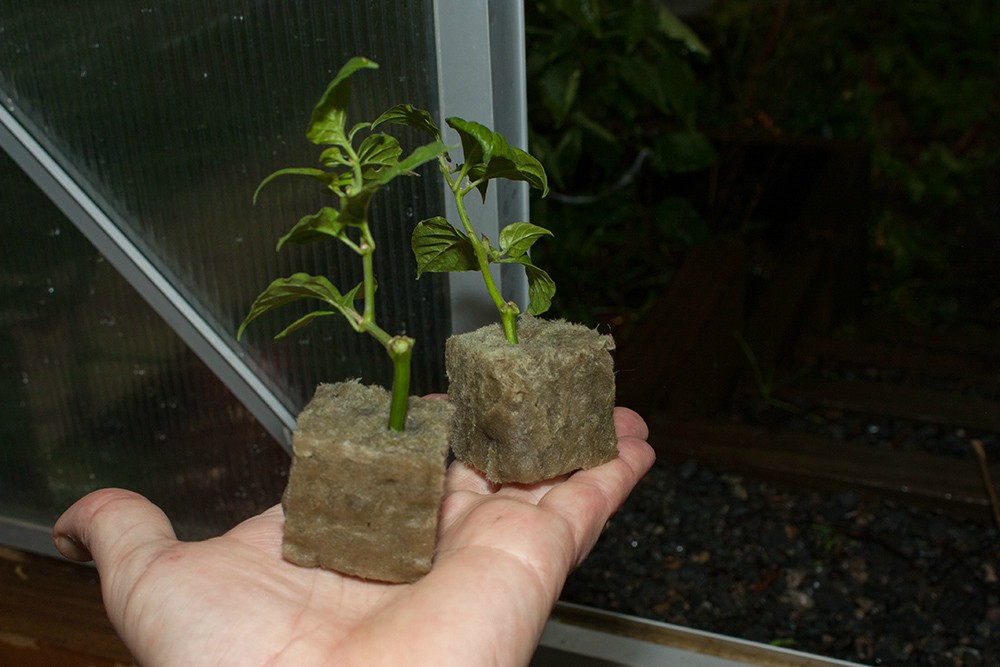
For me, 40mm ( 1 1/2 inch) rockwool cubes work well as a media cause they retain moisture and also they don't fall over like jiffy pellets may do. Before you put the cutting in the rockwool you need to soak the cube in luke warm water so that it is fully wet. Don't use cold water 'cause it may shock the clone.
I push the clone right into the rockwool so that it's nearly at the bottom of the cube. The reason for this is because a heat mat won't warm the whole cube just the bottom of it.
[SIZE=12pt]
 [/SIZE]
Then place the cuttings in a mini greenhouse and put that on a heat mat. Ideal temperature is 26-28C (78-84F). Always keep the rockwool moist, this is critically important. If you let the media dry out the clone will die. I just pour a little bit of luke warm water on each rockwool cube once day, any excess water will just drain through, so rockwool is pretty foolproof to use. Make sure the mini greenhouse is ventilated and not fully sealed otherwise 'damping off' may occur due to too high humidity. If you see drops of water forming on the inside of the mini greenhouse then you need to increase your ventilation because it is too humid.
I use a LED panel for illumination but if you haven't got any artificial lighting, filtered light through a window will be OK. You don't need intense light for clones so don't put them in strong direct sunlight. I run the LED panel 24/7 without issue whereas at work all cuttings are in a large greenhouse with just sunlight. So I don't think specific light cycles are that important for cloning.
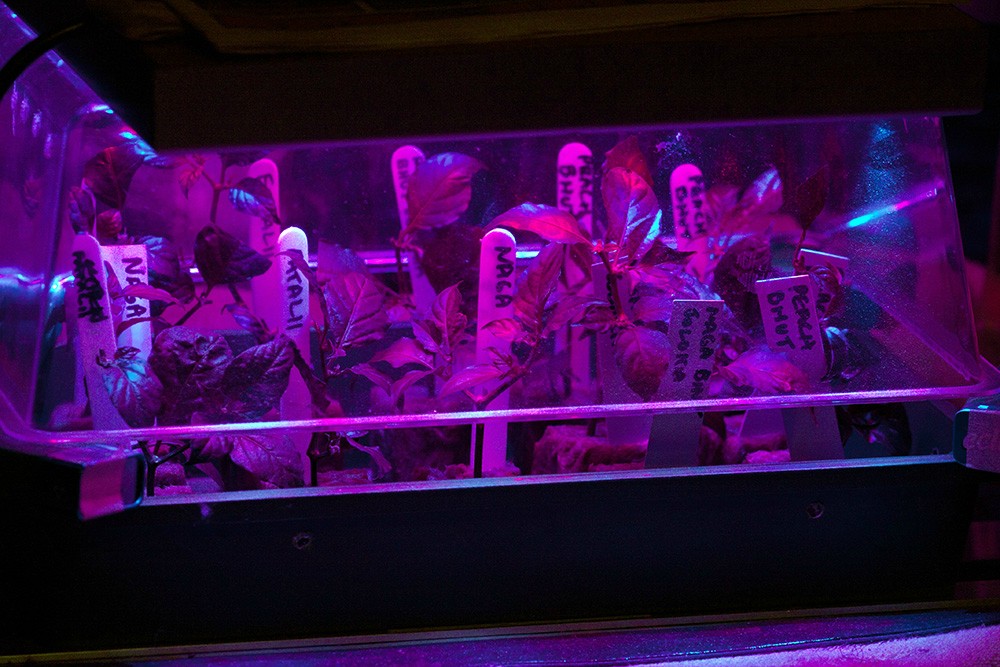
Happy clones in the mini greenhouse with LED lighting. Notice that the cover is sitting on small chocks to raise it up a bit to allow plenty of airflow into the mini greenhouse. This stops the humidity from getting too high.
[SIZE=12pt]
 [/SIZE]
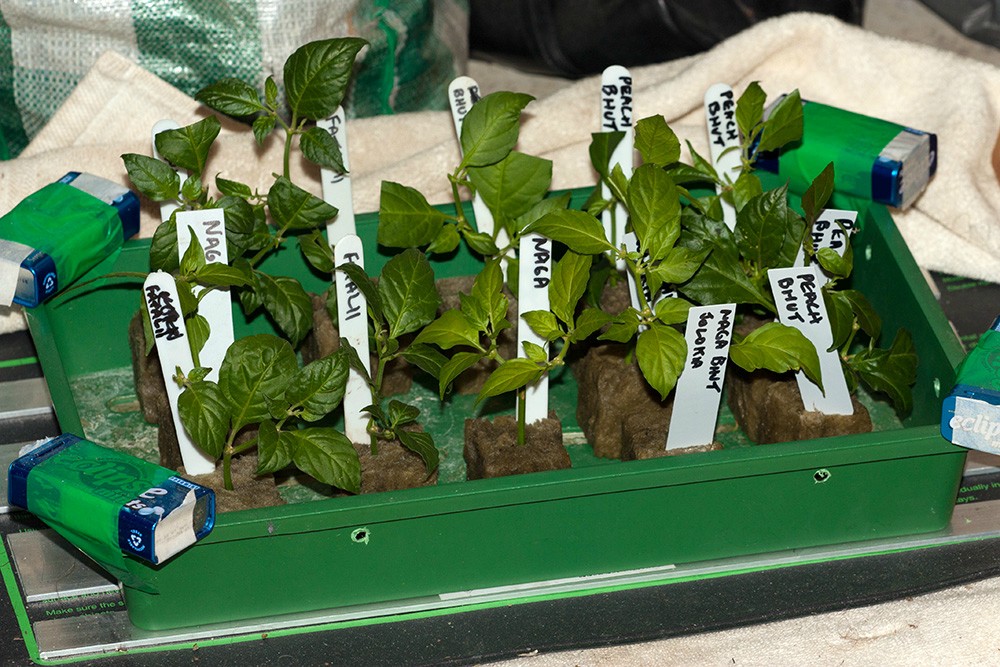
Photo without the LED lights that shows nice healthy clones.
[SIZE=12pt]
 [/SIZE]
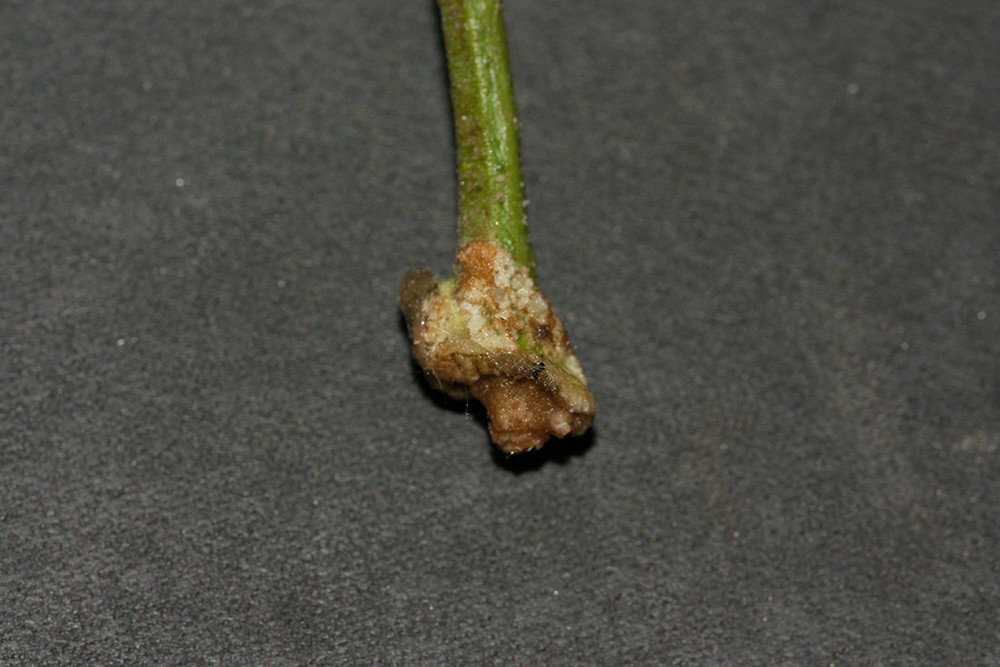
This shot is taken on day 14. You can see that plenty of callus tissue is forming on the bottom of the stem. This is the pre-cursor to root development. BTW don't go pulling the cuttings out of the media to check the bottom of the stem because you may snap any delicate roots, I've just done it for this photo to illustrate what is happening.
[SIZE=12pt]
 [/SIZE]
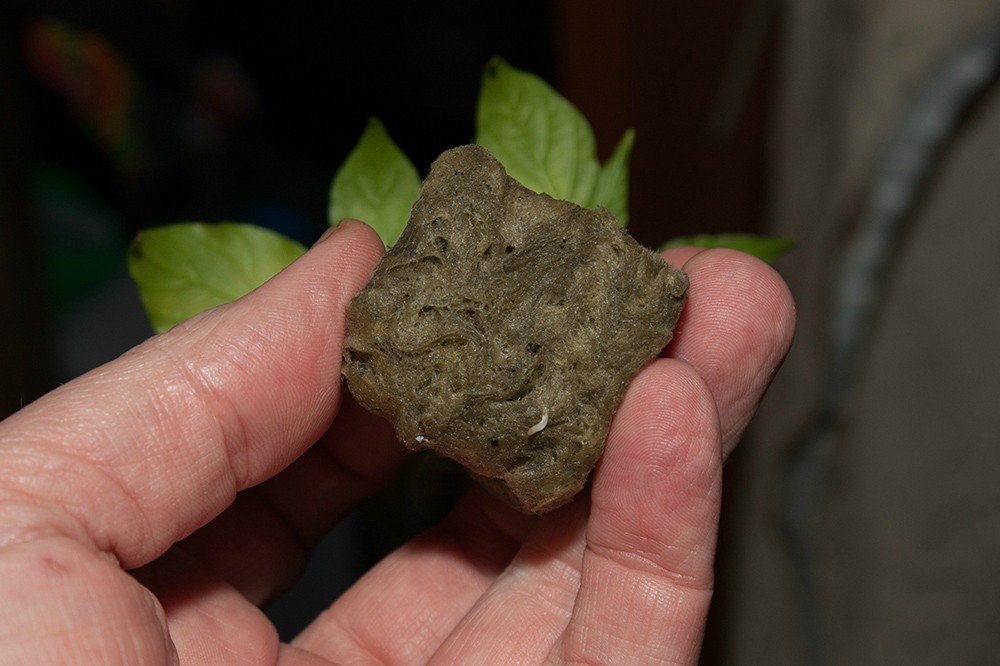
Day 19 - you can see the first root emerge. Wait for a few more roots to appear before you plant out the clone.
[SIZE=12pt]
 [/SIZE]
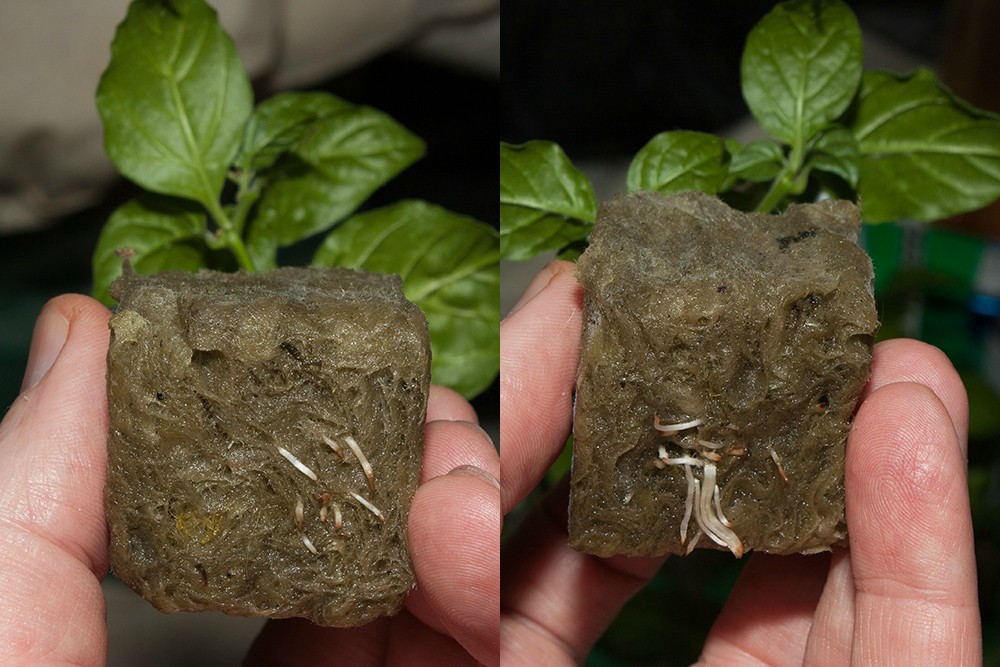
Day 22 - plenty of roots emerging. These clones are ready to be planted out into a pot.
[SIZE=12pt]
 [/SIZE]
Just remember, if you want 10 clones then take 20 clones! This will allow for any failures plus you will get bonus karma points by being able to give away any spares to family, friends etc
Hopefully this guide may be useful for anyone that wants to take clones from their favourite pepper plants.
If you have any questions or if something in the guide is confusing just ask away, I'm more than happy to help. Once you get the hang of it, taking clones is really very easy!
Cheers,
Andrew
I work in the horticulture industry here in Australia and have done 1000's of clones (unfortunately not peppers...ha) but the same basic principles apply. FWIW I've done about 50ish pepper clones over the last couple of years and am running at about 80% success rate.
So what do you need to do cloning?
- a really sharp knife or box cutters or sharp secateurs. I personally use secateurs 'cause being a bit of a klutz there is much less chance of me injuring myself.

- rooting compound - gel or powder. Our preference at work is cloning gel because it doesn't rub off when you push the clone into the media like powder can do. If you're unable to get either gel or powder you can even use honey. There are certain enzymes in honey that aid in root development. Note: honey won't be as successful as proper rooting compound but if that's all you have access to then it's better than nothing. The 2 most common active ingredients used in rooting compounds are indole butyric acid (IBA) and naphthalene acetic acid (NAA). Some rooting compounds have both IBA and NAA in them, these are the 'Rolls Royce' of rooting compounds, if you can get them.
- heat mat
- mini greenhouse
- media eg: rockwool, jiffy pellets, perlite + coco coir mix etc.
- lighting: either artificial or filtered sunlight.
- sterilizing solution - I use a diluted bleach solution to clean the secateurs with before I start and also re-sterilize them when moving from plant to plant. I can't stress how important this is because you don't want to be transferring any potentially nasty pathogens from plant to plant.
If you are able to easily bend the stem between your fingers then it's not suitable for cloning.
Here in Australia it's the middle of winter so I've still got some late pods on the plants, as in the Fatalii pictured below. Carefully remove any pods, flowers and buds because you don't want the clone wasting any energy on trying to fruit. I'll get 2 clones from the stem I've used.
[SIZE=12pt]

You want the clone fairly short, say less than 6 inches and having 2 - 4 nodes on it. The reason for having 2 - 4 nodes is once the clone has rooted and starts growing you will have multiple growing sites which means you'll have a nice bushy plant. (same principle as topping a small plant to make it bushy)
I use the secateurs and cut through the branch on a 45 degree angle. If you cut through at 90 degrees you are more likely to crush the stem instead of actually cutting it.
It's important to make the cut just below a node (like only a couple of mm or 1/8 inch). The reason for this is the node is the area where most of the callus tissue will form which will lead to root development.
[SIZE=12pt]

I also remove any big leaves and even cut some leaves in half. Too many leaves remaining on the clone = too much transpiration through the leaves which is just wasted energy and also quicker for the media to dry out.
[SIZE=12pt]

Dip the cutting into the gel so it has about an inch or so of gel on the stem. Let any excess gel drip off, you don't want a massive globule of gel on the cutting. Note: pour the cloning gel into a small lid and dip your clones into that. Don't dip the clone straight into the cloning gel container because you can potentially introduce contaminants into the remaining gel.
[SIZE=12pt]

For me, 40mm ( 1 1/2 inch) rockwool cubes work well as a media cause they retain moisture and also they don't fall over like jiffy pellets may do. Before you put the cutting in the rockwool you need to soak the cube in luke warm water so that it is fully wet. Don't use cold water 'cause it may shock the clone.
I push the clone right into the rockwool so that it's nearly at the bottom of the cube. The reason for this is because a heat mat won't warm the whole cube just the bottom of it.
[SIZE=12pt]

Then place the cuttings in a mini greenhouse and put that on a heat mat. Ideal temperature is 26-28C (78-84F). Always keep the rockwool moist, this is critically important. If you let the media dry out the clone will die. I just pour a little bit of luke warm water on each rockwool cube once day, any excess water will just drain through, so rockwool is pretty foolproof to use. Make sure the mini greenhouse is ventilated and not fully sealed otherwise 'damping off' may occur due to too high humidity. If you see drops of water forming on the inside of the mini greenhouse then you need to increase your ventilation because it is too humid.
I use a LED panel for illumination but if you haven't got any artificial lighting, filtered light through a window will be OK. You don't need intense light for clones so don't put them in strong direct sunlight. I run the LED panel 24/7 without issue whereas at work all cuttings are in a large greenhouse with just sunlight. So I don't think specific light cycles are that important for cloning.
Happy clones in the mini greenhouse with LED lighting. Notice that the cover is sitting on small chocks to raise it up a bit to allow plenty of airflow into the mini greenhouse. This stops the humidity from getting too high.
[SIZE=12pt]

Photo without the LED lights that shows nice healthy clones.
[SIZE=12pt]

This shot is taken on day 14. You can see that plenty of callus tissue is forming on the bottom of the stem. This is the pre-cursor to root development. BTW don't go pulling the cuttings out of the media to check the bottom of the stem because you may snap any delicate roots, I've just done it for this photo to illustrate what is happening.
[SIZE=12pt]

Day 19 - you can see the first root emerge. Wait for a few more roots to appear before you plant out the clone.
[SIZE=12pt]

Day 22 - plenty of roots emerging. These clones are ready to be planted out into a pot.
[SIZE=12pt]

Just remember, if you want 10 clones then take 20 clones! This will allow for any failures plus you will get bonus karma points by being able to give away any spares to family, friends etc
Hopefully this guide may be useful for anyone that wants to take clones from their favourite pepper plants.
If you have any questions or if something in the guide is confusing just ask away, I'm more than happy to help. Once you get the hang of it, taking clones is really very easy!
Cheers,
Andrew
