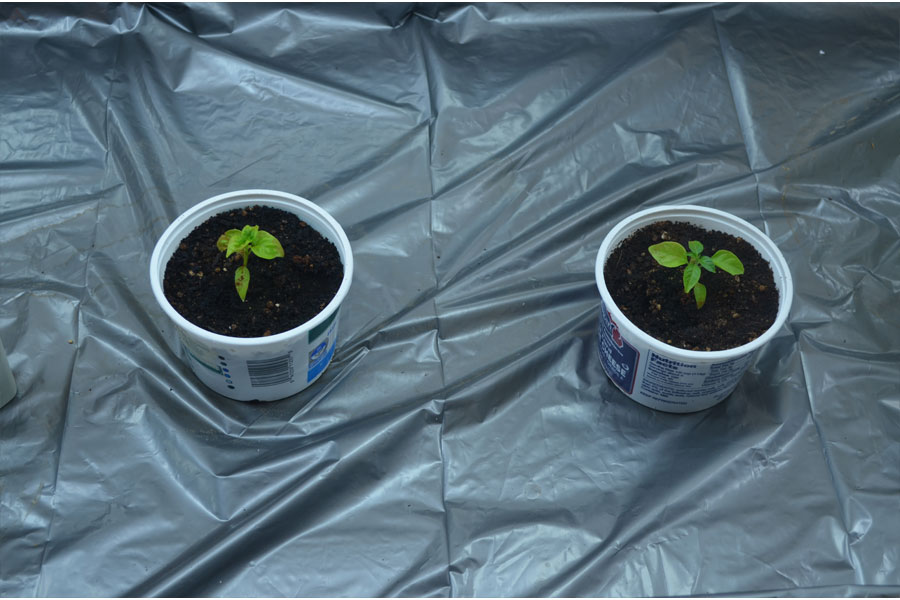
• Blog your pepper progress. The first image in your first post will be used to represent your Glog.

Pulpiteer 2015 - New Year, New Hopes

I've been working towards 2015 for a bit now, so I figured I might as well get the glog fired up.
 
Quick recap: I'm a pastor was moved by the denomination last summer (happens every so often in my profession), so 2014 was not great. The soil in the new garden spot needs a ton of work. So this year is a year I hope to move forward.
 
One benefit of the new place is a 10 by 10 (or so) area in the basement that I can use as a plant room.  I've been working on that lately.
 
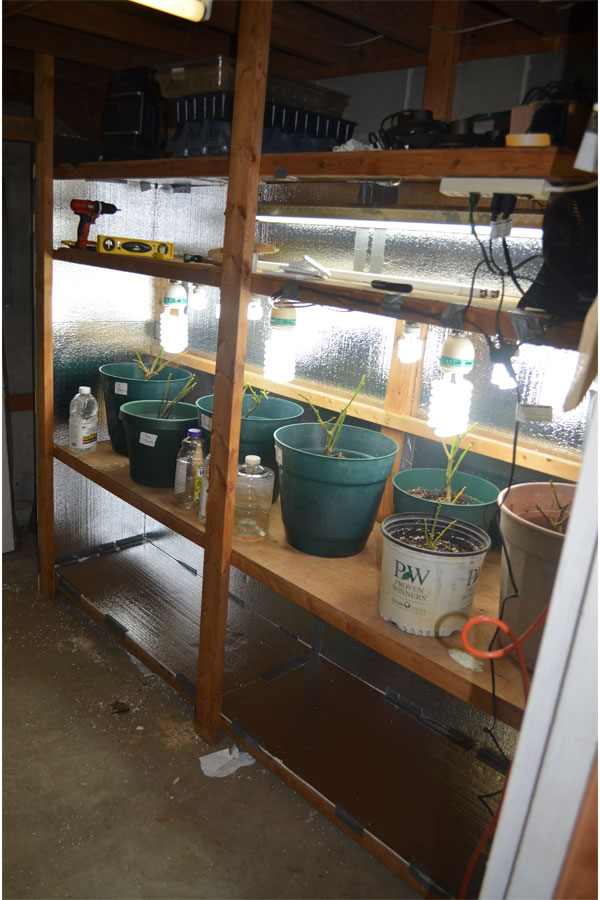
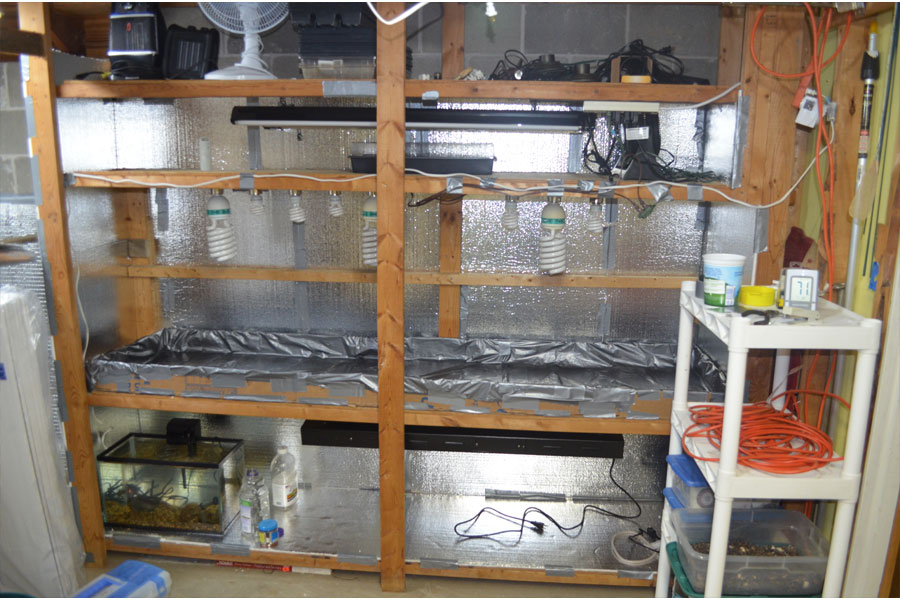
The room was previously used as a small wood shop, so it has a large table and a simple, homemade wooden shelving set up.  Here is a shot of it with the lights temporarily in place for my over winters.  I've already taken out one level in order to have a large growing area in the middle.  Also, on the far end, you can see I began a simple extension.  I wish I had a picture of how it was when I first started.  There were narrow shelves on that far wall.  I tore all of that out.  Also, there was a ton of paint and stuff on the shelving unit, that I had to move elsewhere.
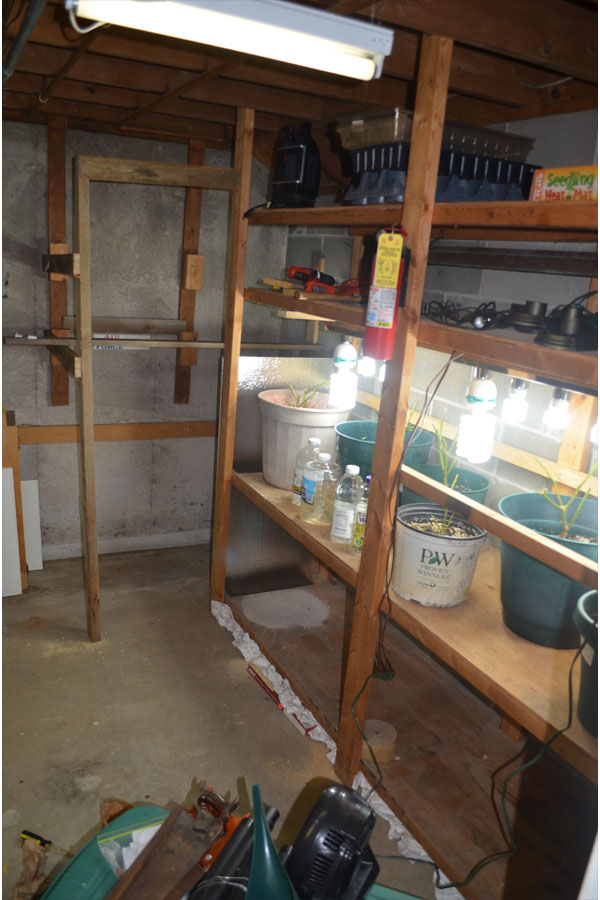
growstep1.jpg


I got some insulation from a big box store (Menards), and began cutting and duct taping it in place.
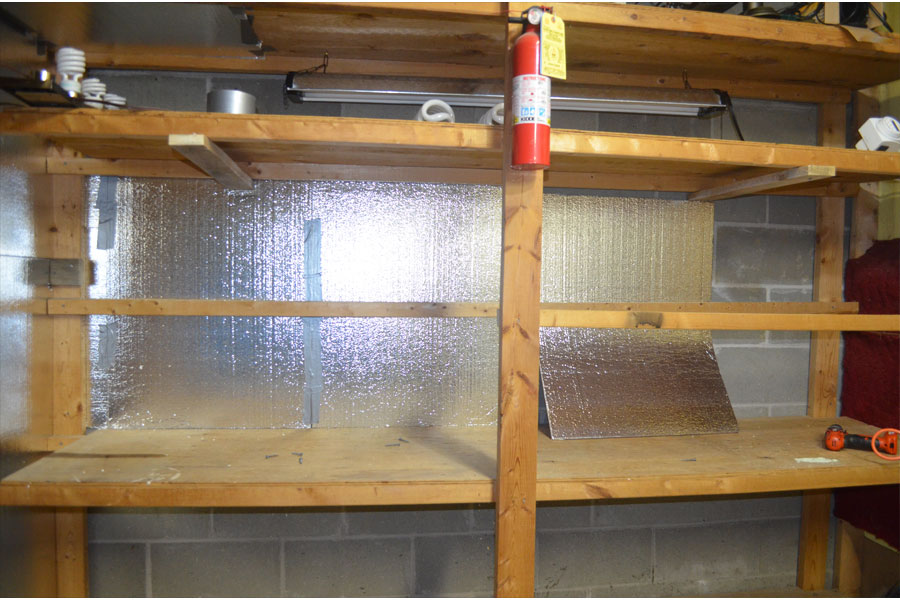
growstep2.jpg


I attached the vanity lighting to 1 1/2 by 3, then screwed it in from the top so the screw head was flush with the upper level, and the lighting was as far up as it would go.
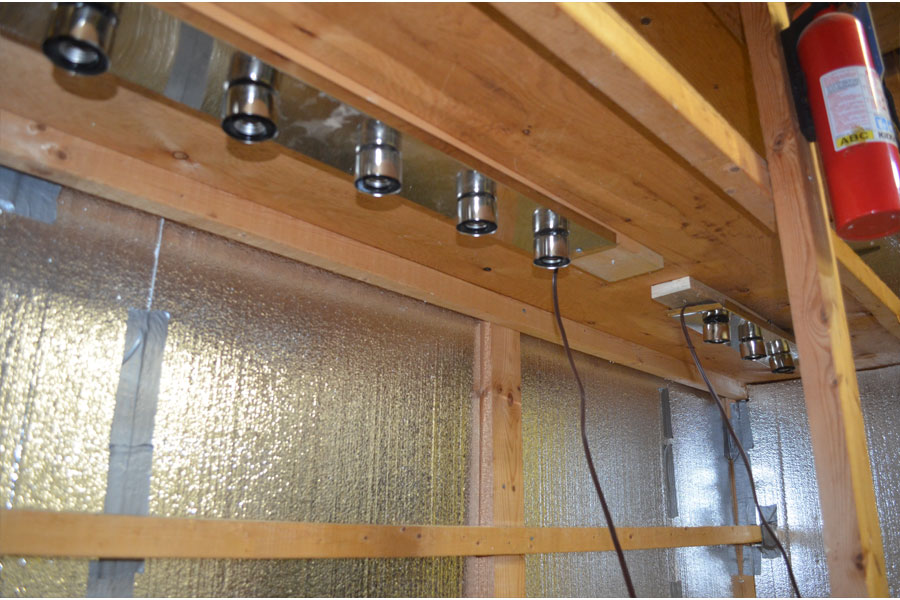
growstep3.jpg


Insulation in, lights on. On the top level I have 2 four foot t8 bulbs. 6500k color. The heat from the CFL's on the mid level make the top compartment warm. I hope warm enough for seeds to sprout.
growstep4.jpg


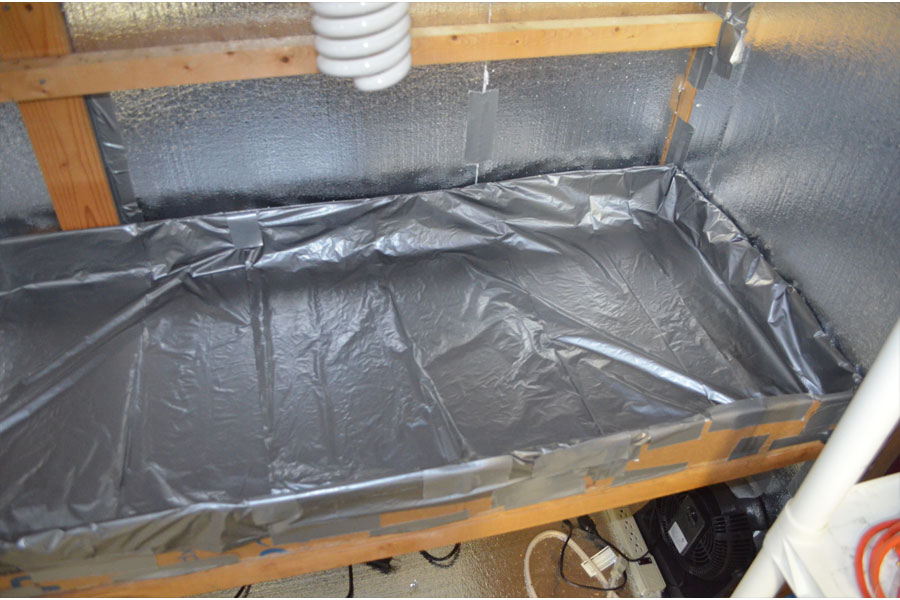
Since I want to be able to have loose plants on the mid level, but don't want water seeping into the wood or down into the lights on the bottom level, I took some cardboard from our packing boxes and made a custom fit box for that second level. I then lined the box with 2 garbage bags I sliced up the sides in order to make plastic sheeting.
growstep5.jpg


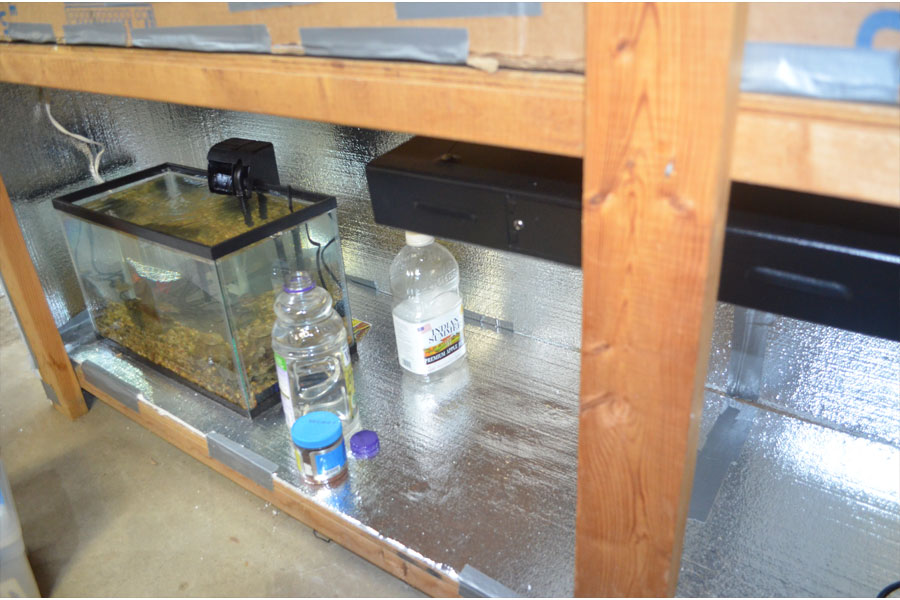
For the bottom level, I added insulation on the floor, since I figured cold air would come up from that. I also bought an 8 bulb, 4 foot, T5 grow light, which you can see hanging from the top of that bottom level. Finally, I thought I'd put a little 10 gallon fish tank in the bottom. This will provide humidity and when I get water from it to water the plants, it'll be full of nitrogen. Oh, and in the tank are 2 Firemouth cichlids.
growstep6.jpg


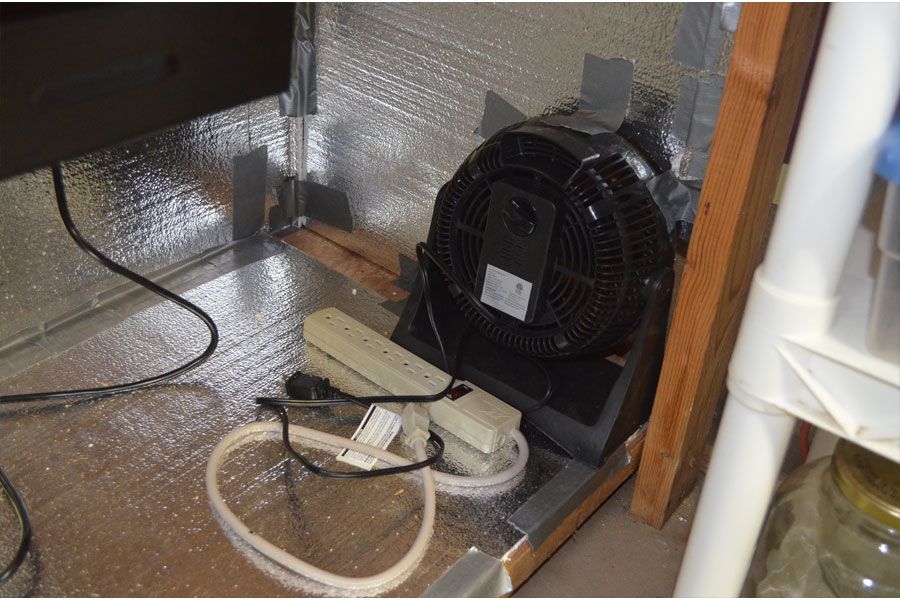
Also on the bottom level, to the right, I put in an exhaust fan. I got 2 of these little fans. They were on sale because they were out of season. I cut a custom hole in the insulation and stuck it in. I know, it looks factory made, right?
growstepfan.jpg


And here is the whole set up. Maybe you can see the second exhaust fan. I put it in the upper level to the right to blow across the seedlings when the come up. Also, my thought was that I could push the hot air to the left where there is a gap running down the side wall, and maybe the bottom fan would pull it all the way to the lower level and push out the cold air.
growstep8.jpg


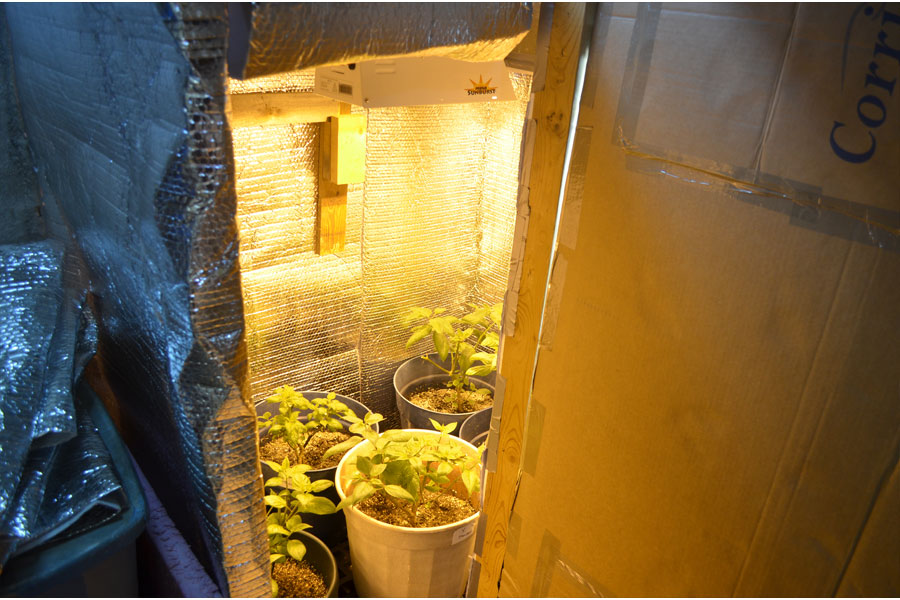
Of course, you need to cover the front in order to keep the heat in. I took some large cardboard boxes and covered the front with Mylar emergency blankets.
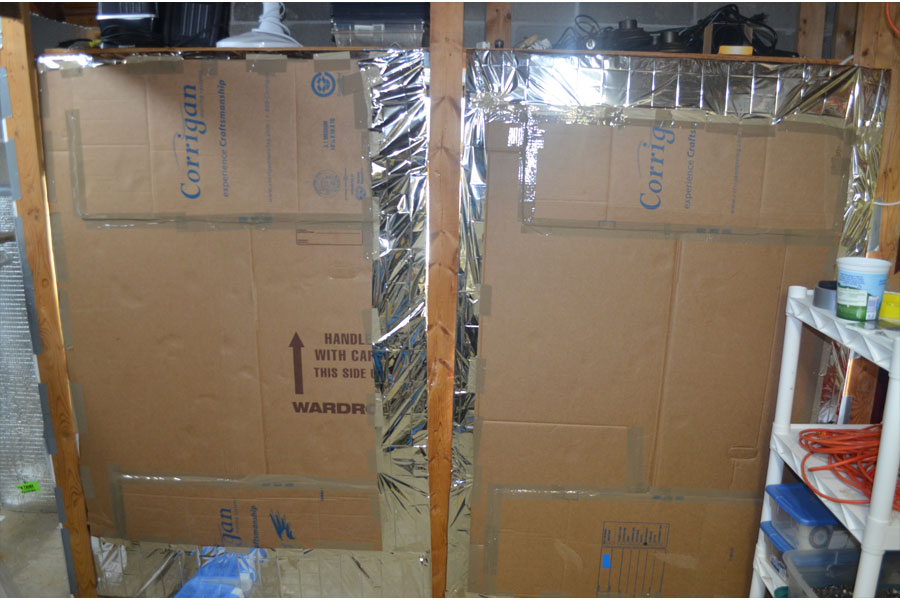
growcover.jpg


I put two screws on each side on the very top, and ran some wire through the top of the card board wall. And I hang them on that to hold it up.
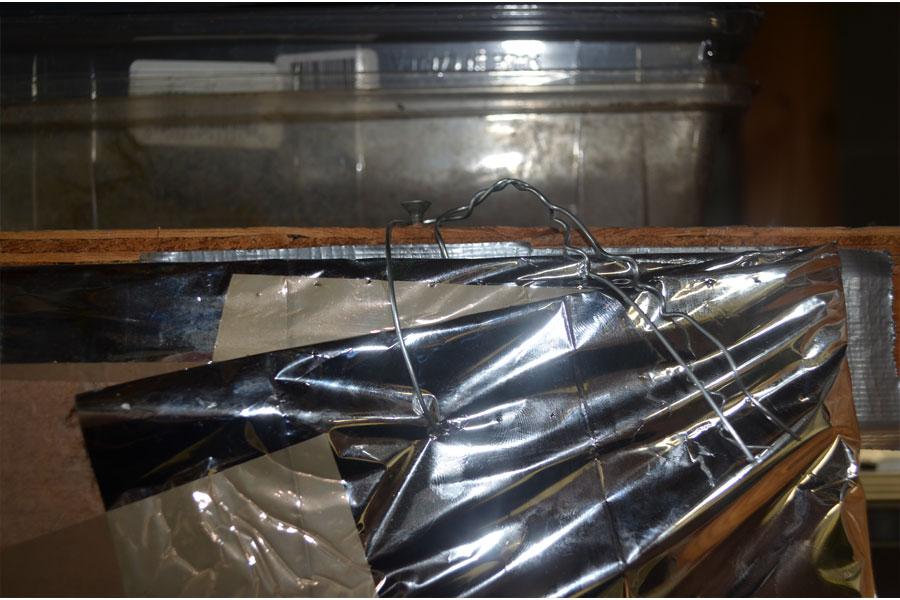
growlatch.jpg


Ok that's my 10 picture limit.  I'll try to make it back tomorrow to cover my overwinters and the seeds I just put down, as well as the soil rehab project. 
 
It's been fun to get this going.  Hopefully it'll pay off.
 
Thanks for stopping by!
 
Aaaaaaaaawesome, Andy!  That will make a super grow room.  
Can't wait to see what you get going in it.
 
Good luck getting on top of the soil project.   Knowing you it will be terrific!
 
Glad to see you getting on board with your 2015 blog.  I guess I should start
thinking about that, too!
 
What a really great space and just a little rearranging to do to make a grow space out of it. Everything looking good there brother! can't wait to see what you've been up to with the soil project and what your growing this year.
 
Hawaiianero said:
Looks like you've been busy. What are you doing "soil rehab"?
 
Yep, I have, and it's been a good thing to work on that stuff.  I hope to post some pics tonight that will detail the soil rehab I'm doing, so check back!
 
 
Grass Snake said:
I like your ideas Pulpiteer, especially the fish tank. Sounds like you got everything covered. Good luck with your grow.
Thanks and thanks!
 
 
Nightshade said:
Sounds neat cant wait to see more progress good luck
 
Me too! 
 
tctenten said:
Nice setup.  Good luck this year.
 
Thanks!
 
pepperguy1 said:
Cool setup. 
 
Thank you! I've learned a bit as I've moved forward.  This is my third attempt at a grow area and my favorite thus far.
 
PaulS said:
Really nice setup.
Fish tank photo please!? I'm not sure what Firemouth cichlids are?
 
I'll try to get on it! Do you keep fish at all?  These aren't anything fancy, but cool fish nonetheless.
 
romy6 said:
Nice to see you back in the game Andy . Will be watching from afar . 
 
Thanks Jamie! You'll be watching and harvesting your never ending Florida harvest.
 
Jeff H said:
 
 
+1 To what Jamie said.
 
Thanks!
 
PaulG said:
Aaaaaaaaawesome, Andy!  That will make a super grow room.  
Can't wait to see what you get going in it.
 
Good luck getting on top of the soil project.   Knowing you it will be terrific!
 
Glad to see you getting on board with your 2015 blog.  I guess I should start
thinking about that, too!
 
Thanks - I'll get a growlist up here soon enough.
 
RocketMan said:
What a really great space and just a little rearranging to do to make a grow space out of it. Everything looking good there brother! can't wait to see what you've been up to with the soil project and what your growing this year.
 
Yeah, I was pleased to see it when we moved in.  Just a little work and it's going to be perfect.  Good to hear from you!
 
Alright everyone, I've got a communion service to do, but I'll be back tonight to post more pictures, I hope.
 
Andy,
 
Great job on the grow room prep!
 
Looks like plenty of room to get things going, and I like the reflective insulation and the way you plan on keeping the heat inside the bench.
 
I look forward to seeing the rehab project.
 
Good luck this season!
 
PaulS said:
Really nice setup.
Fish tank photo please!? I'm not sure what Firemouth cichlids are?
 
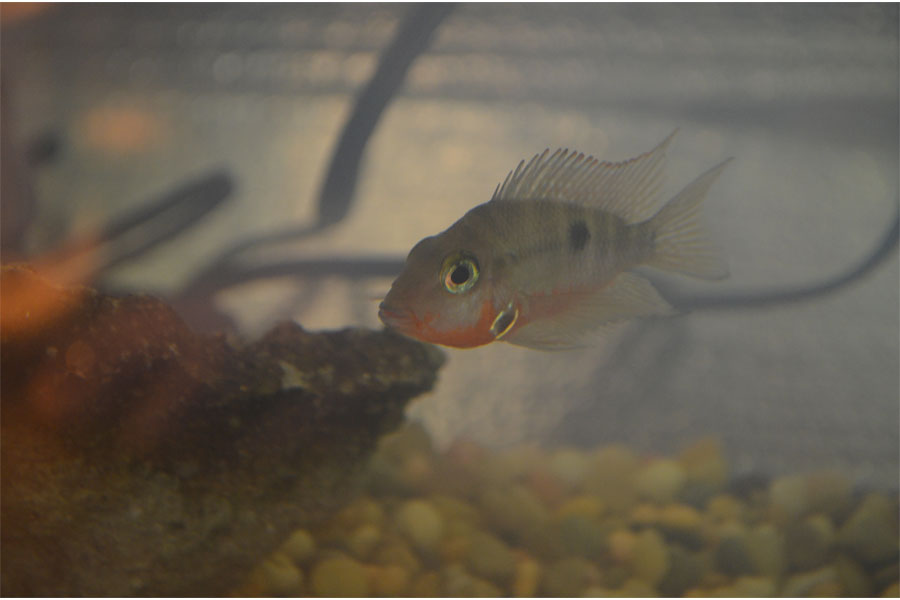
Alright Paul - here is one of the Firemouths, I believe they are "Firemouth Meeki", a type of cichlid.
 
 
fish.jpg

Devv said:
Andy,
 
Great job on the grow room prep!
 
Looks like plenty of room to get things going, and I like the reflective insulation and the way you plan on keeping the heat inside the bench.
 
I look forward to seeing the rehab project.
 
Good luck this season!
Thanks Scott!  I was glad to find that reflective sided insulation, and it wasn't priced too bad.  Hopefully it holds enough heat in.  The biggest downfall of my new grow area that I can see is being in the basement, the temperatures are a bit cooler, so keeping the heat from the lights is key, I think.
 
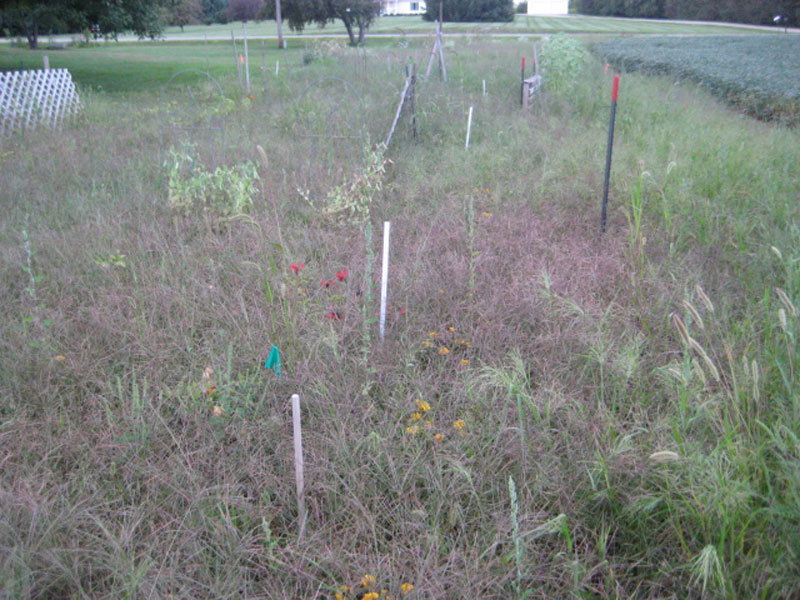
Ok, so the soil rehab.  This is a picture of the garden area last year (facing North).  It's on the edge of a farmer's field, and was farmed in previous years.  The church arranged to have me use this section for my garden when I moved.  It's got plenty of sun and space, which are positives.  The soil is very sandy, and full of weeds.  I didn't have the wood chips I wanted for mulch nor time to weed, so this is what we got: tons of grass, weeds and small pepper plants.

wide.jpg


So I began connecting with church folks, got a source for compost, manure, and wood chip mulch.

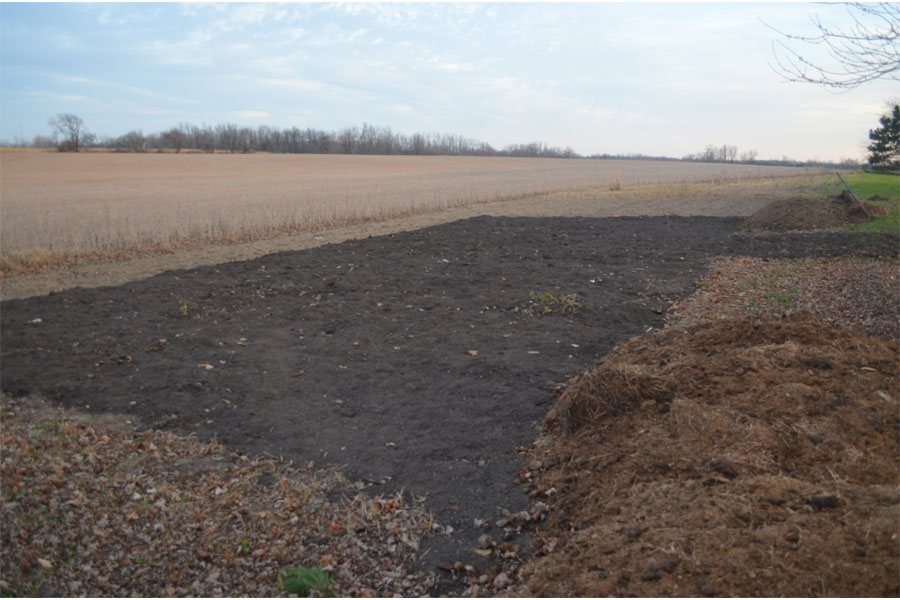
Tilled the garden, laid down cardboard as a weed suppressant, then covered that with compost and chopped up leaves. These shots are south facing, more or less. So from the opposite end as the first picture.

fieldprepcompost.jpg


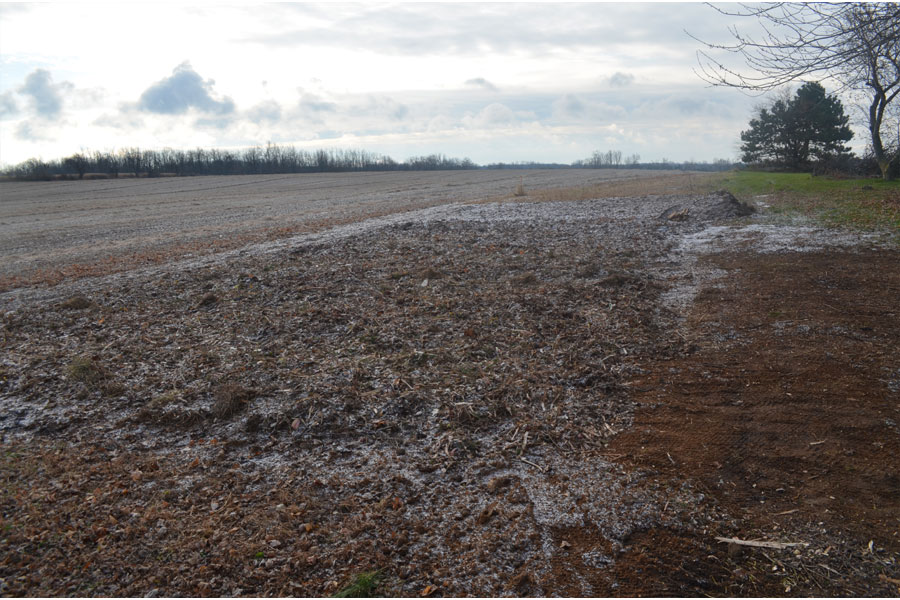
A friend from the church has a lawn tractor with a scoop, and he put on the layer of manure, and then the layer of wood chips. The wood chips are probably 4-6 inches thick.

fieldprepmulch.jpg


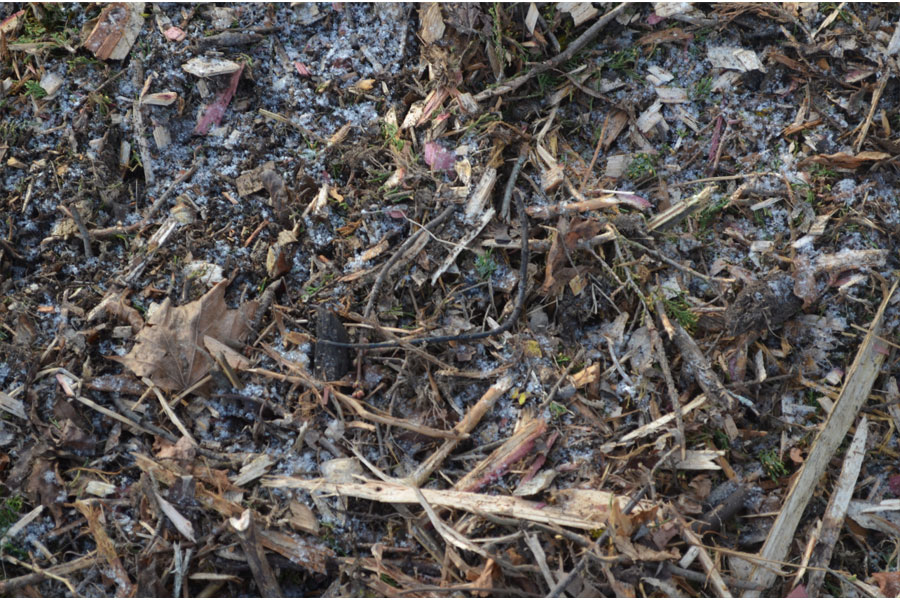
Close up of the wood mulch - just various trees from the city cleaning up downed branches and stuff. Great for the garden.

mulch.jpg


The goal is long term rehabbing the soil. This will sit in place and compost over the winter and early spring. It will bring up worms and increase microbiotic life in the soil. And I'll not till again. I'll just add more manure and wood chips on top of it next year.
Here is a good article on sheet mulching from Permaculturalist Toby Hemenway.

Earlier, I mentioned a spot for overwinters. I don't have a good shot of it yet, I'll have to get one next time, but it's to the left as you face the grow shelf. I found a bunch of free insulation in the dumpster and used it to line the walls and create a ceiling. It was sheets of packing insulation for frozen cookie dough shipments to the preschool that uses the church building, I think. Anyway, great stuff. Also, I was on Amazon after black Friday and they had a great deal on a grow light that was perfect for this sort of space, so I got it. Here's a link to the light.

And here is a picture:
newow2.jpg


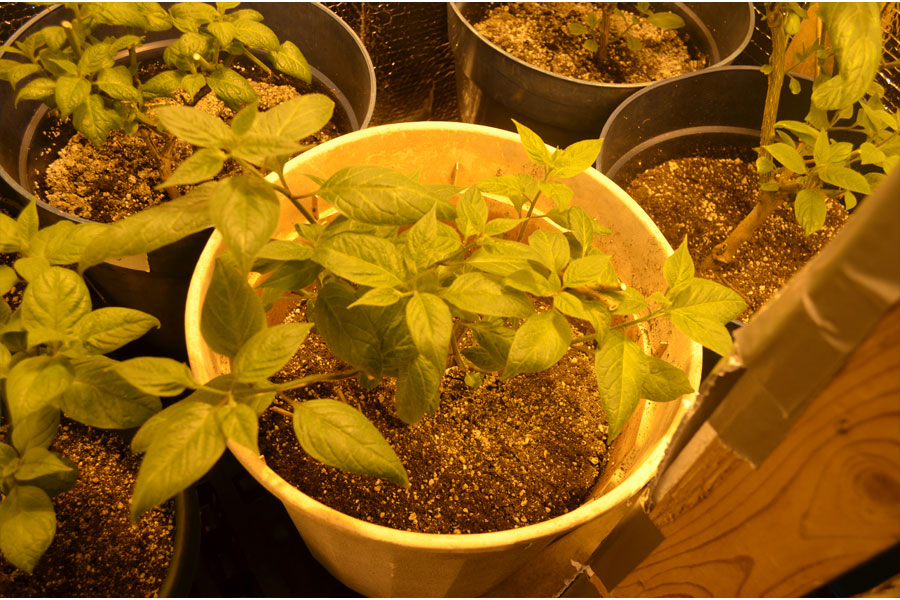
Here are some of the plants close up. I have 6 various pubescens I am over wintering.

newow1.jpg


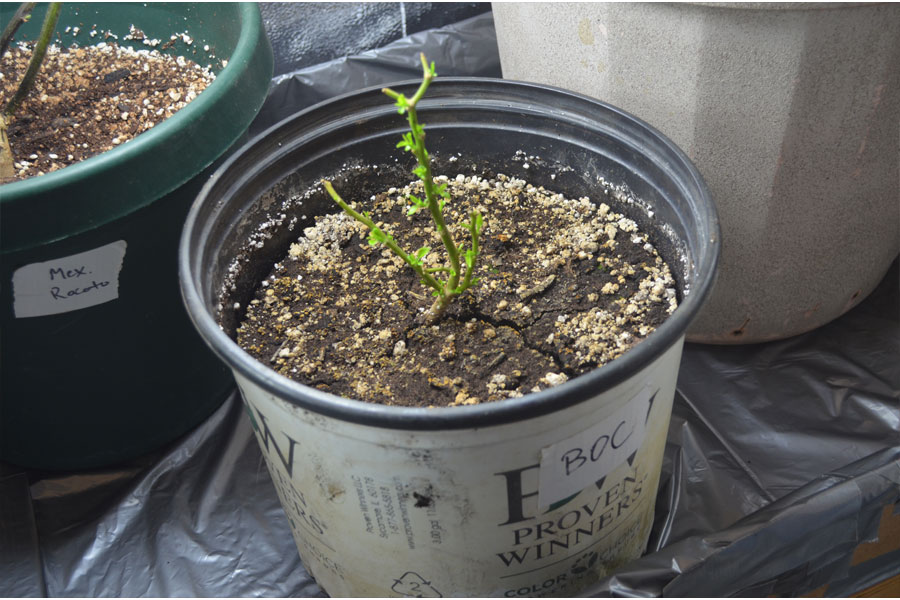
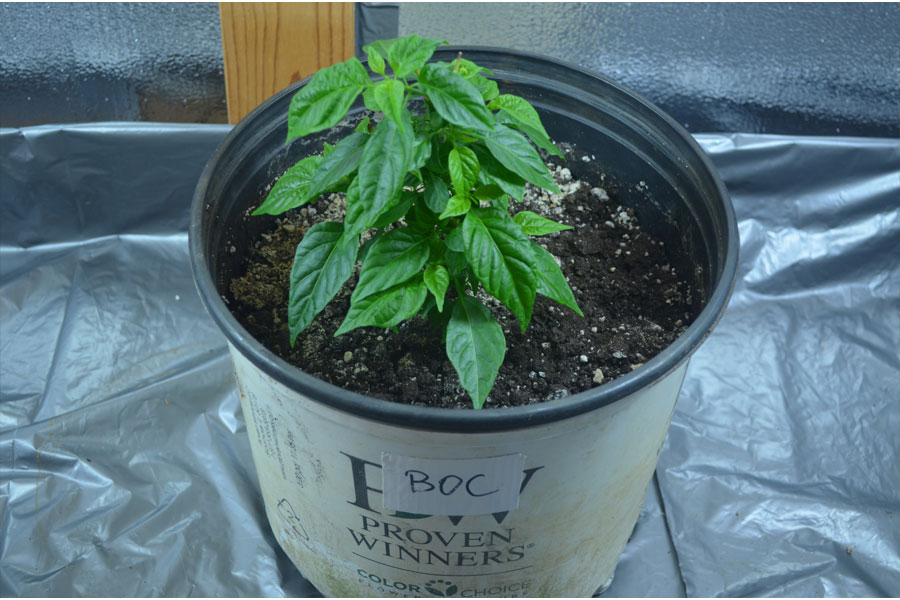
The final overwinter plant I have is a Bhut Orange Copenhagen. Here it is shortly after I brought it in and got the lights going.

BOCbeginning.jpg


And after several days it filled right out. I am keeping this one in the larger grow rack, in the center space with the CFL's.

BOC.jpg


Alright, tomorrow I'll try to get to the seeds I've started this week.
Thanks for stopping by!
 
Pulpiteer said:
 
Alright Paul - here is one of the Firemouths, I believe they are "Firemouth Meeki", a type of cichlid.
 
 
Alright, tomorrow I'll try to get to the seeds I've started this week.
Thanks for stopping by!
 
It's a really nice one. I used to have a few fish, nothing special, I was just intrigued by your setup and the idea of a fish tank! Tropical tanks use t5 lights or simular so it fits really well. I better stop thinking about it otherwise I'll probably want one!
Grow area looks sweet, good job!
 
PaulS said:
It's a really nice one. I used to have a few fish, nothing special, I was just intrigued by your setup and the idea of a fish tank! Tropical tanks use t5 lights or simular so it fits really well. I better stop thinking about it otherwise I'll probably want one!
Grow area looks sweet, good job!
 
Thanks! Have you heard of or read about aquaponics?  It'd be a lot of fun to try sometime, I think.  Here's a link to a site on it.
 
Devv said:
OW's and the garden plot look great! I'll be watching to see how the soil works this and next year for sure!
 
Thanks! I'll be watching too.  I hope it'll be better next year, and then even better the year after.  We'll see.


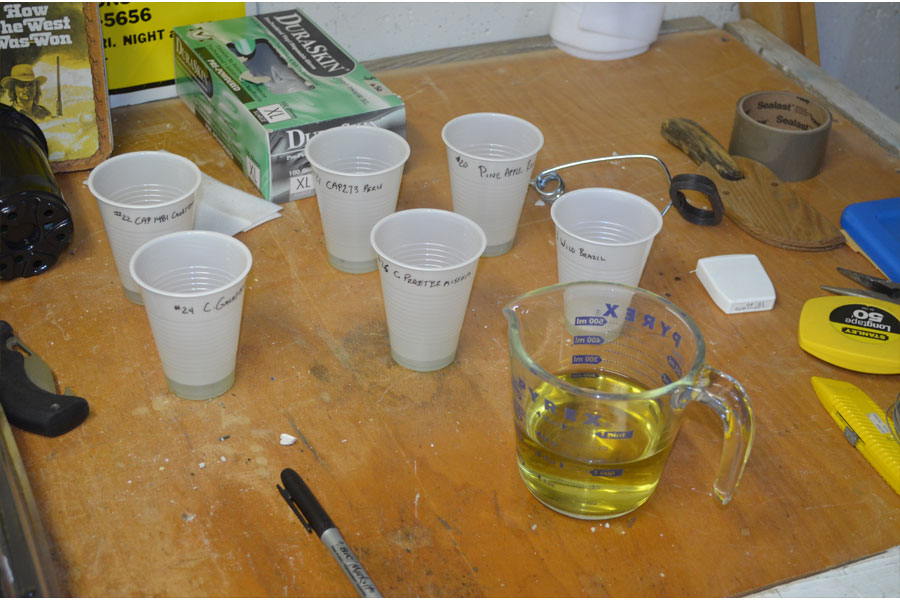
Ok, I planted a few seeds on Monday (Dec. 8).  They were Pubescens and some wilds since they both take longer to either germinate or grow.
 
I soak them overnight in chamomile tea, as that's an anti fungal and it helps keep away dampening off.
 
seed2.jpg


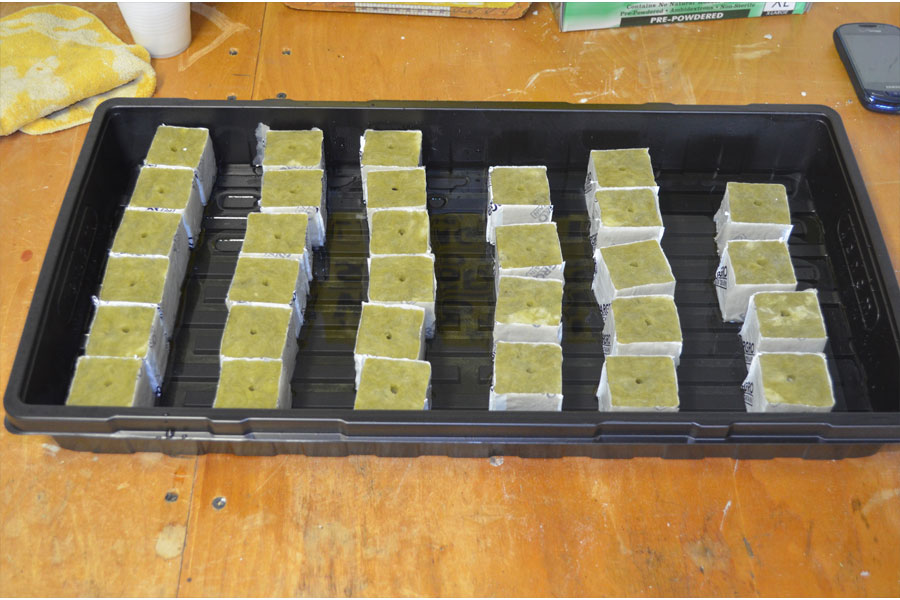
I'm trying some rockwool cubes this year. I'll probably plant in my seedling mix for the rest, but I thought it was worth a shot. Hopefully I'll have good germination rates. I put one seed in per cube, so I'll know exactly what the rates were.

seed3.jpg


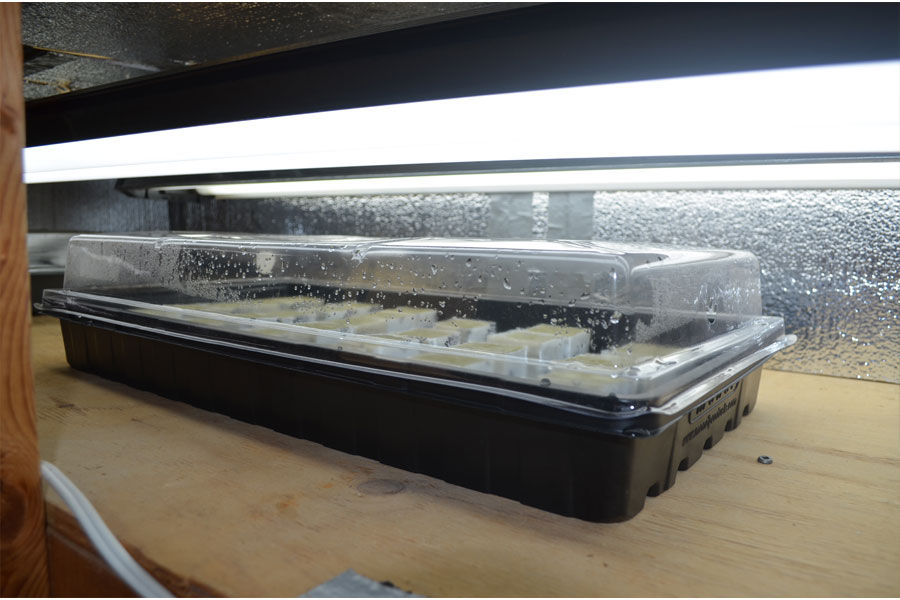
Then they go on the top shelf. When the lights are on and the cover is on the front of the grow shelf the temperature on the top level is upper 90's to 100. I am afraid that might be a bit warm. If I leave a bit of a gap in the front cover, the temp goes down to the upper 80's, which, if I remember right, is where I want to be. During the night the lights go off and the temp drops to the upper 60's I think.

seed4.jpg


While I was out buying stuff to make my soil mix and checking out ideas for a grow area about a month ago, I stopped in at a Indoor Grow Shop in Lansing and had an interesting conversation with one of the guys who works there. It turns out he knew a bit about peppers too, and gave me two seedlings that just popped. One was a scotch bonnet from what he said was the Schneider farm in Jamaica. The other was an Aji Pinguita Demono. They were in rock wool when he gave them to me. They're doing ok, I hope they thrive.

seedlinggift.jpg


They have had a hard time adjusting to the soil. I just buried the cubes in the soil mix and watered them. They are staying alive, but that transition wasn't the best. I'm curious too to see the effects of rock wool on the roots, since it is supposed to help.

Finally, my grow list for 2015 (thus far)

1     7 Pot Primo                                          Pepperlover
2     7 Pot Brain Strain [R]                           Pepperlover
3     7 Pot Yellow                                         Pepperlover & Buckeye Pepper
4     7 Pot Barrackpore Chocolate              Coheed196
5     Bhut Jolokia Peach                              Pepperlover
6     Bhut Jolokia Red                                 Pepperlover
7     Bhut Jolkia White                                Pepperlover
8     Bhut Orange Copenhagen                 Coheed196
9     Bih Jolokia                                          Tradewinds
10   Carolina Reaper                                 Pepperlover & Buckeye Pepper
11   Devil's Brain                                       Pepperlover
12   Jay's Peach Ghost Scorpion              Buckeye Pepper
13   Jonah's Yellow Brain                          Pepperlover
14   Peach Congo                                     Pepperlover
15   Trinidad Scorpion Chocolate             Buckeye Pepper
16   Trinidad Scorpion Yellow                    Pepperlover
17   Red Rocoto                                      Tradewinds
18   Yellow Manzano                                Hooda
19   Giant Mexican Rocoto                       Pepperlover
20   Pineapple Rocoto                              Pepperlover
21   CAP273 Peru                                    Coheed196
22   CAP1481 Guatemala                        Coheed196
23   Wild Brazil                                         Coheed196
24   C. Galapagonese                             Coheed196
25   CGN22775 C. Frutescens                Coheed196
26   CGN22795 C. Praetermissum          Coheed196
27   Bell of Gollu                                      Pepperlover
28   Cinnamon Bell                                  Pepperlover
29   Cumra Cherry                                  Pepperlover
30   Jimmy Nardello                                Pepperlover
31   Palmyra                                           Pepperlover
32   Adjoema                                          Aji Joe
33   Bahamian Goat                               Aji Joe & Buckeye Pepper
34   Giant White Hab (w/stinger)            PaulG
35   Harold St. Barts Habanero              Buckeye Pepper
36   Jam. Scotch Bonnet Montego Bay   Pic1
37   MoA Scotch Bonnet                        Steve954
38   Mustard Habanero                         Tradewinds
39   Sofi Scotch Bonnet                         Buckeye Pepper
40   TFM Scotch Bonnet                       Pic1
41   Tobago Scotch Bonnet R               Pepperlover
42   Tobago Scotch Bonnet Y               Pepperlover
43   Aji Cito                                           Pepperlover
44   Bishops Crown                              Buckeye Pepper
45   Orange Thai                                 Tradewinds
46   Tonga Orange                               Habanero Aji Joe
47   Tobago Seasoning                       Pepperlover
48   Explosive Ignite                            Aji Joe
49   Royal Black                                 Aji Joe
 
Alright, I think that's it for a bit.  I'll let you know as seedlings pop.  Thanks for stopping by!
 
That's impressive, my friend   :clap:
 
And you have two little starts to boot!
 
I hope the not Giant White Hab grows well for you.
I've decided to start calling it a Yellow Scorpion since
so many pods have stingers/tails!
 
The vanity lights are a great idea. I've been reading up on how to build something like this homemade, but vanity fixtures can be pretty cheap & likely safer than what I'd build myself with no experience with electrical work. Do you think the fixture could accommodate Y splitters with 2 CFLs in each? I plan on stealing or modifying your idea. Thanks for posting it.
 
Back
Top