Greetings from South Africa!
It has been a few years since my last glog on THP. Sadly, life got in the way (as it does) and I had to step away from THP. But it does feel good to be back doing another glog!
A shout out to all my pals on THP who have kept the home fires burning! You guys are the glue that keeps this site going")
This glog will be retrospective somewhat as our grow season here started in August and is now in full swing already.
For those of you who maybe don't know me, a little background info.
My previous glogs:
PeriPeri's Grow Log 2012: South Africa
PeriPeri's Grow 13/14/15/2016: South Africa
I live in Johannesburg, South Africa and the farm we grow our chillies on is about 1 hours drive away. Geographically our farm is situated on the "Highveld" near Pretoria (the capital of South Africa). The altitude here is around 5,751ft above sea level. We have a dry and a rainy season. Our rainy season goes from August/September until April (our summer) with an average rainfall of around 28 inches during these months. We are currently experiencing lower rainfall, but luckily this does not affect us as we have a very generous borehole with ample water throughout the year. Temperatures in summer at the farm can range anywhere from 26 - 40ºC daytime and 18 - 25ºC night time. The farm is located in a valley surrounding a large dam, so we have a very hot and humid micro climate that does not really relate to the general local weather. Our winter temperatures can range from 18 - 23ºC daytime with night time temps that can range from 7 to -1ºC. Our winters are bone dry as we do not get any rain from May - August. We do get light frost in our winters, but come first week of October night time temps are usually up to 10ºC again.
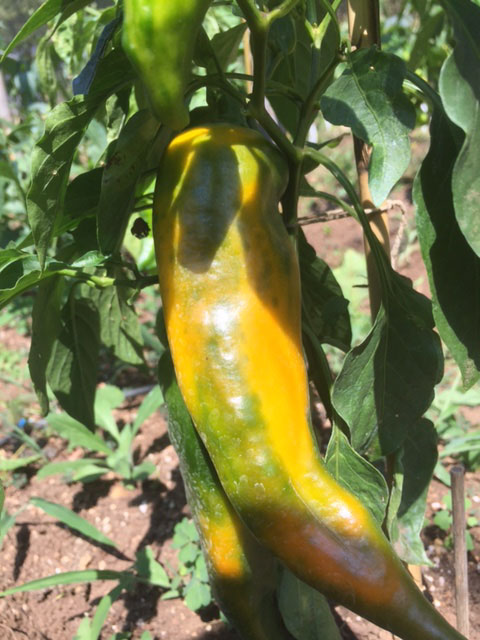
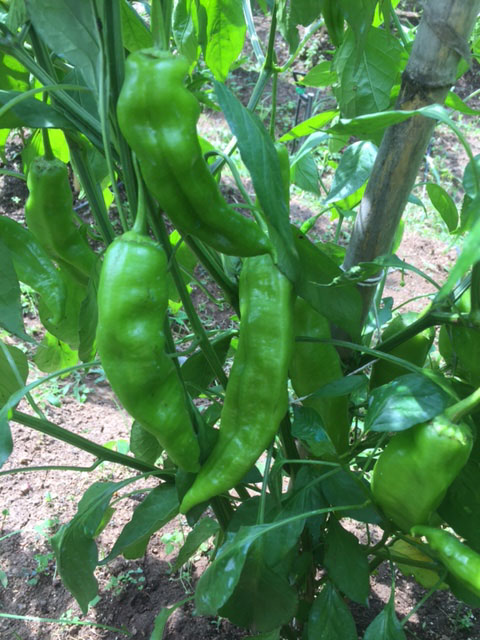
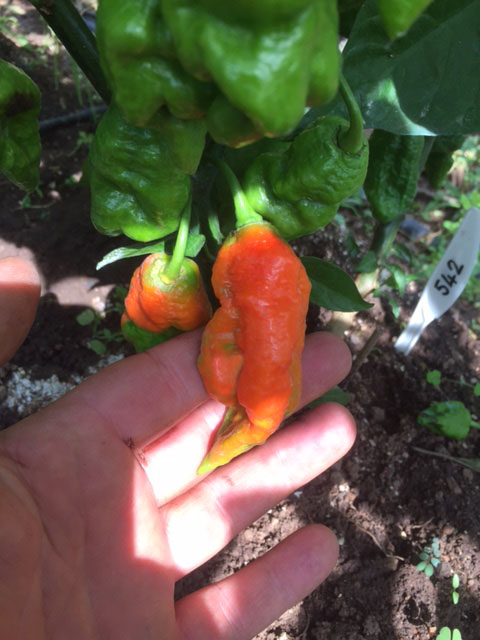
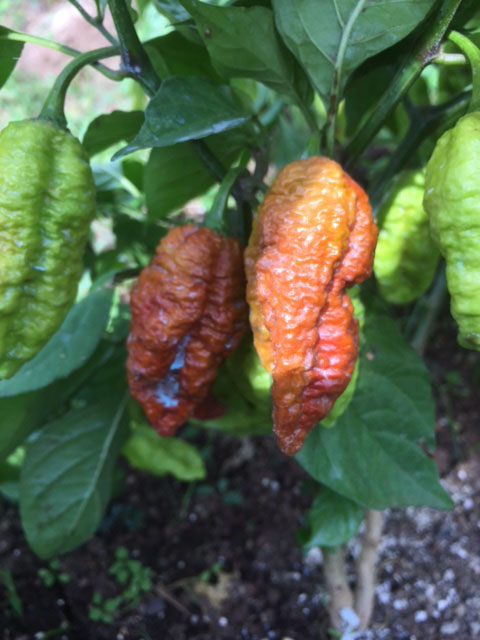
The grow area on the farm is located close to the banks of a small river, so we are blessed with very rich and fertile loamy soil. Most things seem to grow in the soil and chillies seem to do exceptionally well there. I do rent the land from the owner and have access to an enclosed area that is about 20x20m and surrounding land. The enclosed area has 40% shade netting, which is great as the African sun is intense, but better yet - we have monkeys on the farm, so this keeps them out! Since we last grew there in around 2016, the land has not been used much, so it has had some time to recuperate. But more about that later. First off, let's flash back to August 2017.
So I started germination this season in August 2017. It is always a little messed up at first as seeds usually arrive late. No matter how hard I plan ahead, our near bankrupted Post Office always manage to delay orders from clearing through customs. This season one of the parcels took 3 months to get through our customs. So as much as you guys may complain about USPS or whatever... it doesn't get worse than our national Post Office here in South Africa! I will add that the grow list was a little ambitious this season. But, with a little scorpio determination - anything is possible! Right?
I like to pre-soak my seeds before germination. I have created my own formula of pre-soak solution that seems to work for me. I know everyone here has their own mix or ideas about this, but this is what seems to work for me. Distilled water, hydrogen peroxide, salt peter & liquid soap. The soap helps take oils off the seed coat and facilitates uptake of water and the other two help with oxygenation and breaking down the seed coat as well as kill any nasties. Seeds soak for about 18 hours and then I like to use pure Coco Peat for final germination.
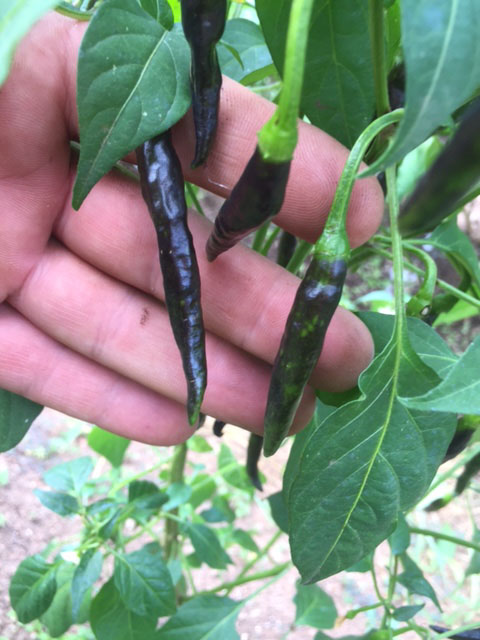
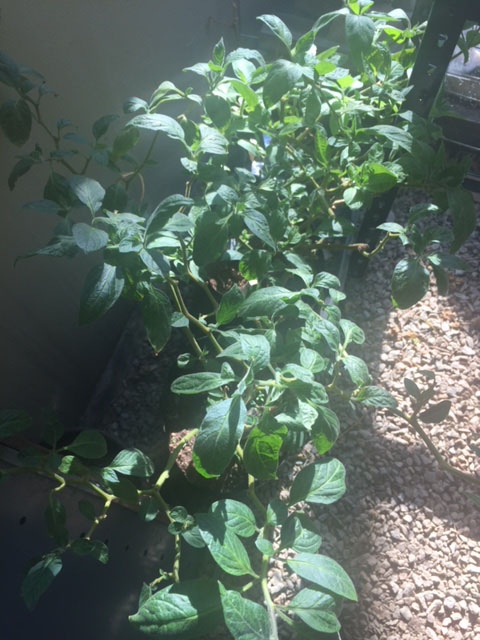
In the pic, some overwintered Rocotos in the greenhouse back home.
From the pre-soak, seeds are entrusted to my old faithful - "Big Bertha". "Big Betha" is my trusted propagator. I created her from scratch in about 2013. She can house about 800 cells at any one time. Keeps a nice humid 30ºC at all times and runs off just 5 compact fluorescents. She just gets the job done. Given my grow list this season, it would take a few rounds to germinate everything. Which was all straight forward - and even the seeds that arrived late were handled in their stride.
But, no season would be complete without issues - right? The first round of germination first week of August was brilliant. Second round, things started looking a little sucky. Germinated rates fell and those seedlings that did emerge soon fell too. By all definitions, what I was experiencing was Damping Off. As mentioned, poor germination and established seedlings would go thin at the base and just keel over and wilt. Sound familiar?
Now, I knew temp was regular and consistent. Watering was ok... I went through the checklist. I was pretty sure it wasn't damping off. Everything was correct and the same as it always was. This left but two things in my mind - water and medium. I was sure the water was ok, as I only use spring water. It just so happened that I received a call from the CEO of Jiffy here in South Africa, asking if I were interested in trying the pellets. We chatted, I explained and he said - give those C7 Jiffy pellets a go. I did and that is that - as they say! What a brilliant product. Germination rates were more than satisfactory and growth was super fast. I was smiling.
What emerged from our conversation was that quite a few growers had experienced issues with the Coco Peat blocks that I was using. Clearly a bad batch had come into my possession and other growers too around the country. What I had not realized, was that the PH of those blocks was not regulated and what became apparent was that the Coco Peat was too acidic. The seeds & seedlings were sitting in acid. The results being poor germination, poor roots, narrowed base of stems and certain death. A lesson learned.
What I can say is I like the C7 Jiffy Pellets. The slight acidity of the Coco Peat does promote better root growth (in my experience) and the sterile nature of the product does limit the possibility of fungal or bacterial issues (seeds rotting in the medium). Well, at least this is my views. All buffered and ph balanced - They also come packed with all the nutrients needed by the seedlings that really seems to spur on growth. So, I am using that for sure going forwards. My only reservations about the Jiffy product was the outer membrane. I used the product some years back and found that the outer membrane did not break down and rather had caused bound roots and stunted growth in plants. But I was prepared to give this another test and work around. But more about that later!
As for the Coco Peat blocks I used to buy at the nursery - out the window! Unfortunately on the down side of things, the impact of the bad germination was that I had lost some varieties on my grow list. To order seeds this late in the season was pointless - as it would take months before they arrived. All I could do was dust off and move on!
So, given the set back with the germination, I had my last batch germinating by the end of August. My D-Day is always first week of October. This is generally when we have seen the last of the frost here and night time temps have risen above 10ºC. We do still get cold snaps in October, but these never really last longer than a day or two. So no big issues there.
Some of the seedlings in trailer on their way to the farm early October.
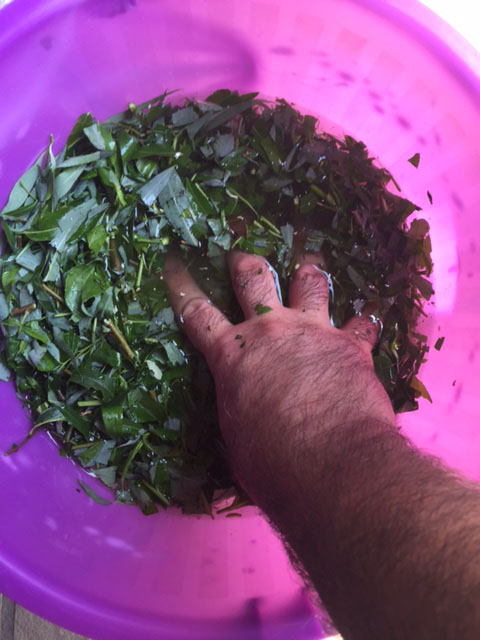
This season I have also continued making and using my own rooting hormone. I stumbled across this some years ago and do seem to think that it really helps. First weeks of spring, I harvest new green shoots from the Willow trees down by the part and steep these in water. Three days later, I am ready to water the seedlings with the water. The science behind this is the active growth hormones found in Willow trees. Indolebutyric Acid & Salicylic acid - These are released into the water and ultimately into the root zone of the seedlings. This works two fold. It increases the plants resistance to disease and stimulates growth. I seem to think it is really simple but is highly effective.
As mentioned earlier, the farm that we are growing at is about one hour from home. It takes a lot of planning and logistics to go out there every time. I have managed to get a trailer that has been invaluable to cart everything there and back. I am mostly only able to go there on weekends. I have my kids every alternate week - so it does take some planning to arrange trips out there. Another added issue is that I can't leave anything at the farm as things get stolen there. Anything of value is stolen from farms at night - so the trailer literally carries everything.
Our first inspection at the farm in August revealed some infra-structure issues that I had to get sorted before d-day.
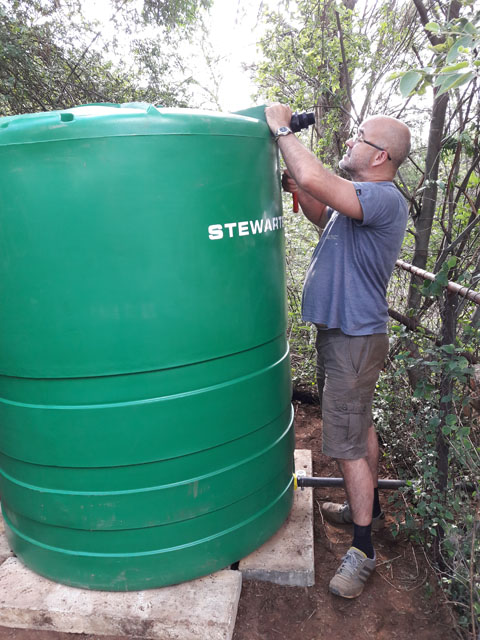
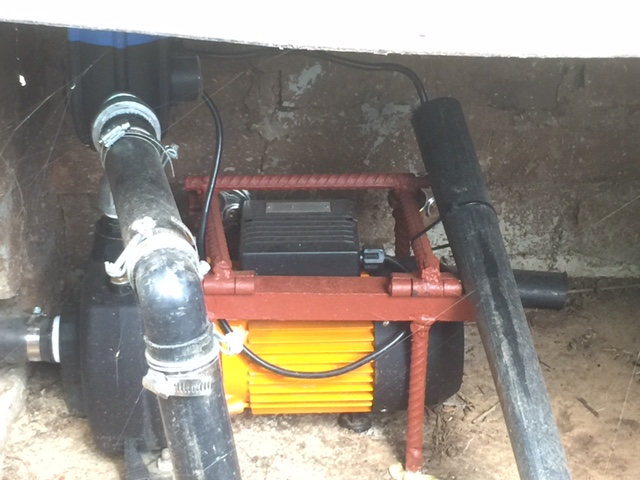
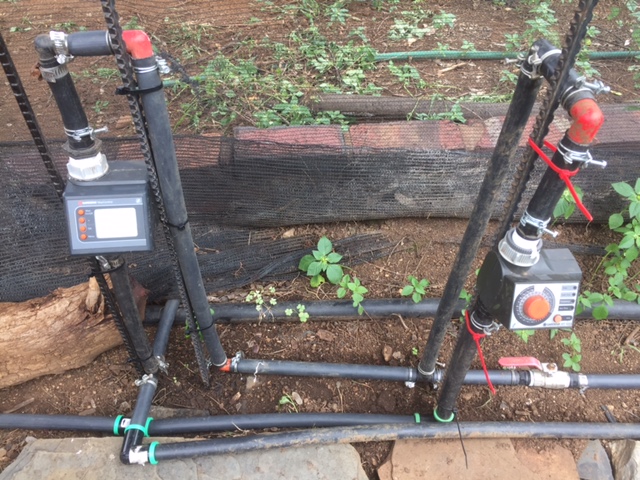
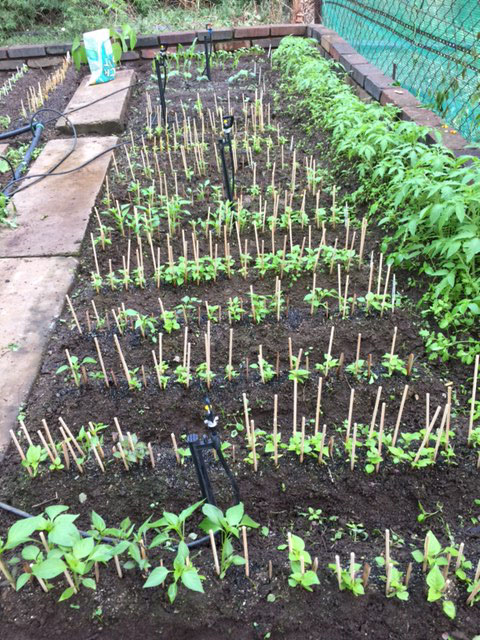
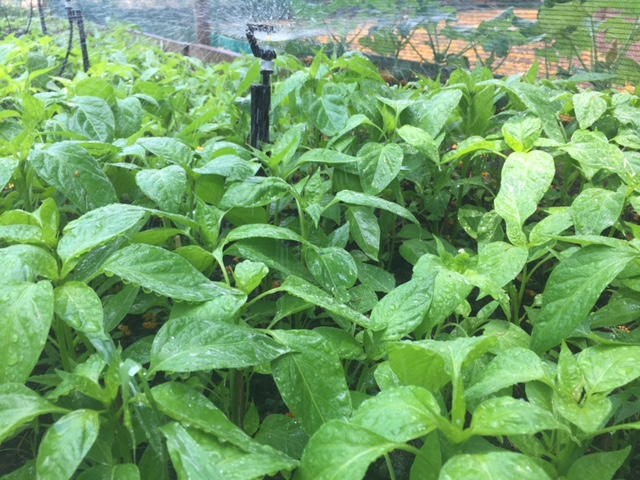
I established the new water feed. Water from the borehole was delivered to a 2500 litre holding tank. From there water ran through a 220kw Pressure pump capable of delivering 200 litres of water per minute. I have had my fair share of burst pipes and irrigation headaches this season for sure. Irrigation is my absolute nemesis! Irrigation is one of those giant black hole for money and patience. The amount of times this season I walked out of the hardware saying "that is it now"... lol But, it is done - finally and all running smoothly. I ultimately had budgets to reign in, so I had to go with a 2500 litre tank. Running about 100 micro mists and 7 impact sprinklers also required I run three watering cycles. So I have three separate areas running off different timers.
Connecting float valve below.
Pump needed caging in for security.
Different irrigation circuits with own timers below.
I had originally envisaged that the seedling area would be a holding area for new seedlings to harden off at the farm. This - I envisaged - required a shade netting for the roof and two of the sides to block out some of the harsh light. It later became apparent that monkeys were getting into the seedling area. They were not really going for the seedlings, but rather the root vegetables we were growing there. But the real issue was that they would damage seedlings in the process. So we subsequently enclosed the entire seedling area. Monkeys sorted!
The picture below shows what was in the area I established the seedling area. There were some unused raised beds and some metal structure of sorts. As you can see things in August were pretty dry. Rains were late and had not come yet. First task was to secure 40% shade netting onto the framework.
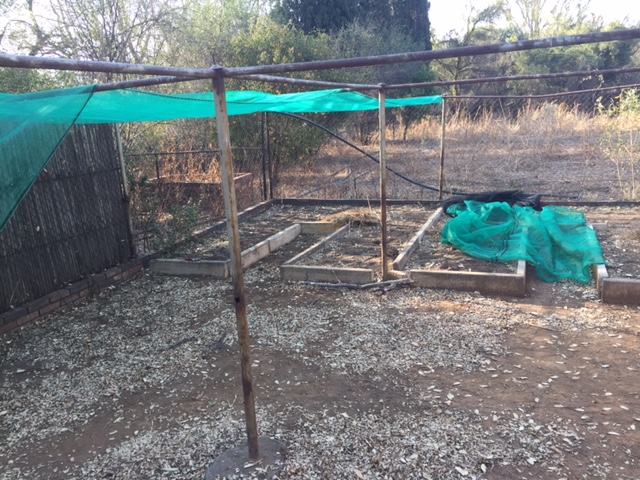
Next picture shows the area after I established the beds for the seedling area. The fencing was to keep dowgs out. No monkey issues then yet!
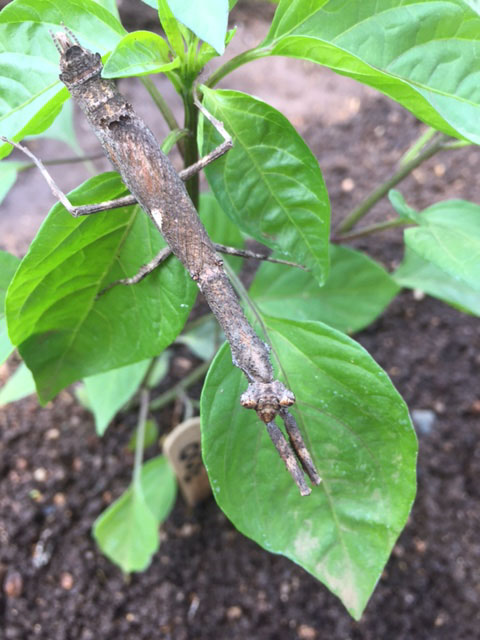
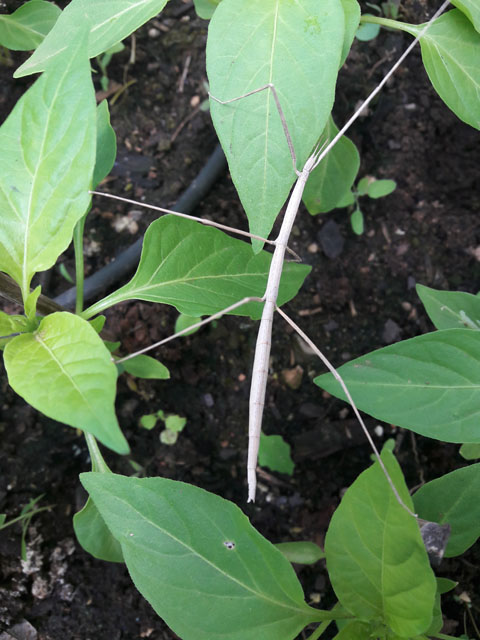
Other issues we have at the farm is your more common pests. Whitefly (not much - but some), Aphids, Caterpillars, Leafhoppers, Locusts, Snails and Cutworm. The most critical at seedling stage being the cutworm that seem to be more prolific early spring. But my good friend Stickman did teach me to use wooden sticks, which work brilliantly - and I still use to this day (thanks buddy!). I don't like to use pesticides as they do mess with the food chain. I do try everything before turning to pesticides. If I do, I go organic. Neem Oil, Neudosan etc - these are our local choices, yours may be different. Aphids are not really an issue either until later in the season when we get cooler mornings. But Neem Oil seems to sort them out quick. Locusts are a bugger here as they do eat the outer of stems and the fruit of the plants. Also, we do have issues with ants in the grow area. They do not generally affect plants, but when they do, they usually attack the roots of a plant, resulting in signs of wilt.
Picture of good guy below.
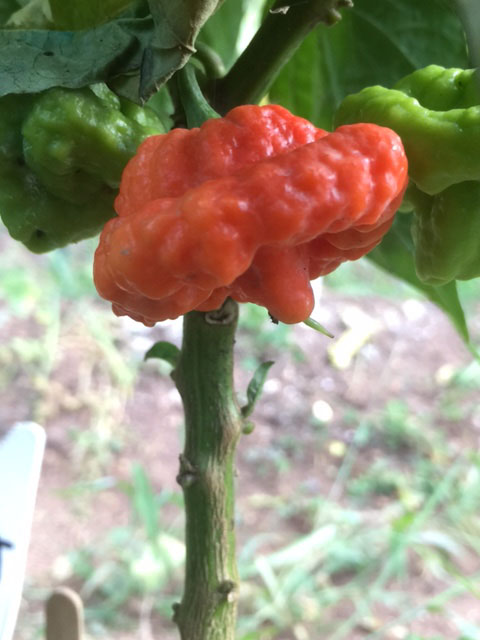
As mentioned we do get some larger pests at the farm. Giant African land snails that have to be picked every morning. They tend to nestle into the soil around the roots and suck nutrients from the plants. Not major damage, but needs controlling. Monkeys are a real bugger. Not much deters monkeys. Luckily they will try a chilli and do not go beyond 10,000 SHU. They are curious animals and learn quick. So once they have bitten into a superhot, they do tend to move on. They do cause a lot of damage in the fields, as they tend to push over plants.
Apart from this, we do have a great wildlife on the farm. We have leopards, buck, monkey, lynx, snakes, jackals and lots of spiders and scorpions. The usual stuff, that all goes to making growing chillies more interesting
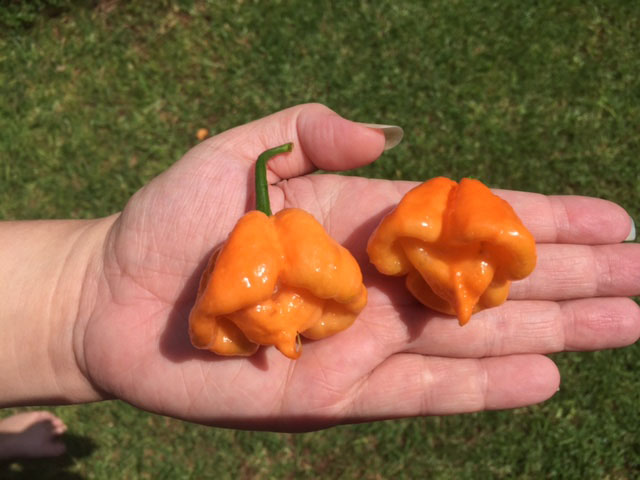
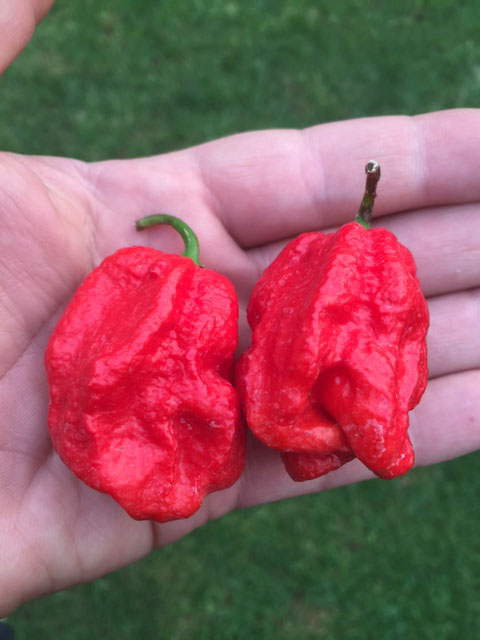
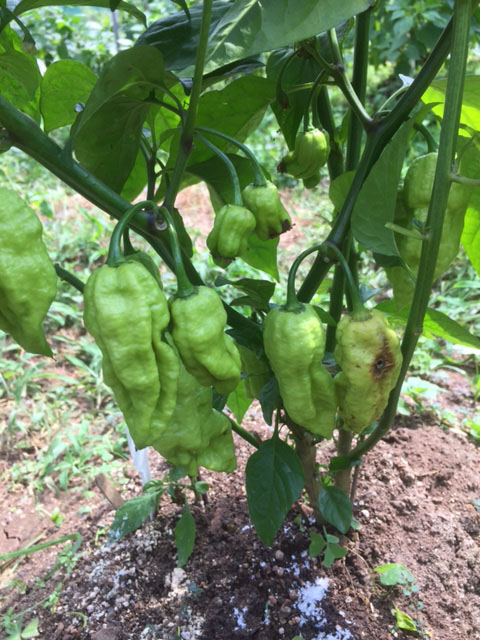
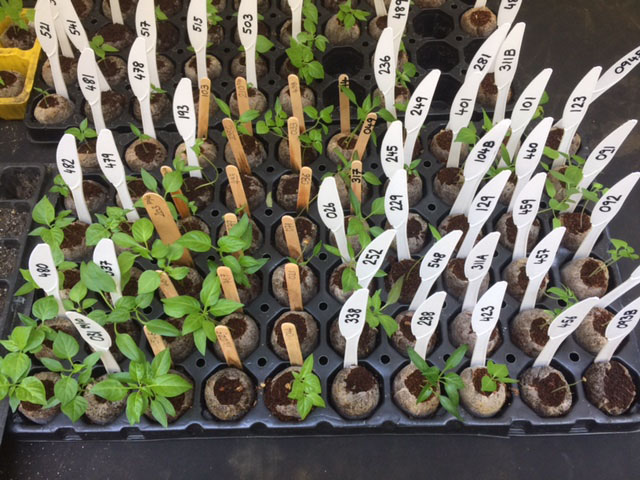
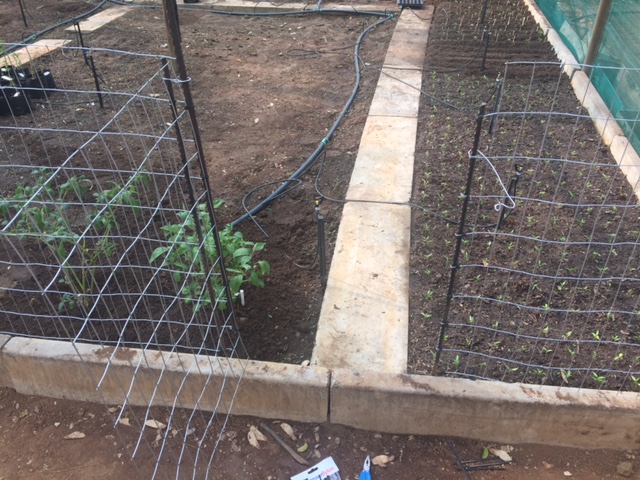
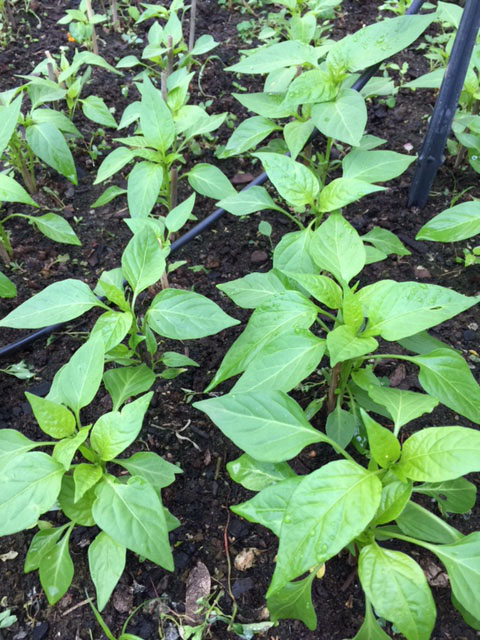
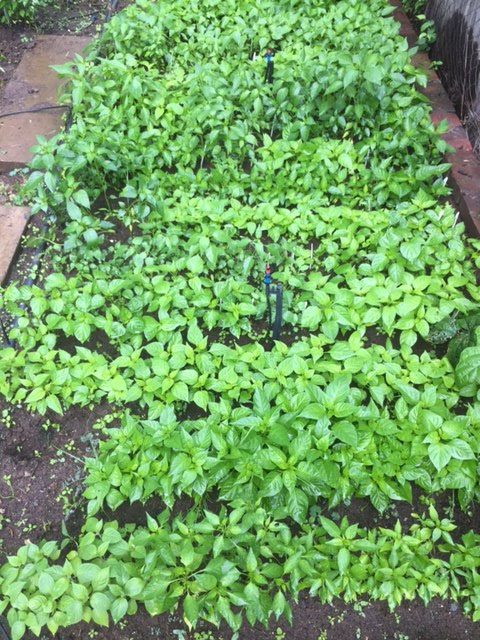
Below, plants ready for planting on, these will be going into the outside field for sauce manufacture only.
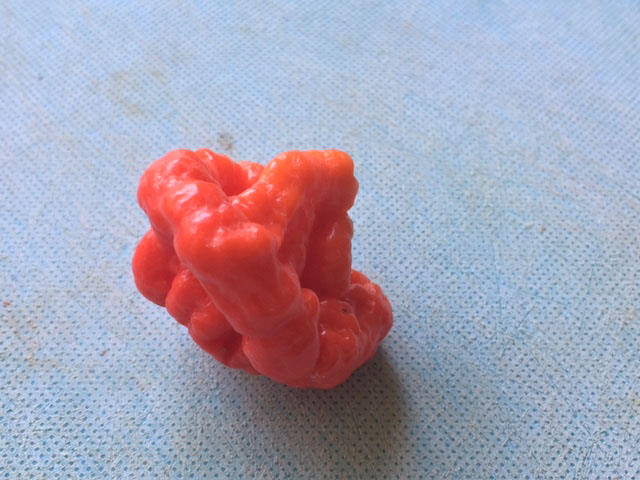
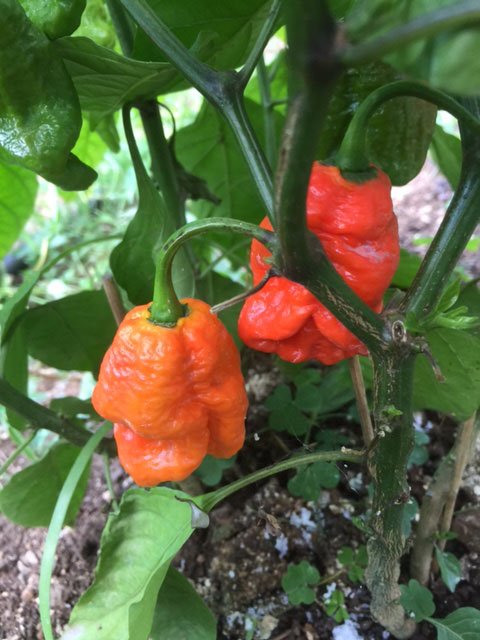
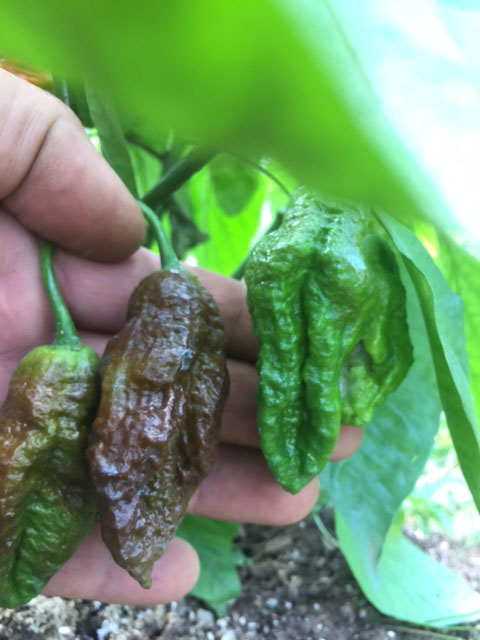
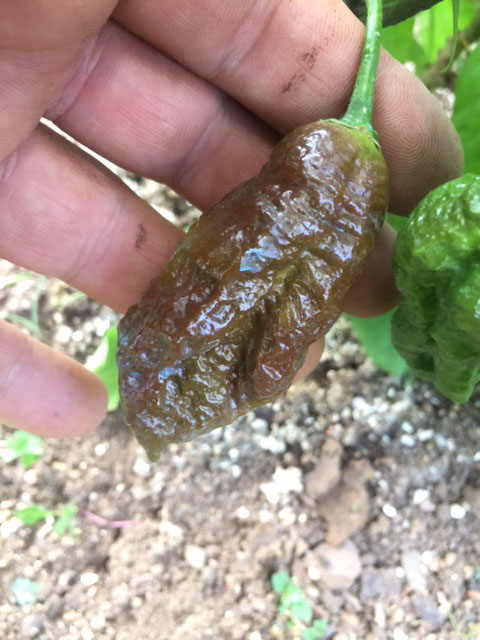
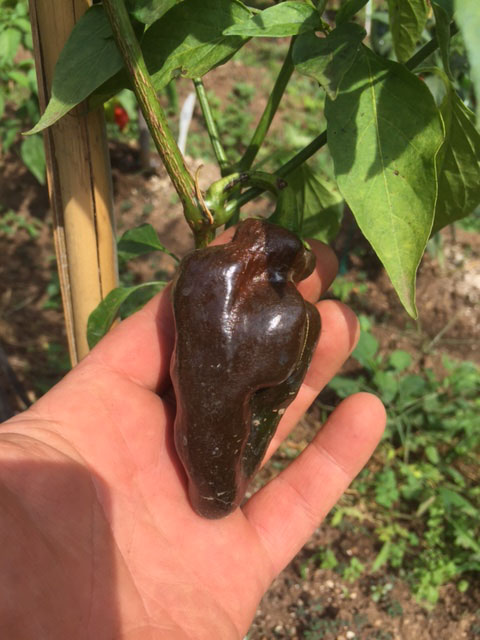
Stickman, this one is for you buddy...
More to follow...
It has been a few years since my last glog on THP. Sadly, life got in the way (as it does) and I had to step away from THP. But it does feel good to be back doing another glog!
A shout out to all my pals on THP who have kept the home fires burning! You guys are the glue that keeps this site going
This glog will be retrospective somewhat as our grow season here started in August and is now in full swing already.
For those of you who maybe don't know me, a little background info.
My previous glogs:
PeriPeri's Grow Log 2012: South Africa
PeriPeri's Grow 13/14/15/2016: South Africa
I live in Johannesburg, South Africa and the farm we grow our chillies on is about 1 hours drive away. Geographically our farm is situated on the "Highveld" near Pretoria (the capital of South Africa). The altitude here is around 5,751ft above sea level. We have a dry and a rainy season. Our rainy season goes from August/September until April (our summer) with an average rainfall of around 28 inches during these months. We are currently experiencing lower rainfall, but luckily this does not affect us as we have a very generous borehole with ample water throughout the year. Temperatures in summer at the farm can range anywhere from 26 - 40ºC daytime and 18 - 25ºC night time. The farm is located in a valley surrounding a large dam, so we have a very hot and humid micro climate that does not really relate to the general local weather. Our winter temperatures can range from 18 - 23ºC daytime with night time temps that can range from 7 to -1ºC. Our winters are bone dry as we do not get any rain from May - August. We do get light frost in our winters, but come first week of October night time temps are usually up to 10ºC again.
The grow area on the farm is located close to the banks of a small river, so we are blessed with very rich and fertile loamy soil. Most things seem to grow in the soil and chillies seem to do exceptionally well there. I do rent the land from the owner and have access to an enclosed area that is about 20x20m and surrounding land. The enclosed area has 40% shade netting, which is great as the African sun is intense, but better yet - we have monkeys on the farm, so this keeps them out! Since we last grew there in around 2016, the land has not been used much, so it has had some time to recuperate. But more about that later. First off, let's flash back to August 2017.
So I started germination this season in August 2017. It is always a little messed up at first as seeds usually arrive late. No matter how hard I plan ahead, our near bankrupted Post Office always manage to delay orders from clearing through customs. This season one of the parcels took 3 months to get through our customs. So as much as you guys may complain about USPS or whatever... it doesn't get worse than our national Post Office here in South Africa! I will add that the grow list was a little ambitious this season. But, with a little scorpio determination - anything is possible! Right?
I like to pre-soak my seeds before germination. I have created my own formula of pre-soak solution that seems to work for me. I know everyone here has their own mix or ideas about this, but this is what seems to work for me. Distilled water, hydrogen peroxide, salt peter & liquid soap. The soap helps take oils off the seed coat and facilitates uptake of water and the other two help with oxygenation and breaking down the seed coat as well as kill any nasties. Seeds soak for about 18 hours and then I like to use pure Coco Peat for final germination.
In the pic, some overwintered Rocotos in the greenhouse back home.
From the pre-soak, seeds are entrusted to my old faithful - "Big Bertha". "Big Betha" is my trusted propagator. I created her from scratch in about 2013. She can house about 800 cells at any one time. Keeps a nice humid 30ºC at all times and runs off just 5 compact fluorescents. She just gets the job done. Given my grow list this season, it would take a few rounds to germinate everything. Which was all straight forward - and even the seeds that arrived late were handled in their stride.
But, no season would be complete without issues - right? The first round of germination first week of August was brilliant. Second round, things started looking a little sucky. Germinated rates fell and those seedlings that did emerge soon fell too. By all definitions, what I was experiencing was Damping Off. As mentioned, poor germination and established seedlings would go thin at the base and just keel over and wilt. Sound familiar?
Now, I knew temp was regular and consistent. Watering was ok... I went through the checklist. I was pretty sure it wasn't damping off. Everything was correct and the same as it always was. This left but two things in my mind - water and medium. I was sure the water was ok, as I only use spring water. It just so happened that I received a call from the CEO of Jiffy here in South Africa, asking if I were interested in trying the pellets. We chatted, I explained and he said - give those C7 Jiffy pellets a go. I did and that is that - as they say! What a brilliant product. Germination rates were more than satisfactory and growth was super fast. I was smiling.
What emerged from our conversation was that quite a few growers had experienced issues with the Coco Peat blocks that I was using. Clearly a bad batch had come into my possession and other growers too around the country. What I had not realized, was that the PH of those blocks was not regulated and what became apparent was that the Coco Peat was too acidic. The seeds & seedlings were sitting in acid. The results being poor germination, poor roots, narrowed base of stems and certain death. A lesson learned.
What I can say is I like the C7 Jiffy Pellets. The slight acidity of the Coco Peat does promote better root growth (in my experience) and the sterile nature of the product does limit the possibility of fungal or bacterial issues (seeds rotting in the medium). Well, at least this is my views. All buffered and ph balanced - They also come packed with all the nutrients needed by the seedlings that really seems to spur on growth. So, I am using that for sure going forwards. My only reservations about the Jiffy product was the outer membrane. I used the product some years back and found that the outer membrane did not break down and rather had caused bound roots and stunted growth in plants. But I was prepared to give this another test and work around. But more about that later!
As for the Coco Peat blocks I used to buy at the nursery - out the window! Unfortunately on the down side of things, the impact of the bad germination was that I had lost some varieties on my grow list. To order seeds this late in the season was pointless - as it would take months before they arrived. All I could do was dust off and move on!
So, given the set back with the germination, I had my last batch germinating by the end of August. My D-Day is always first week of October. This is generally when we have seen the last of the frost here and night time temps have risen above 10ºC. We do still get cold snaps in October, but these never really last longer than a day or two. So no big issues there.
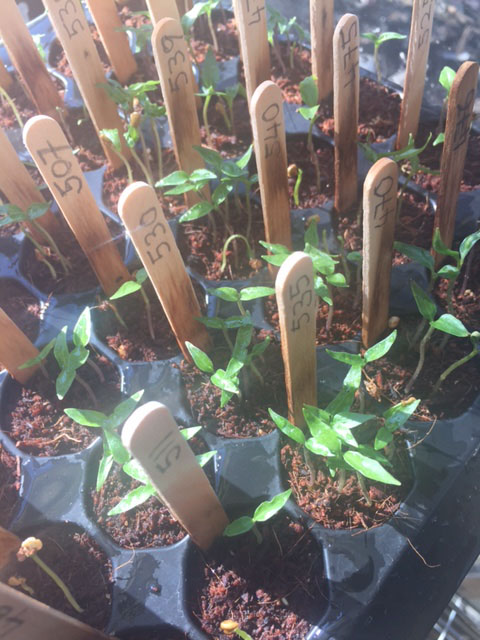
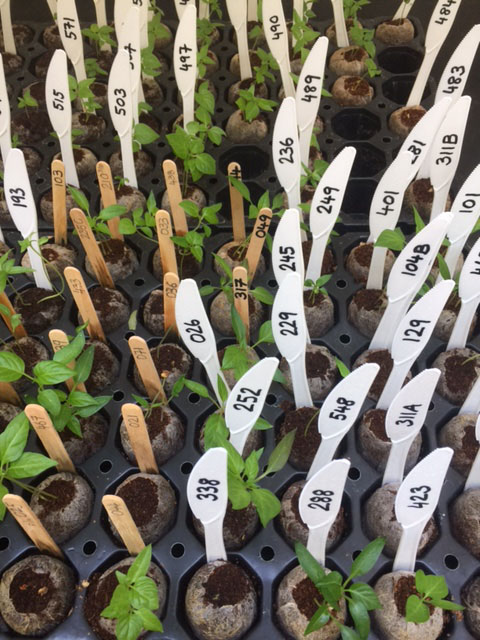
Some of the seedlings in trailer on their way to the farm early October.
This season I have also continued making and using my own rooting hormone. I stumbled across this some years ago and do seem to think that it really helps. First weeks of spring, I harvest new green shoots from the Willow trees down by the part and steep these in water. Three days later, I am ready to water the seedlings with the water. The science behind this is the active growth hormones found in Willow trees. Indolebutyric Acid & Salicylic acid - These are released into the water and ultimately into the root zone of the seedlings. This works two fold. It increases the plants resistance to disease and stimulates growth. I seem to think it is really simple but is highly effective.
As mentioned earlier, the farm that we are growing at is about one hour from home. It takes a lot of planning and logistics to go out there every time. I have managed to get a trailer that has been invaluable to cart everything there and back. I am mostly only able to go there on weekends. I have my kids every alternate week - so it does take some planning to arrange trips out there. Another added issue is that I can't leave anything at the farm as things get stolen there. Anything of value is stolen from farms at night - so the trailer literally carries everything.
Our first inspection at the farm in August revealed some infra-structure issues that I had to get sorted before d-day.
- Prep grow area inside netted area.
- Establish grow area for seedlings.
- Install Pressure Pump & Holding Tank.
- Install irrigation for inside area, outside field and seedling areas.
I established the new water feed. Water from the borehole was delivered to a 2500 litre holding tank. From there water ran through a 220kw Pressure pump capable of delivering 200 litres of water per minute. I have had my fair share of burst pipes and irrigation headaches this season for sure. Irrigation is my absolute nemesis! Irrigation is one of those giant black hole for money and patience. The amount of times this season I walked out of the hardware saying "that is it now"... lol But, it is done - finally and all running smoothly. I ultimately had budgets to reign in, so I had to go with a 2500 litre tank. Running about 100 micro mists and 7 impact sprinklers also required I run three watering cycles. So I have three separate areas running off different timers.
Connecting float valve below.
Pump needed caging in for security.
Different irrigation circuits with own timers below.
I had originally envisaged that the seedling area would be a holding area for new seedlings to harden off at the farm. This - I envisaged - required a shade netting for the roof and two of the sides to block out some of the harsh light. It later became apparent that monkeys were getting into the seedling area. They were not really going for the seedlings, but rather the root vegetables we were growing there. But the real issue was that they would damage seedlings in the process. So we subsequently enclosed the entire seedling area. Monkeys sorted!
The picture below shows what was in the area I established the seedling area. There were some unused raised beds and some metal structure of sorts. As you can see things in August were pretty dry. Rains were late and had not come yet. First task was to secure 40% shade netting onto the framework.
Next picture shows the area after I established the beds for the seedling area. The fencing was to keep dowgs out. No monkey issues then yet!
Other issues we have at the farm is your more common pests. Whitefly (not much - but some), Aphids, Caterpillars, Leafhoppers, Locusts, Snails and Cutworm. The most critical at seedling stage being the cutworm that seem to be more prolific early spring. But my good friend Stickman did teach me to use wooden sticks, which work brilliantly - and I still use to this day (thanks buddy!). I don't like to use pesticides as they do mess with the food chain. I do try everything before turning to pesticides. If I do, I go organic. Neem Oil, Neudosan etc - these are our local choices, yours may be different. Aphids are not really an issue either until later in the season when we get cooler mornings. But Neem Oil seems to sort them out quick. Locusts are a bugger here as they do eat the outer of stems and the fruit of the plants. Also, we do have issues with ants in the grow area. They do not generally affect plants, but when they do, they usually attack the roots of a plant, resulting in signs of wilt.
Picture of good guy below.
As mentioned we do get some larger pests at the farm. Giant African land snails that have to be picked every morning. They tend to nestle into the soil around the roots and suck nutrients from the plants. Not major damage, but needs controlling. Monkeys are a real bugger. Not much deters monkeys. Luckily they will try a chilli and do not go beyond 10,000 SHU. They are curious animals and learn quick. So once they have bitten into a superhot, they do tend to move on. They do cause a lot of damage in the fields, as they tend to push over plants.
Apart from this, we do have a great wildlife on the farm. We have leopards, buck, monkey, lynx, snakes, jackals and lots of spiders and scorpions. The usual stuff, that all goes to making growing chillies more interesting
Below, plants ready for planting on, these will be going into the outside field for sauce manufacture only.
Stickman, this one is for you buddy...
More to follow...