• Blog your pepper progress. The first image in your first post will be used to represent your Glog.

PIC 1's............Pod-ography.............2013

  Good Eve-ning, and Welcome to my bog...glog !

Hey folks sorry for the late glog-up I'm a month behind last years startup,...... :rolleyes: ...... I still have 12+ weeks (plenty of time) before I can start think about hardening off the plants outdoors.

First off I'd like to give a shout out to those who followed my grow last season. Thanks for all the comments, thoughts and ideas. The chuckles we shared......there were some good laughs...(and especially all the criticisms........ :liar: .......hah)

To those who are new, I try to follow a "weekend update" format with photos and captions. Although if anyone has questions or replies that needs and answer or response I'll get back during the week. I hope to keep this interesting and entertaining...

and away we go!


Garden Rewind


scan0001.jpg


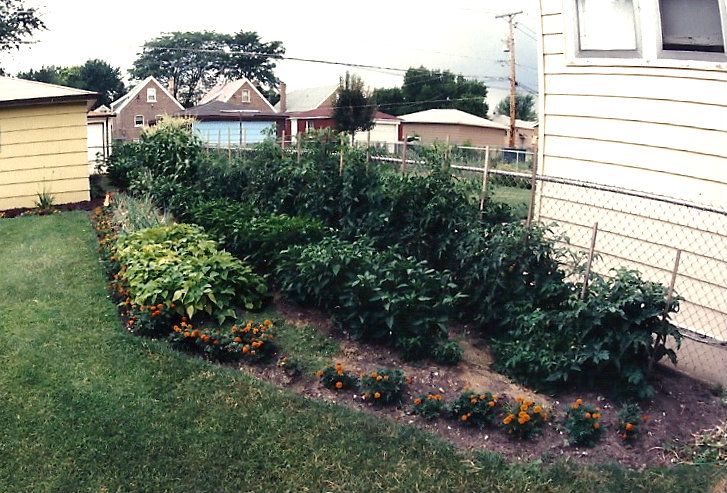
Here's my 1st garden (1986)...it was modest but what we grew we used in our kitchen. I had a couple of dual bulb 4ft T12 fixtures in my basement. A couple grow-lux and daylight color temp bulbs. The indoor grow was far superior to the vegetable starts sold at the local nurseries.
My Italian neighbor couldn't understand why his bell pepper starts only had flowers while mine had golfball size peppers very early in the season.....The hot varieties I grew back then were the cayennes, orange habaneros, and a few different type or thai-birds. Things have changed but I still grow those varities.

IMG_1796.jpg


Here's a shot from last season. I grew around 150+ pepper plants in two different sections of the garden. Plants were grown in raised beds and containers from 5 gal up to 20 gal

IMG_1763.jpg


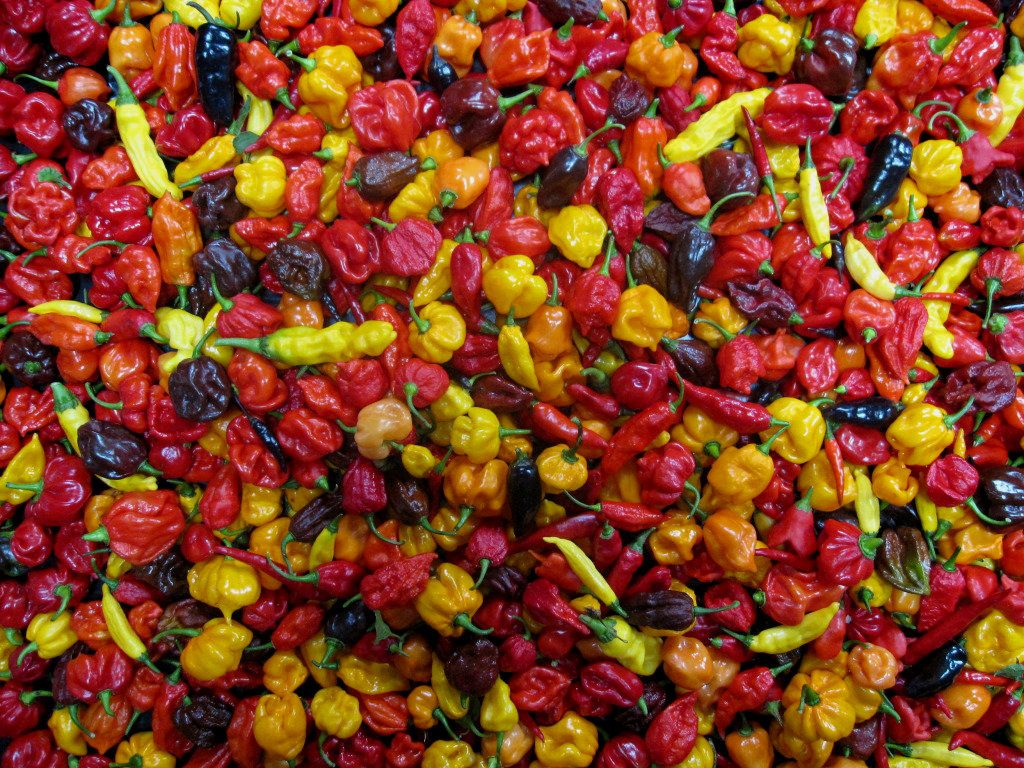
A typical weekend harvest shot from later in the season when the gardens at full swing.

IMG_5253.jpg


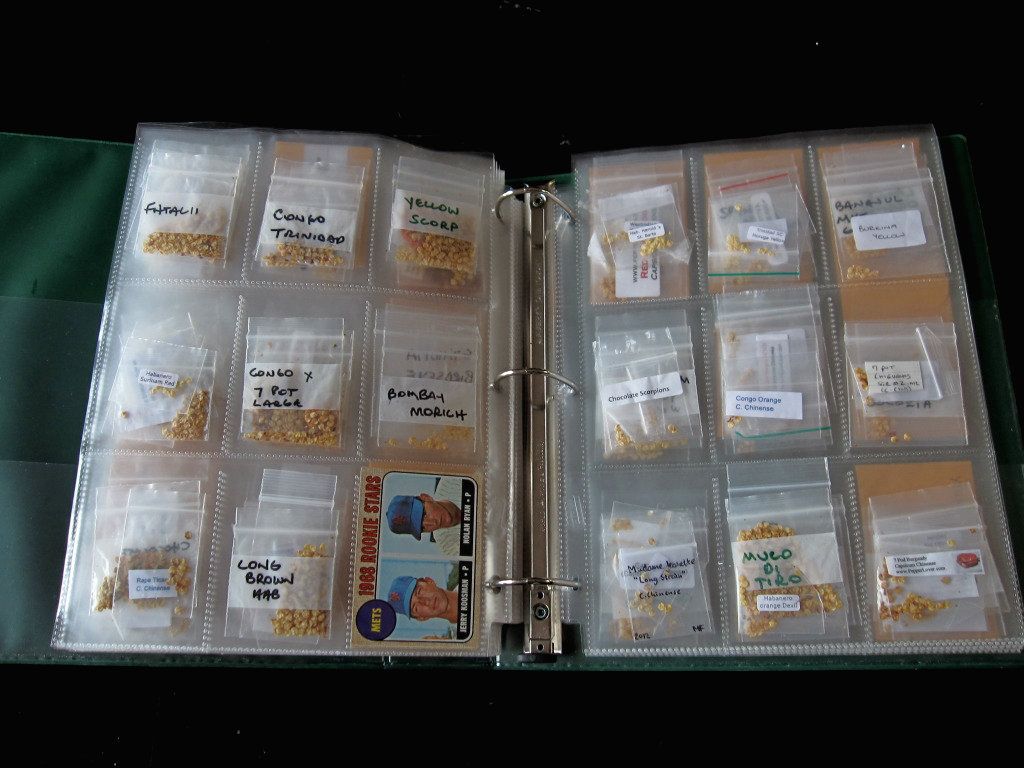
This is one of my seed catalogs, the c.chinense....the seeds that invade our gardens every year...
This book and other seed catalogs are kept in a tupperware container container on a shelve in the corner of the basement.
No elaborate system needed, The seeds are kept in 1.5" zip backs. I have seeds that are as far back as 2007, and still germinating without a hitch....theres no need to pitch. Speaking of pitching theres some old baseball card to display the size of the pages used.

IMG_5217.jpg


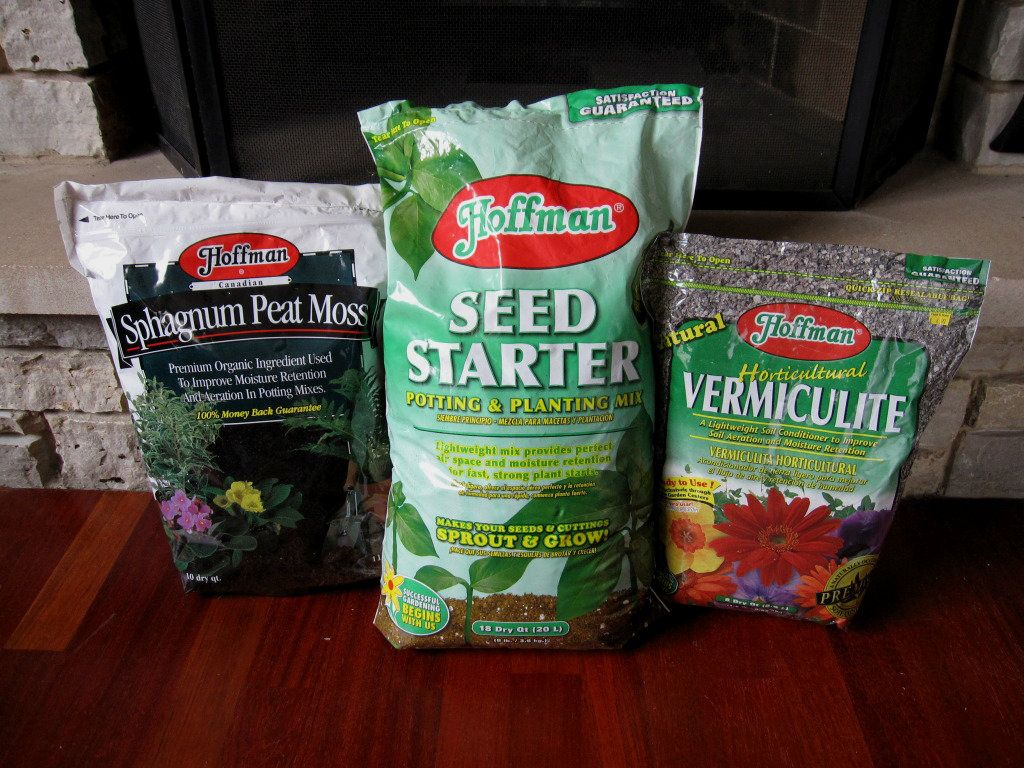
These are what I use to get the seeds on their way. I take 1/4 bag of each, mix that into a 5 gal bucket and moisten with water. The spagnum peat give fluff to the texture also helps indicate when the mix need to be re-moistened but the lighter color it displays. The vermiclite helps with water retension while letting the air and moisture through. The seed starting mix also has fine grain perlite to keep drainage and airflow moving.

IMG_5165.jpg


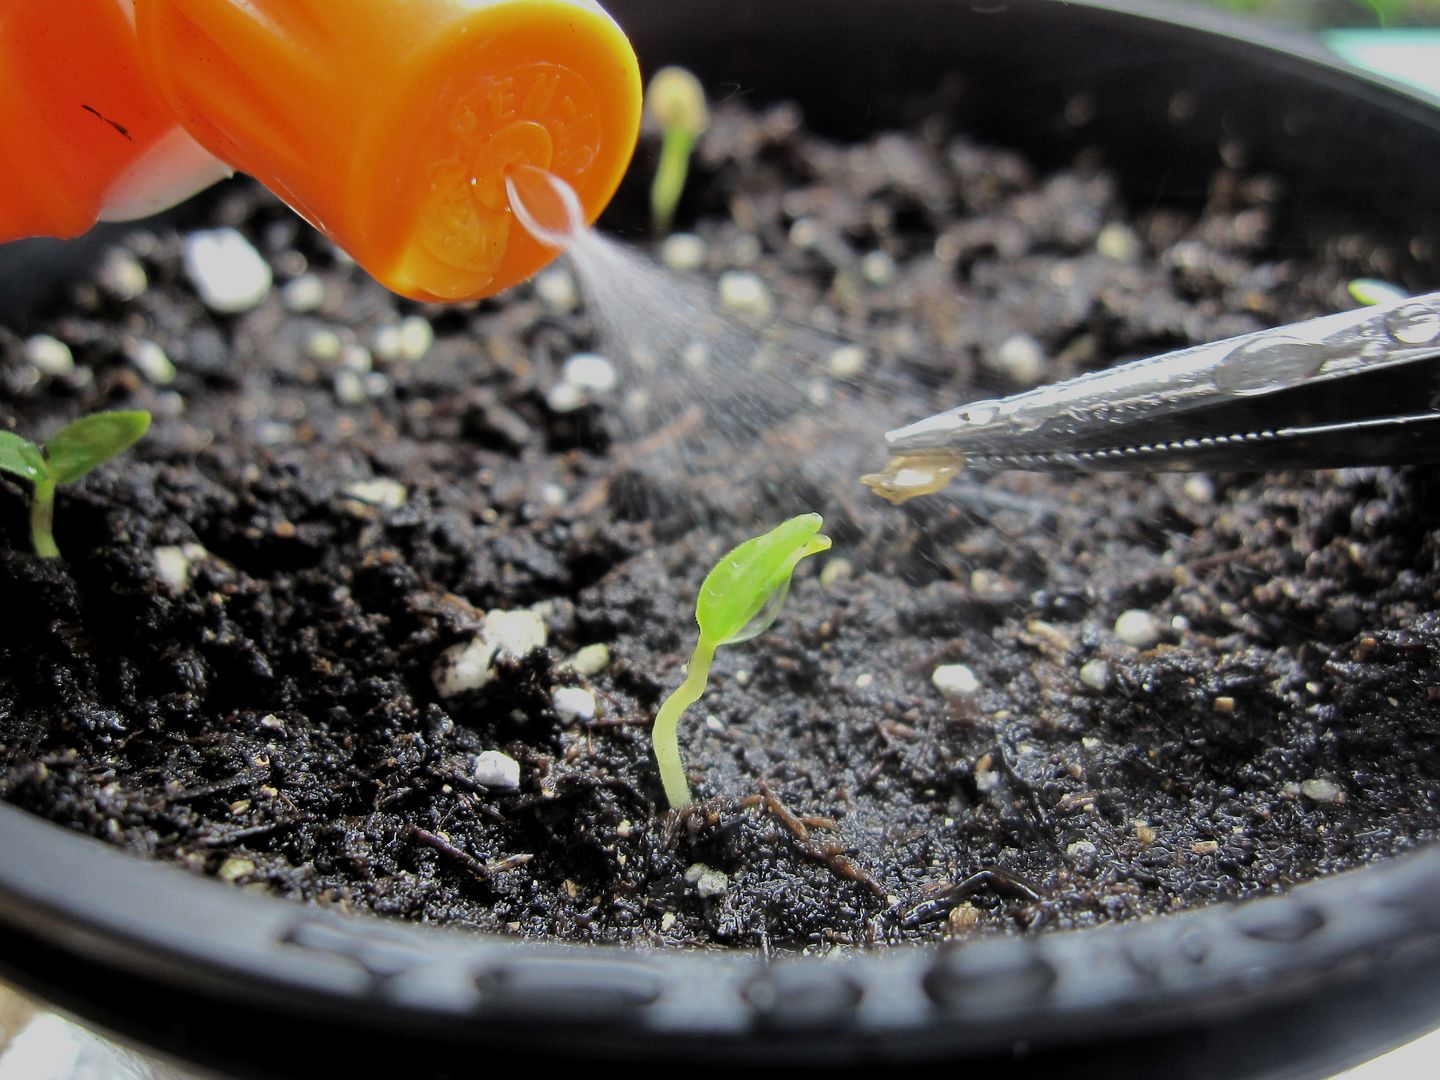
Ha..........I knew this chop stick would come in handy someday. Once the seed medium is moistened I'll make a hole with the stick 1/4" down .
The seeds will be planted at the same depth. That helps when misting the top with water. Seeds that are planted too high may dry out or seeds planted to deep may rot.

IMG_5099.jpg


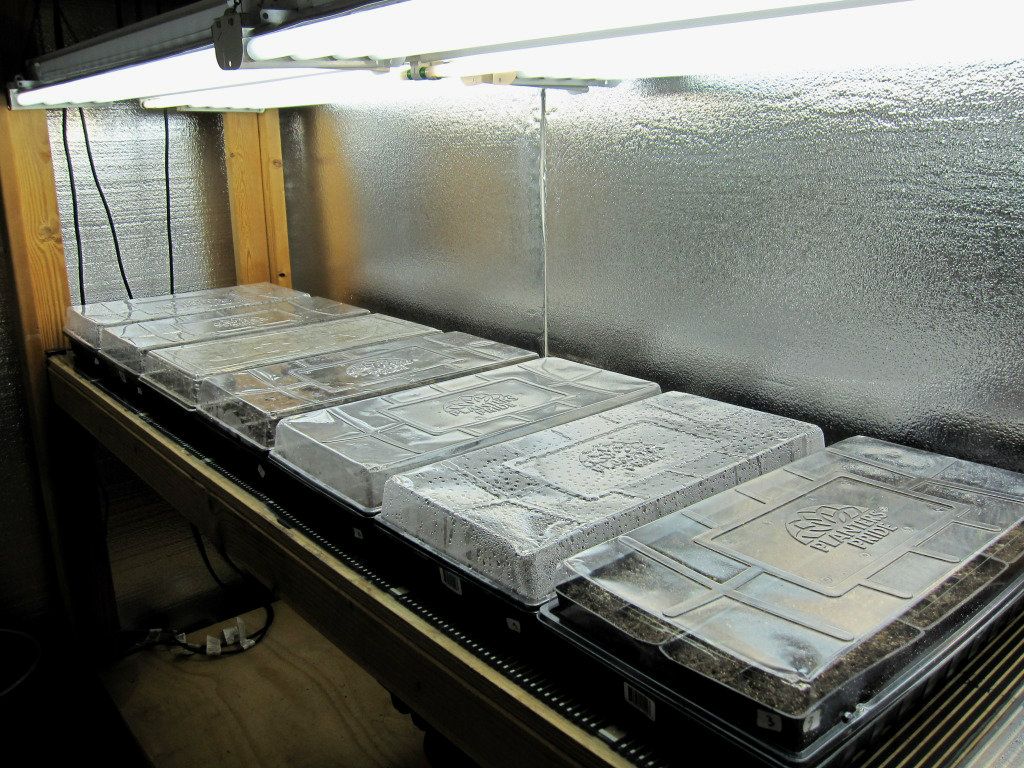
I use two 2ft x 4ft germinating mats. Enough area to warm 8 seed flats at once...

IMG_5246.jpg


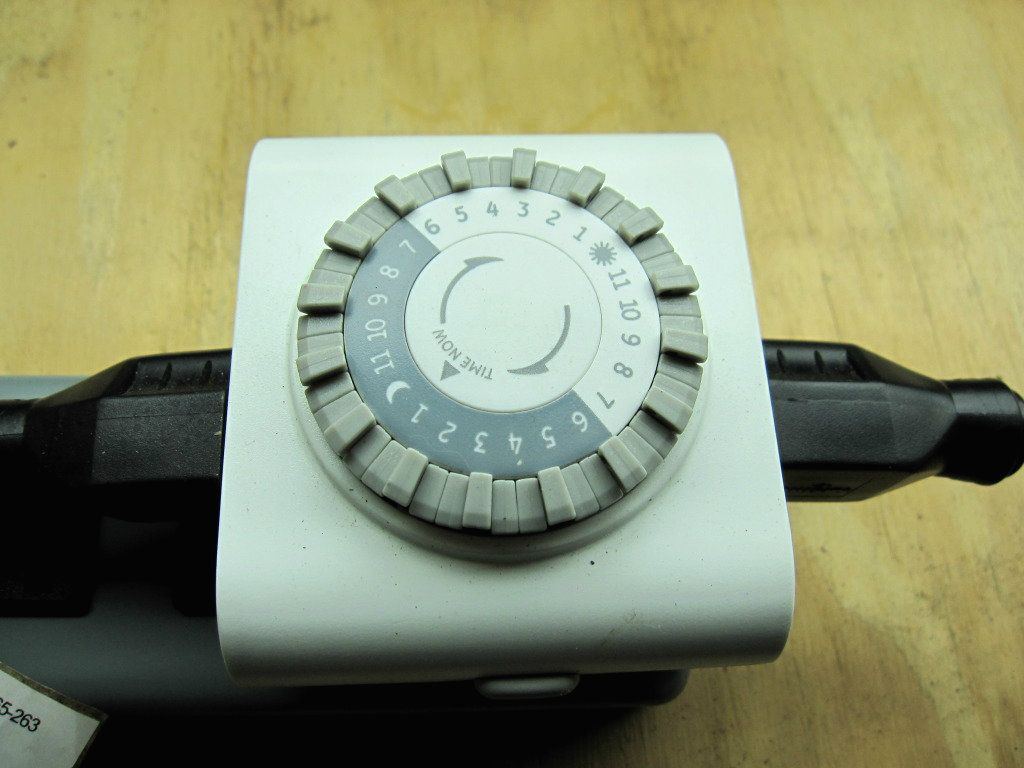
I don't bother with a thermostat for the mats. I run them through a timer, 2 hrs on, 1 hr off...continous. The average temp of the soil stays at +/-85 deg

IMG_5101.jpg


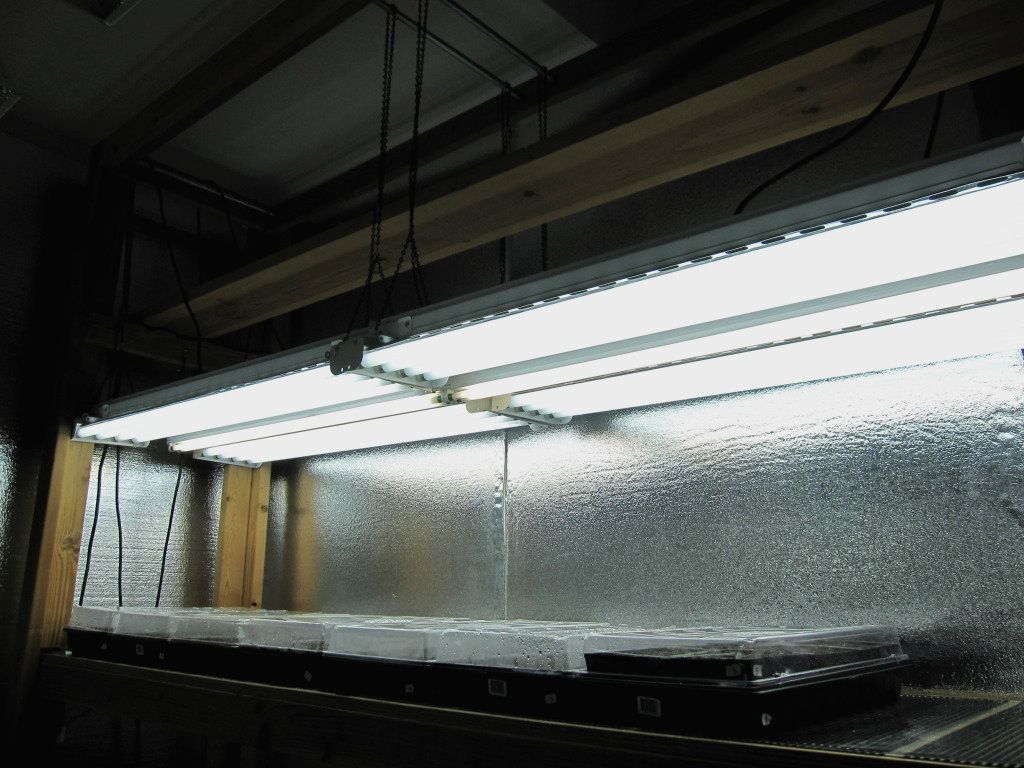
This is the main grow room. I built the 2 tier shelving units 8ft long x 2ft wide. 8 flats fit underneath the lighting units. Here we have four narrow spaced T8 4 bulb fixtures with 6500k bulbs and one 8ft TF twin bulb tight spaced fixture with 4100k bulbs. I have 4 identical systems in the room with an addition of three 400w mh fixtures with 7200k lamps. The room has 2- 20a dedicated circuits and 1-15a to split the current draw..

more photos in a few minutes....thanks for looking!
PIC 1's......Pod Pornage.............2012


.
 
Good choice on the bulbs. The T8's have done the trick for me. I only use them to get the plants up and going for the plantout. Current draw is less with the T8's , than the T5's.When running numerous fixtures it is a savings on the electric bills. Keep your babies close to the bulbs and you'll end up with dense foliage......and who doesn't like that !How's the MoA's..........still MiA ? or have they sprouted ? 2 of 6 so far with mine...

MoA's 1 for 6. 1 actually sprouted this morning :party: The other 5 are soon to follow :pray:
 
Greg . . . I was afraid to come here, but will be back and back and back. Am . . . speechless. Seriously. Office phone just rang and let it go to voicemail, as I just can't freakin' talk. Serious skills, and please keep the food porn coming: I just had what "they" call broiled chicken from uni "chow hall." Dayum and thanks for the star cell example: got "stars" in my eyes for 2014! Man . . . WOW! Annie
 
MoA's 1 for 6. 1 actually sprouted this morning :party: The other 5 are soon to follow :pray:
Cool......We can see how these plants perform in our Zone 5a/b climates.

Awesome updates! You got your set up so dialed in!! You plants just stack leaves on leaves on leaves. no stem at all... its beautiful!
Thanks Bee,There's no fighting for lights with the plants, the c.chinense haven't forked out yet. I like to keep the tops of the plants as close to the T8 bulbs as possible. Most plants will stay pretty bushy before they're brought outside to harden off. I've got about 8 Scotch Bonnets in 3 gal containers and 2 more in 10 gal under 3 400w mh hoods. I've already picked all the buds off, but I'll leave the next wave on to flower out. The plants growth habit is lateral .....which is good. I don't need any tall leggy plants indoors. Thanks for taking a peek here...

Greg . . . I was afraid to come here, but will be back and back and back. Am . . . speechless. Seriously. Office phone just rang and let it go to voicemail, as I just can't freakin' talk. Serious skills, and please keep the food porn coming: I just had what "they" call broiled chicken from uni "chow hall." Dayum and thanks for the star cell example: got "stars" in my eyes for 2014! Man . . . WOW! Annie

Annie.....thanks , I'm surprised......and hungry now..........ha

I'm glad you've found this glog "likeable".........tanx

Pick youself some of those star cells for next year. They drive the roots down like no other. They are reuseable and from what I remember start as small as 144 cells per standard flat. I use mostly 38 cell and 21 cell serts.Enjoy the rest of the day, don't work too hard in the plant room......... ;)
 
Greg I appreciate your glog so much. always great info and great pics. Plant goodies and pod goodies. I found a hydro store today in Caldwell and in Fairview ?? New Jersey. Directions say approximately 35- 45 mins for both.. OMGGGG I CAN FIND GOOD SOIL. They carry The Ocean Grow (or whatever) and ProMix. I will post pix of my shopping spree this weekend.. OHHH This is a pay weekend .... WOOOHOOOOO Grow on my friend
 
Nice update Greg. Plants are all looking like they been love'n long time ;)

I really like the look of those star trays. Do you use new ones ever year of reuse them till you have to replace them?

have a great week,
Bill
 
Greg I appreciate your glog so much. always great info and great pics. Plant goodies and pod goodies. I found a hydro store today in Caldwell and in Fairview ?? New Jersey. Directions say approximately 35- 45 mins for both.. OMGGGG I CAN FIND GOOD SOIL. They carry The Ocean Grow (or whatever) and ProMix. I will post pix of my shopping spree this weekend.. OHHH This is a pay weekend .... WOOOHOOOOO Grow on my friend

Cool Pia !,

Remember, you can always cut the good stuff with the regular .........a-haha

That's what I do with the Happy Frog, Fafards, Pro-Mix, its a "collageart" of soil mixes...and it works !

Nice update Greg. Plants are all looking like they been love'n long time ;)

I really like the look of those star trays. Do you use new ones ever year of reuse them till you have to replace them?

have a great week,
Bill


I had them from a few years back, they are reusable and more durable than the typical flimsy cell inserts. Last year I used alot of 3" pots with the 1st pot up. The pots are nice since you can move them into different trays to adjust for different plant heights, without continually raising the lights just because one plant is taller than the rest.

I was hoping on doing a smaller grow this year, but with all the kind growers sending me seeds, I opened the "play book" for a change of plans......more plants...ha..but cool.

I store all the seed flats and inserts in my garage, but all the small to large containers in my sons garage (thanks Ryan). I was hoping on using only the star-certs and then potting up to 5" or 1 gal pots. But I'm running out of inserts so today I'll be running over to his garage for some 3" pots.......yikes.

I haven't counted the seedlings yet, but a guess would be over 300 hundred and I still haven't planted the annuums or other vege yet...at the end of it all only the best will survive the final pot up. Some will be sold, but most will be grown by me ....and , well you know... the chef's knife will be waiting...
 
Weekend update...


IMG_5779.jpg


"The Little Train that Could"..............Finally ! Here's a "Galapagoense" that has risen......Hallelujah...........hah
It's only been 60 days since I dropped this seed in the dirt...... :shocked:
Notice the dark color of the seed hull, I know that's not from the black dirt that I'm using.

IMG_5700.jpg


"No Sweat" Steve954........just pulling the helmut off of one of the MoA's.............. :cool:
A mist of water and a pair on needle nose pliers will do the trick...........if one has steady a steady hand............ ;)

IMG_5833.jpg


6 for 6 with the Moa's. Just spending some time basking in the morning sun...(East facing windowsill)

IMG_5834.jpg


One of the Moa's (Yellow Jamaican Scotch Bonnet) is getting its 1st pair of wings.........Varoom!

IMG_5801.jpg


Main grow room... plant trays in the light of 2 T8 4 bulb fixtures...with a T5 eight ft fixture overhead.
No need to turn that one on yet, but when the plants get tall it will add light to the spectrum.

IMG_5817.jpg


Some of the larger plants under the 400w mh lamps. Its difficult to take photos of the plants with the lights on.
With the gloss on the leaves and the bright light source there becomes a huge variation from the "Highlight" parts of the leaves to the "Shadowside"
Thus becoming an extremely constrasting situation to photograph. ...Or, maybe its just my 100 dollar pocket camera thats the problem....ha

IMG_5762.jpg


Heading to the lower level grow. Just raising the lights for some shots of the plants....one side at a time.
Before the fixtures get lowered I'll mist the trays with some Epsom Salts..........I'll do this once a week.
The lights will get lowered back to within an inch of the tallest plants in the tray. When using individual pots they can be rotated to other flats to compensate for height issues. If using solid trays inserts the flats can also be moved around under a different fixture.

IMG_5749.jpg


Here's a flat thats in dire need for water.Notice the separation between the soil and the tray cells.

IMG_5744.jpg


and a flat thats in need for a pot up.

I'll be back shortly with a few more photo's.
 
A mist of water and a pair on needle nose pliers will do the trick...........if one has steady a steady hand............ ;)

Looks like you need 3 steady hands. haha

In the pics with the bank of fluoros all tilted are those t8's?

I wish I had the space you do.
 
IMG_5747.jpg


64 plants of various varieties in 5.25" containers.

IMG_5746.jpg


The "Maui Purple" gang just hangin round...
Soon to be budding beauties !

IMG_5758.jpg


Hawaiian Sweet Hot looking pretty dense

IMG_5754.jpg


Yellow Jamaican Scotch Bonnets packing on the foilage !

IMG_5752.jpg


Thai Hots...not the upright Thai-Birds but the down and dirty needle shaped pods

IMG_5845.jpg


Here's the lonely "Test Pod" from the "Bonnet/Brain" cross. I picked all the other flowers off hoping to produce a larger pod. But what I ended up with is a small pepper on a large plant. Most early pods can be small or inconsistant shaped....

IMG_5855.jpg


a couple more shots of the same pod......... :rolleyes: .....Here shows the bottom side with the traditional "4 lobes" a Jamaican Scotch Bonnet characteristic.

IMG_5848.jpg


"Bonnet meets Blade"...a 10" chef's knife that is........hah
Ok, the taste test was no surprise, very little scent nor oil when cut open. But the true Bonnet flavor was there, one that I haven't tasted since last season. Nice back of the throat burn that lasted ........Kinda messed up the taste of my Kona coffee that I was drinking....... ;)
I'm looking forward to getting these plants outdoors to see if the 7/Pot side of the cross kicks in........a winner so far !

A food shot coming up in a few...
 
Great updates as always Greg...every time I feel great about my little grow, I come over here for some jaw dropping bajillion perfect plant porn...and a pod shot to boot...from a cool cross no less. I am gonna go yell at my plants and show them pictures of yours now for motivation. "...and that's why the color yellow makes me sad..."
 
IMG_5714.jpg


Ingredients: Serranos, Thai-Birds, Sartori Bellautano , Mozzarella and Aged Provolone cheeses, Olive oil, Hawaiian BBQ sauce, Pineapple, Applewood Thick Cut Bacon, Canadian Style Bacon, Hawaiian Spicey Red BBQ sauce, Caputo "00" Flour, Hawaiian Seasoning Salt, and Thai Basil

IMG_5736.jpg


Sprinkle Pineapples with Hawaiian Seasoning Salt, grill the Pineapple and blister the Serrano's to bring out the oil. Fry up Bacon indoors set aside.

IMG_5867.jpg


The pizza dough was mixed up 2 days ago and spent that time in the fridge. Let dough come to room temp and rise until doubled.
Hand stretch dough into a rough circle. Top with Sweet/Smokey BBQ sauce, scatter a cup of Provolone over sauce followed by Bacon, 1 cup of Mozzarella, drizzle of Hot BBQ sauce, add Canadian Bacon , Pinneapple, Serrano's. Scatter Thai Chili's and grated Santori cheese. .

Tip: when cutting small Thai chili's into rounds I throw them in a colander and rinse under water. You'll lose all the seeds but none of the heat.

IMG_5878.jpg


The pie was baked at 425 deg using a Fibrament stone on the floor of the oven for the 1st part of the bake and another stone on the top rack to finish the pie. All in all about 12 minutes. When the pizza came out I topped it with shreeded Thai Basil leaves.

IMG_5891.jpg


Plating shot with a "Kona Golden Ale"
Although far from traditional this Pineapple/ Pork combo fare's well with the barbeque sauces rather than the "conventional Red Italian sauce"

Thanks for stopping by.........see ya all next week !

Looks like you need 3 steady hands. haha

In the pics with the bank of fluoros all tilted are those t8's?

I wish I had the space you do.

Thanks, nothing like have a tripod and a timer on the camera.
Those are all 6 bulb T8's. The span is 18" per fixture. I have 10 units ganged together. With roughly less than an inch between fixtures I have a running span of 16 ft.

I know it's only Saturday, but waiting all week for the 'weekend updated pics' is a bit tough for me!

Haha Steve....good one, Better to wait than to dread. I hope you find this weeks interesting

Aight homie...shortly's over!

ha..........I wish I had better typing skills, this may have been finished yesterday...

Great updates as always Greg...every time I feel great about my little grow, I come over here for some jaw dropping bajillion perfect plant porn...and a pod shot to boot...from a cool cross no less. I am gonna go yell at my plants and show them pictures of yours now for motivation. "...and that's why the color yellow makes me sad..."

Your glog is inspiational ! I have to see what you're up to before I get going on mine........It's called "Getting Hyped Up !"
Thanks for the entertaining comments.
 
Man, I never realized the insanity that is your grow room! Wow! Everything looks healthy and happy. You've got enough light in there for a second sun! Nice!

It gets a little crazy at times.........sometimes too much time. Although I know when to quit for the day, if I start stepping on pearlite, then its time to sweep up and call it a day.
Funny you should mention it I have 2 suns but its the other kind (Sons)

Amazing update! Everything looks great!

Cya

Datil

Thanks , I'm looking forward to getting this show on the road with the outdoor part of the grow , only 3 more months......... :tear:
 
Back
Top