• Blog your pepper progress. The first image in your first post will be used to represent your Glog.

CaneDog - Off-Season Season 2018/19

Thought I'd post a few pics of what I have going on indoors this off-season.  I used to do a winter indoor grow about every season, but this will be my first in a couple years now.  I went a bit over-board with the number of plants, as usual, but I've culled a few already and I have expansion room if needed.
 
I'm using a handy little extra walk-in closet to start things out. Keeps temp well and makes it easy to chill and work with the plants.
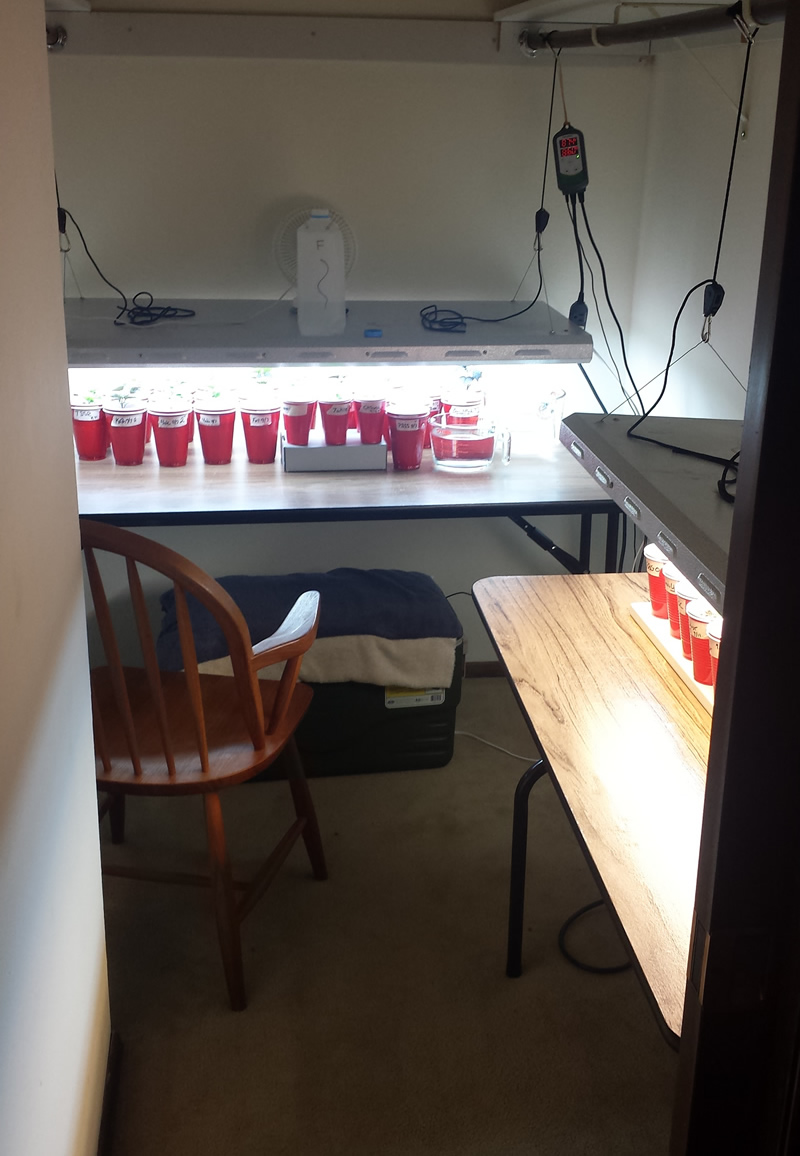
 
20181008_PWalk30.jpg


Most everything's potted up into 1g Boxer Browns now.  Here's a few of this season's players.
 
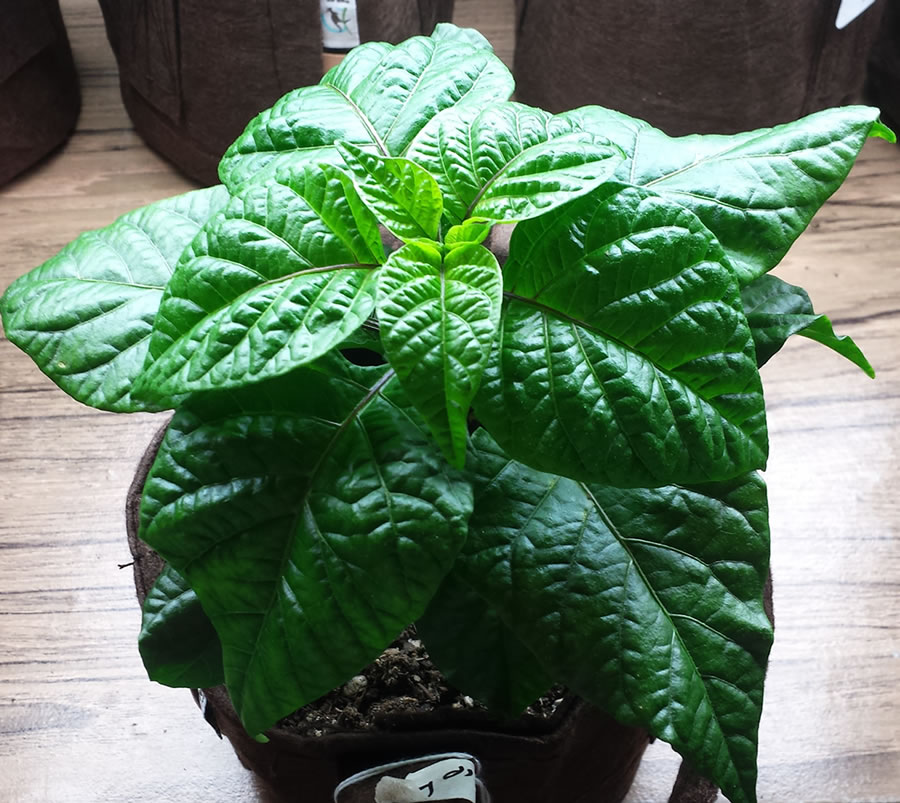
Baha Goat
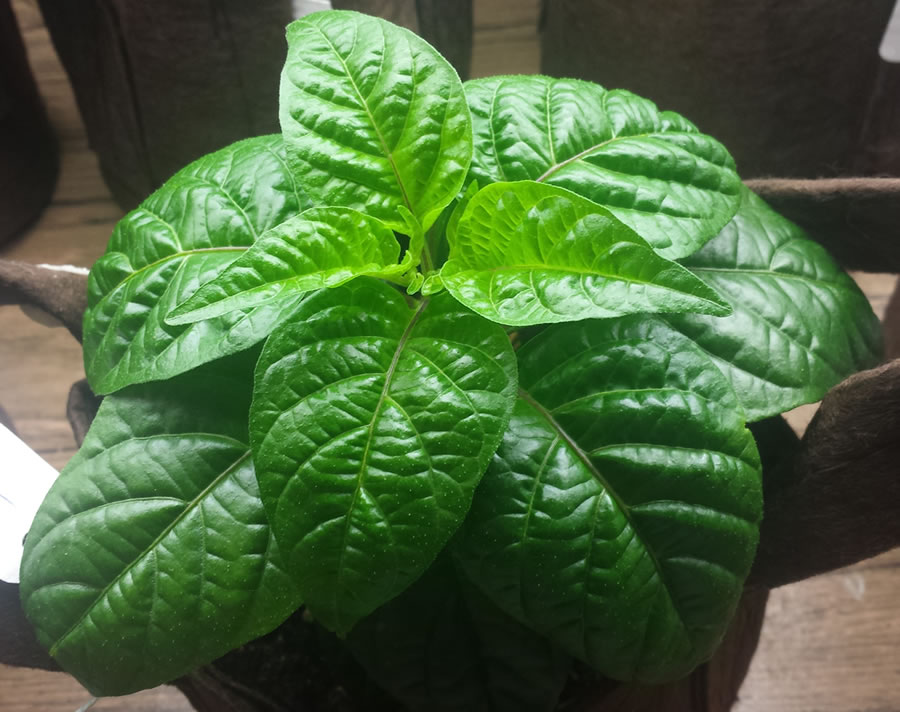
_20181119_BGoat.jpg


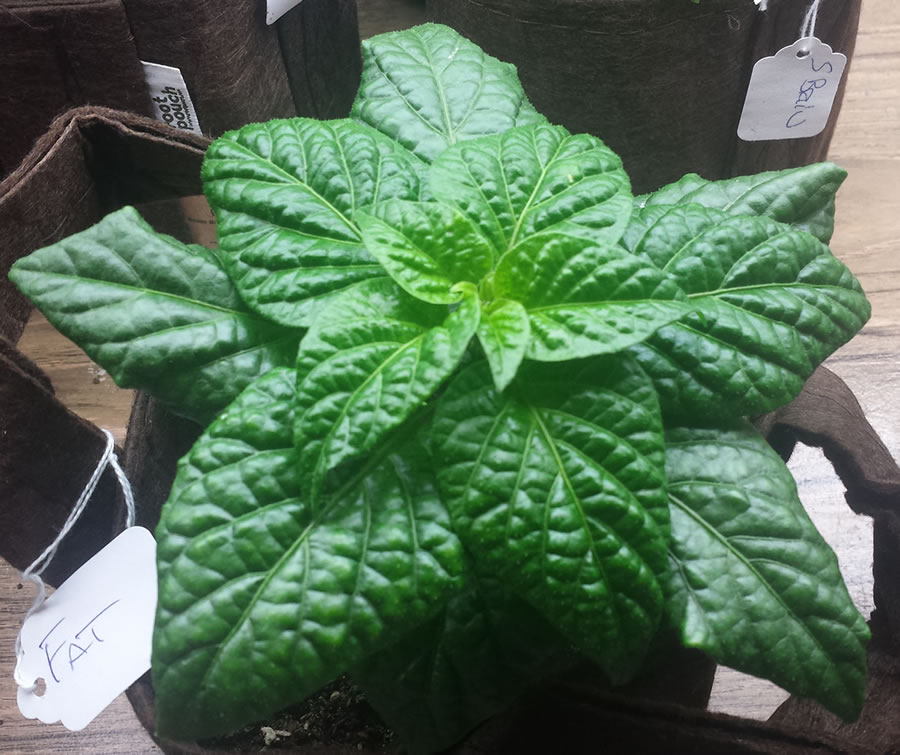
Fatalii
_20181119_Fatty.jpg

 
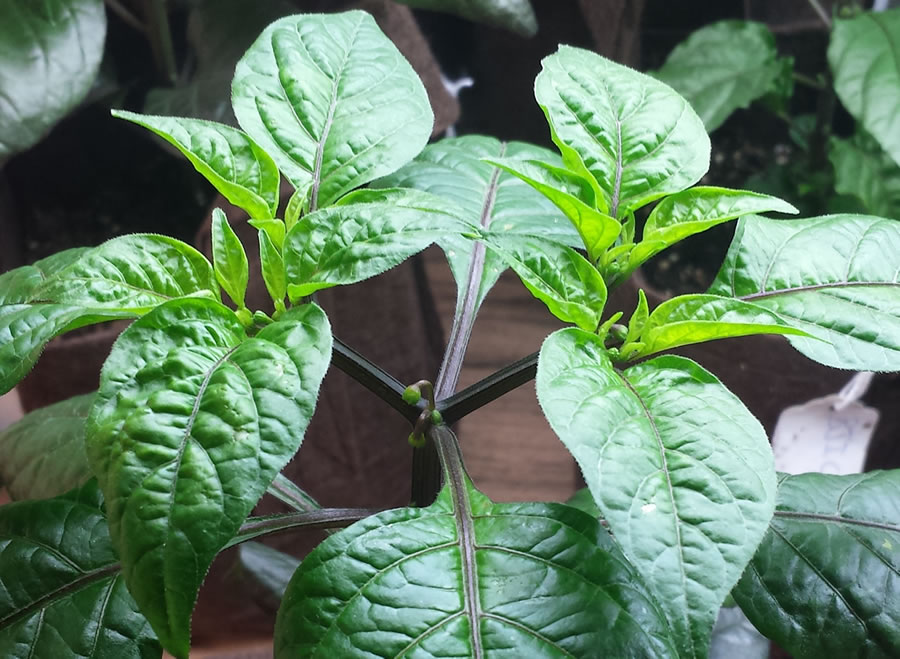
Bhut Jolokia White - topped it early on as it was already wanting to branch like crazy
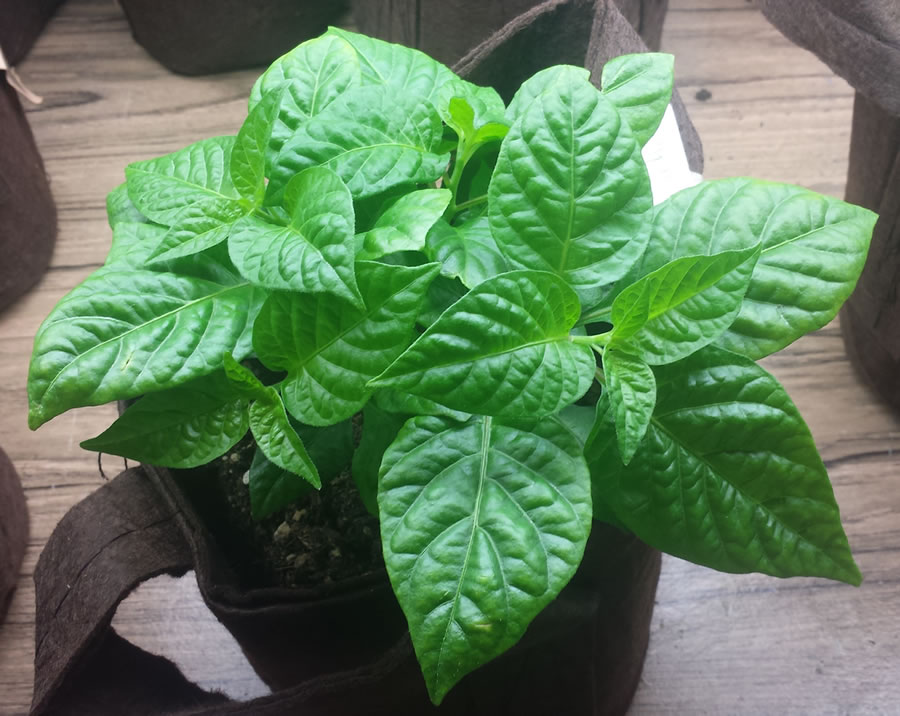
_20181119_BJWhiteTopped.jpg

 
Butch T
_20181119_TScorpBT2.jpg

 
Kathumby starting to bud up
_20181119_Kathumby.jpg


And this guy is a 7 Pot White that sprouted late right up against another plant, so I yanked it out.  It had what seemed like only about 2mm of root still attached, but I stuck it in Kratky and it not only survived but seems fairly happy.
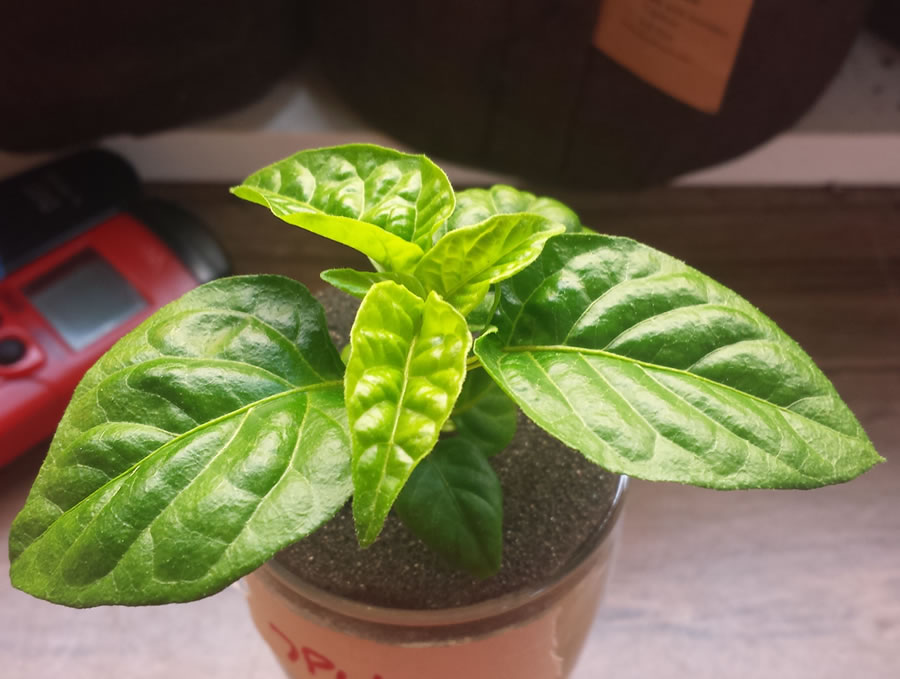
_20181119_7PW_KratkyTop.jpg

 
CD
 
Dogmessiah said:
When they become of sufficient size I will select only one rocoto, and grow a single plant. I have yellow rocoto seeds in addition to the red rocoto starts. I am hoping to graft the red onto yellow or vice versa and keep only one plant to grow both varieities and see which I like better. I have never grown/eaten either before.
This is a way cool idea.  
I'd follow that wherever it goes!
 
I can vouch for the Reds.
Some of the best culinary peppers around.
 
Shane (stc3248) would call this a 'Page Topper' 
post. But I digress.


PaulG said:
Superb, 'Dog! That array of bronchi his impressive.
 
How's the leaf curl on the BOC? Sometimes, plants
just seem to sort of catch a cold or something, and
then kind of grow out of it   :think:    :rolleyes:
 

Thanks, in retrospect doing them at this stage (versus full-season plants) and leaving that amount of growth on them I would have removed more growth or put them into clear totes to increase the humidity for the first few days.  Most are fine, but a few had some leaf droop toward the growth tips that would have dropped if I hadn't removed it first.
 
Both BOC's were funky from the start. They get better, but then they'll show a little unhappiness and I make little environmental adjustments - it comes and goes.  Seems they're my canaries for this grow, but I think they'll be OK.  I haven't grown a BOC before so I'm really hoping they do well.
 
 
I think you'll be happy with both Rocotos. I'm a big fan.  Those seeds can be a pain during processing though.
 
The community garden is a great resource.  I usually keep 2 10x40 plots and use hoop houses in the spring and fall to extend my western Washington season.  Gives me a lot of extra growing room and it's not too far away
 
Yep, I send my grow-down SASBE out early, but somehow it didn't manage to find its was to Guru.  He was really cool about it and is sending me seeds anyway.  Lots of really good people on the THP - and glad to have you here now too.  I don't expect to be competitive at the top of the heap, but I think it will be fun to participate.
 
I'll look forward to seeing how the grafting goes for you and hopefully the results are both cool and meet your purposes.
 
CD
 
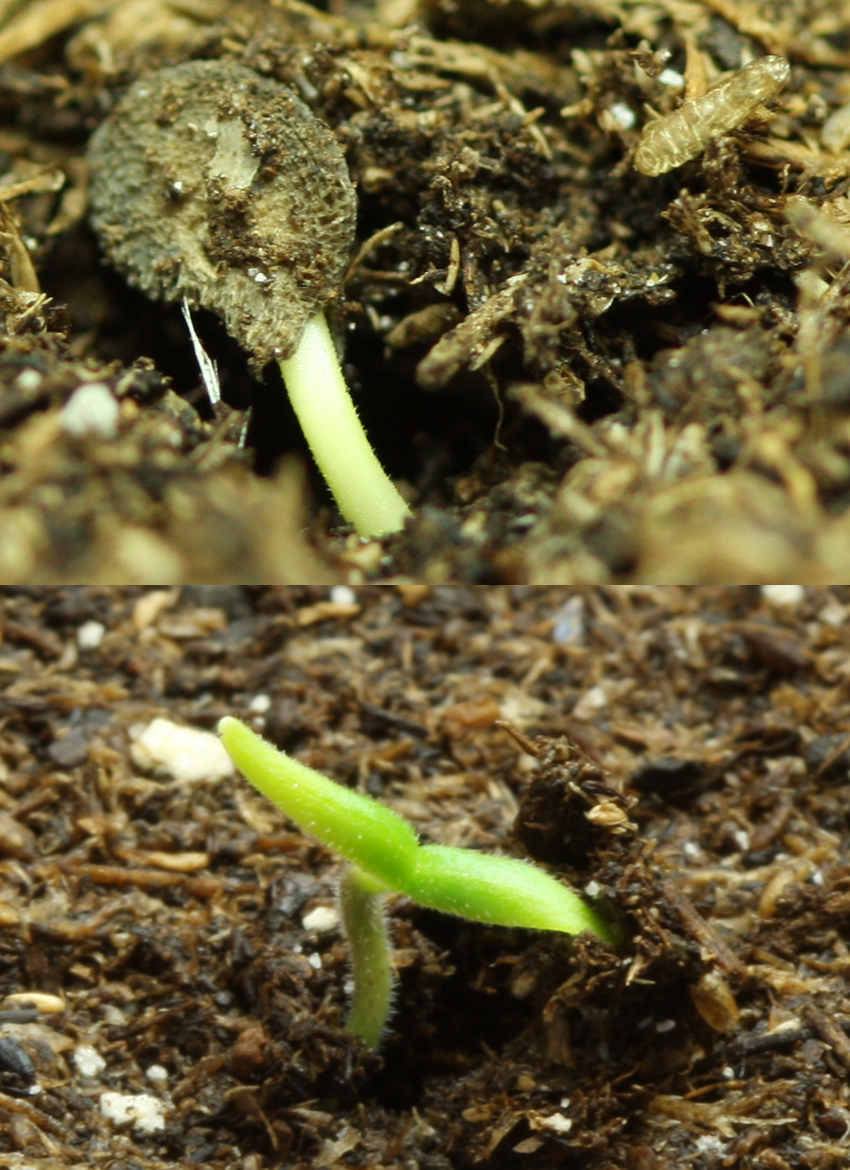
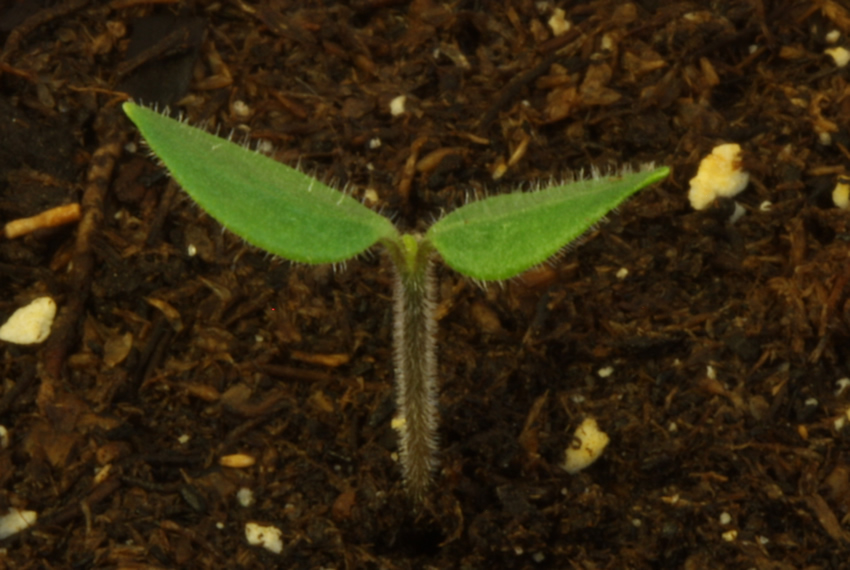
So, I had mixed feelings seeing (1st pic) Saturday evening. I'd lost an Eximium sprout to helmet head recently and had my first (and as yet only) Tovarii pop with HH.  Really didn't want to lose it.  It looked bad because not only was the testa completely covering the coty's, but the HH was above the rest of the sprout and above the soil so I thought there was little chance it would shed on its own.  To make matters worse, when I tapped it the whole sprout moved, which often means the root is underdeveloped and may have issues.  Instead of messing with it, I sprinkled starter mix over the entire cup surface including the emerging seedling and dampened it, then put a baggie over the solo cup and put it back under the lights. My thinking was that the sprout was coming up at an angle and the damp soil might weight the larger seed coat, then if the hypocotyl threw a hook over the weighted seed coat it might manage to drag the testa off on its own - especially if the extra humidity loosened it. 
 
FF 18 hours and when I looked this morning the sprout was up and the seed coat was only barely stuck to the farthest tip of one cotyledon (pic 2).  Looks like success!  It's interesting that when I investigated after taking the picture the clump of soil (highly peat based) that's holding onto the seed coat was stuck very firmly to it (it wouldn't pull off or break apart easily; I had to "crush" it off with forceps), leading me to believe there was even more resistance than I had expected pulling the seed coat away from the cotyledons as the sprout re-emerged.  I've been reluctant to re-cover emerging helmet heads in the past for concern they'd damp off, but I think I caught this one at just the right time and, if I'm lucky enough that another emerges, the extra depth of more coverage will likely help it shed its testa too.
 
Photobombed by the pupal shuck of a fungus gnat.  Bastards!
20181222%20TovariiDouble.jpg
 
heefy said:
Very interesting glow. All your plants look super healthy and green. I like your nature of constant experimentation. I will be following. Keep it up.


Sent from my iPad using Tapatalk
 

Thanks Heefy.  I'll definitely be checking in on your grow as well.  You have a lot of interesting varieties underway.  Should be really cool.
 
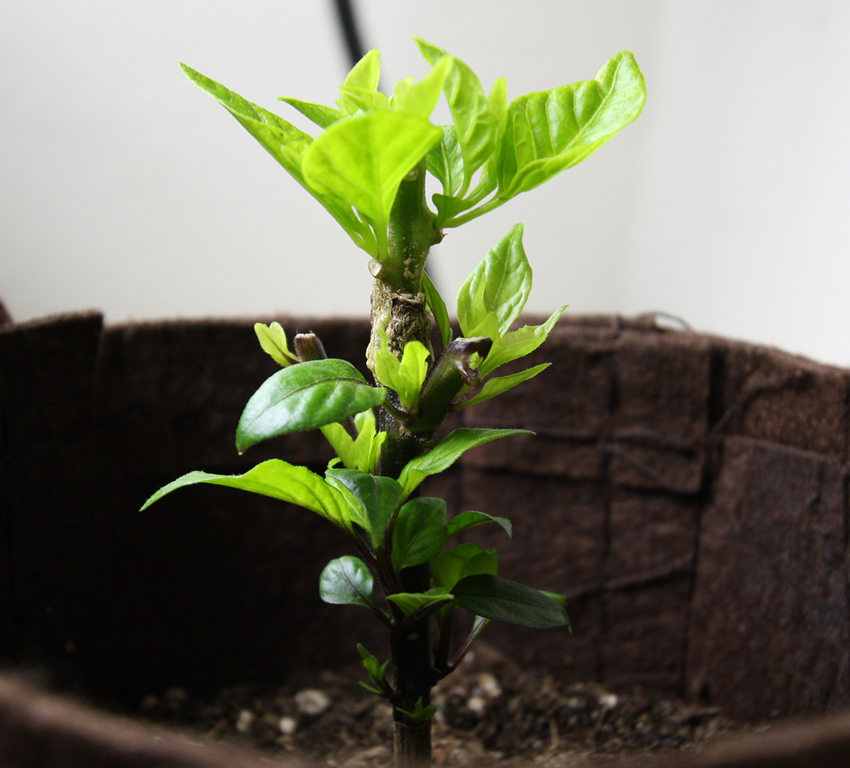
Well, the Tov sprout's looking sturdy, straight and green and true leaves are coming in, so I think it's safe to say it's made it through germ OK.  I'm really curious to see how this guy grows for me. 
 
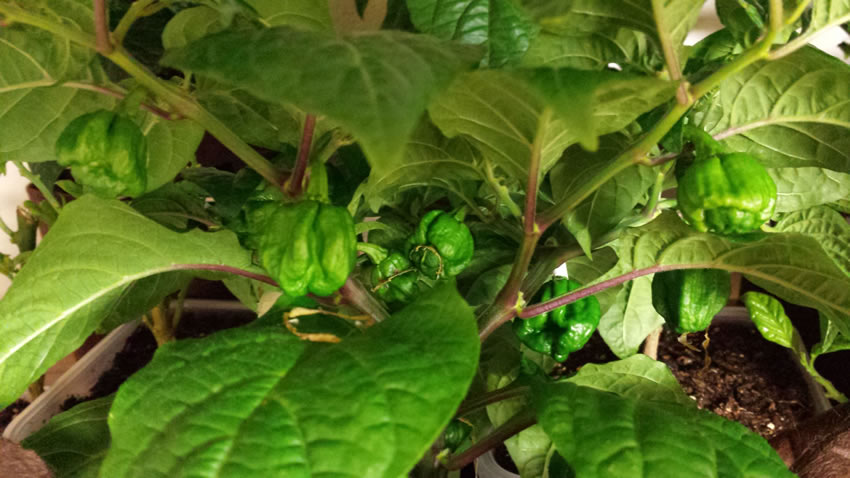
The B Goat has completely stopped budding and is putting its all into growing out the pods, as has the Kathumby.  I tried to get a good shot of the Goat, but didn't have much time and couldn't get a proper angle - the pods just seemed to hide in with the green foliage. I'll try again later. There's a few other production shots I'd like to capture as well.
 
20181226%20Tovarii850.jpg
 
OK PaulG, this one’s for you. 
 
After watching the vid you posted on germinating old seeds – and your comment that someone might be able to make this work DIY  – here’s my initial go at it.  It’s kind of fun to have an excuse to break out the old home brewing / yeast management gear.  It’s been a good year or so since I’ve worked with some of it.
 
Quick summary if you haven't seen the vid - and I'm paraphrasing.  Guy in video discusses his proprietary "kit" for germinating really old and/or valuable seeds. Essentially, says the issue is the enzymes may be weak and unable to adequately break down the complex sugar stores into simple sugars for growth and that the key is getting them infused with simple sugars and oxygen. Also key is to kill off any fungi or other pathogens on the seed coat.
 
The kit/process has these steps:
  1. Treat the seeds in a 0.15% H2O2 bath for 30 – 60 minutes.
  2. Float the seeds in a sterile proprietary oxygenated sugar-water solution until they sink.
  3. Plant the seeds into a sterile coco coir medium dampened with a sterile proprietary oxygenated sugar-water mixture contained in a sealed vial.
  4. Wait and be amazed.
 
So, in the interest of seeing whether this might help with situations of difficult, lengthy, or uncertain germinations, I took a (very) simple run at this. If there's some indication of success here, I'll probably try this again putting a little more thought and effort into it.
 
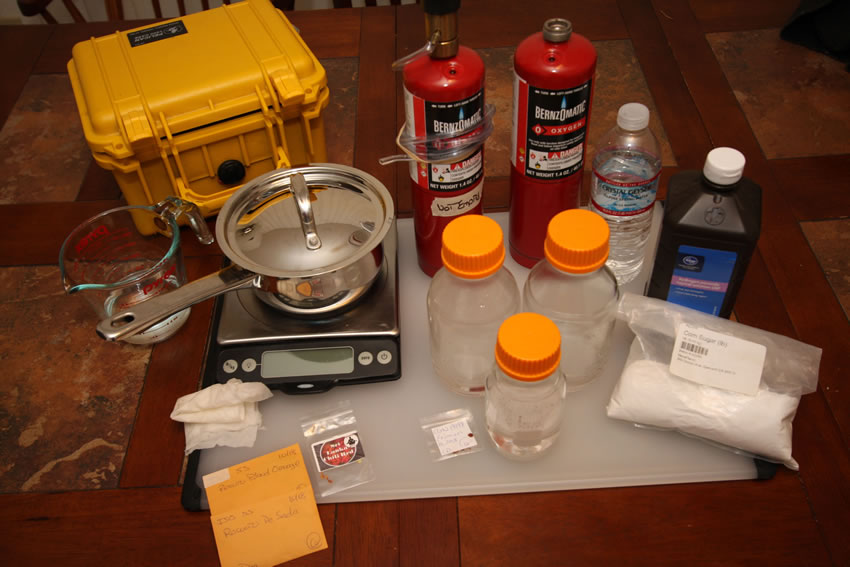
Getting Started - Obligatory "all-the-gear" shot.  I chose a wild seed (though not a particularly tough one) because they're usually tougher to germinate.  There's some other varieties I may try next if the seeds pop faster and stronger, some rocotos and perhaps this other variety I just happened to get my hands on recently...
20181227%20GERM01Gear850.jpg


First step was to soak 4 CGN 19198 seeds in a 0.15% water/H2O2 solution for 30 minutes.  I’ve previously used a 1:30 ratio versus this 1:20 ratio over a longer soak, but want to limit the duration of the soak so the seeds are less hydrated when they reach the sugar-water soak step.
20181227%20GERM02H2O2%20Soak850.jpg

 
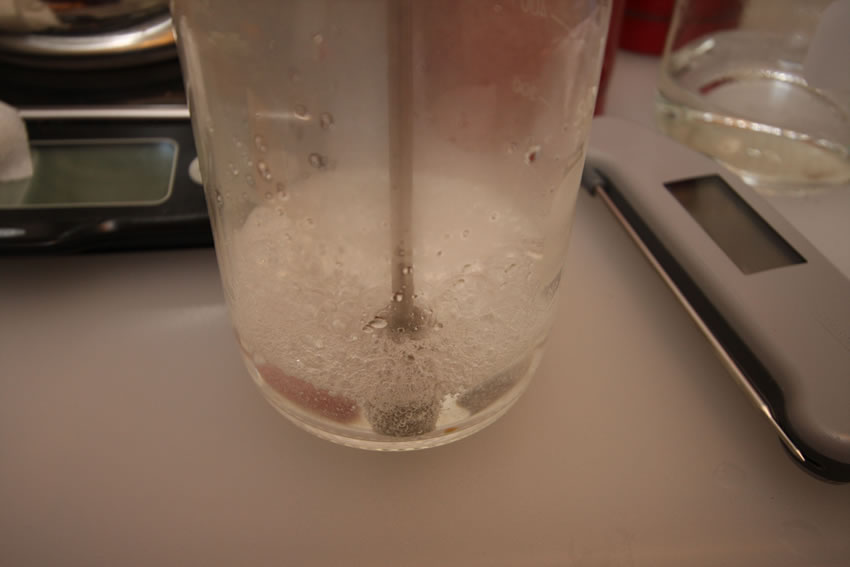
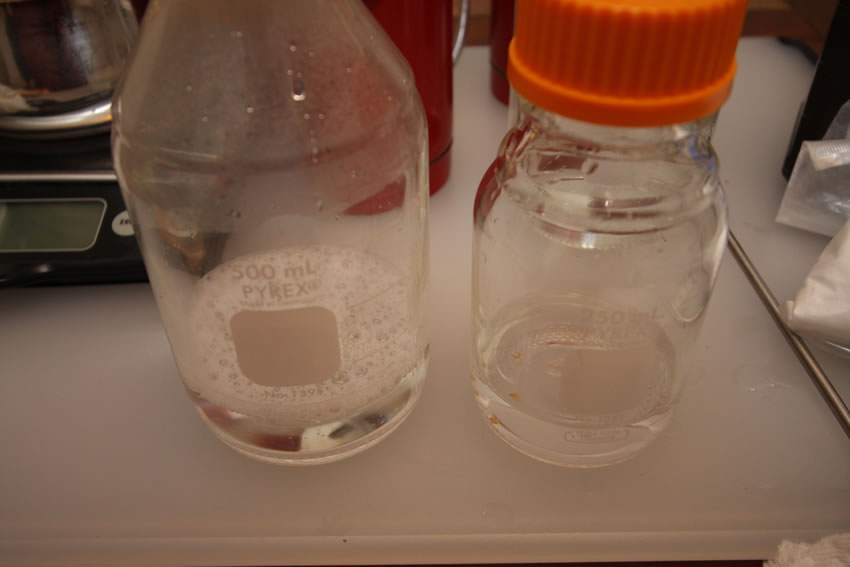
Next I prepared the flasks. The first flask contains a sterilized sugar water solution (Crystal Geyser bottled water and 5% dextrose by weight boiled for 15 minutes then cooled) oxygenated to an targeted 12ppm - for high-OG and lager fermentations this is normally 60 seconds of pure O2 flow into a 5 gallon carboy using a sterilized stainless steel diffuser wand, but I swagged this at about 25 seconds given the small volume of water.  The second flask was prepared as the control and contained only plain Crystal Geyser bottled water.
20181227%20GERM03O2Water850.jpg

 
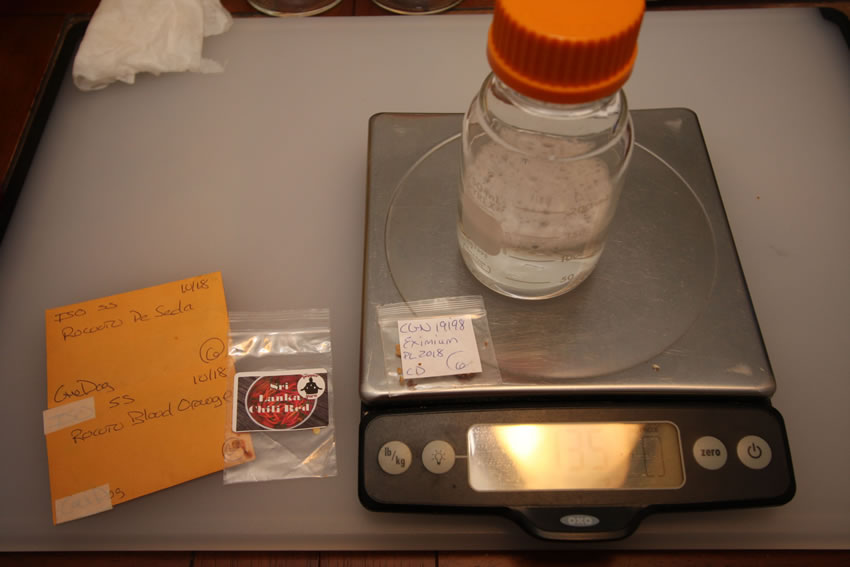
Next step, I transferred each set of 2 seeds into its container. I'll keep them like this for the next 4-6 hours
20181227%20GERM05Final850.jpg


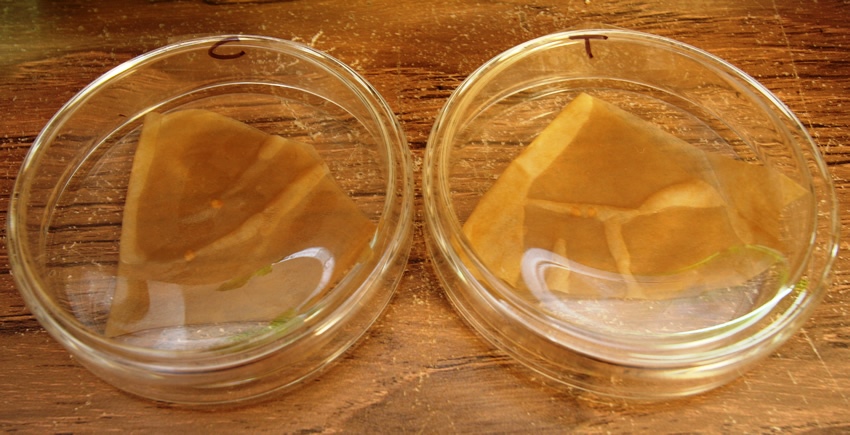
When they're done soaking I'll transfer them to plates/Petri dishes lined with coffee filters, dampening the filters with either the sugar-water or control water.
 
I'll post up a pic after they get transferred, then it's just a waiting game.
CD
 
CaneDog said:
OK PaulG, this one’s for you. 
 
After watching the vid you posted on germinating old seeds – and your comment that someone might be able to make this work DIY  – here’s my initial go at it.  It’s kind of fun to have an excuse to break out the old home brewing / yeast management gear.  It’s been a good year or so since I’ve worked with some of it.
 
Quick summary if you haven't seen the vid - and I'm paraphrasing.  Guy in video discusses his proprietary "kit" for germinating really old and/or valuable seeds. Essentially, says the issue is the enzymes may be weak and unable to adequately break down the complex sugar stores into simple sugars for growth and that the key is getting them infused with simple sugars and oxygen. Also key is to kill off any fungi or other pathogens on the seed coat.
 
The kit/process has these steps:
  1. Treat the seeds in a 0.15% H2O2 bath for 30 – 60 minutes.
  2. Float the seeds in a sterile proprietary oxygenated sugar-water solution until they sink.
  3. Plant the seeds into a sterile coco coir medium dampened with a sterile proprietary oxygenated sugar-water mixture contained in a sealed vial.
  4. Wait and be amazed.
 
So, in the interest of seeing whether this might help with situations of difficult, lengthy, or uncertain germinations, I took a (very) simple run at this. If there's some indication of success here, I'll probably try this again putting a little more thought and effort into it.
 
Getting Started - Obligatory "all-the-gear" shot.  I chose a wild seed (though not a particularly tough one) because they're usually tougher to germinate.  There's some other varieties I may try next if the seeds pop faster and stronger, some rocotos and perhaps this other variety I just happened to get my hands on recently...
20181227%20GERM01Gear850.jpg


First step was to soak 4 CGN 19198 seeds in a 0.15% water/H2O2 solution for 30 minutes.  I’ve previously used a 1:30 ratio versus this 1:20 ratio over a longer soak, but want to limit the duration of the soak so the seeds are less hydrated when they reach the sugar-water soak step.
20181227%20GERM02H2O2%20Soak850.jpg

 
Next I prepared the flasks. The first flask contains a sterilized sugar water solution (Crystal Geyser bottled water and 5% dextrose by weight boiled for 15 minutes then cooled) oxygenated to an targeted 12ppm - for high-OG and lager fermentations this is normally 60 seconds of pure O2 flow into a 5 gallon carboy using a sterilized stainless steel diffuser wand, but I swagged this at about 25 seconds given the small volume of water.  The second flask was prepared as the control and contained only plain Crystal Geyser bottled water.
20181227%20GERM03O2Water850.jpg

 
Next step, I transferred each set of 2 seeds into its container. I'll keep them like this for the next 4-6 hours
20181227%20GERM05Final850.jpg


When they're done soaking I'll transfer them to plates/Petri dishes lined with coffee filters, dampening the filters with either the sugar-water or control water.
 
I'll post up a pic after they get transferred, then it's just a waiting game.
CD
 
This just blew my mind ...not that its very hard to do ..but still..very cool CD
 
 
Back
Top