This is going to be (hopefully) a sticky on an easy bubbleponic cutting cloner.
Ok...here we go!
First is the basic setup. A simple bucket from Lowes. Make sure it is NOT white, as light can penetrate and cause algae build up.
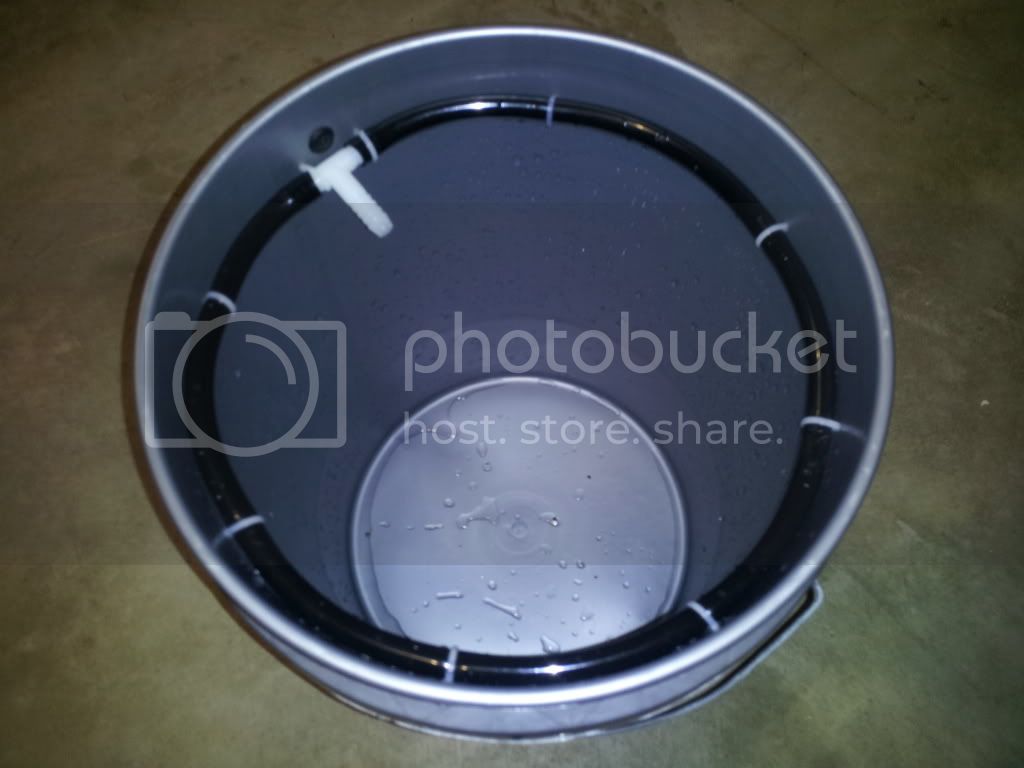
1.) Start off by measuring the ID of the bucket by connecting one end of the hose to the "T" fitting and making a complete circle on the inside of the bucket. Cut according to circum. and attach other piece to the fitting. You want it to be a tight fit, this way you won't have any areas that aren't against the inside wall. I drilled 9 SMALL holes around the outside for the zip ties to keep the tubing in place. Also drilled a small hole for a grommet to run the air line through. The picture is very self explanatory.
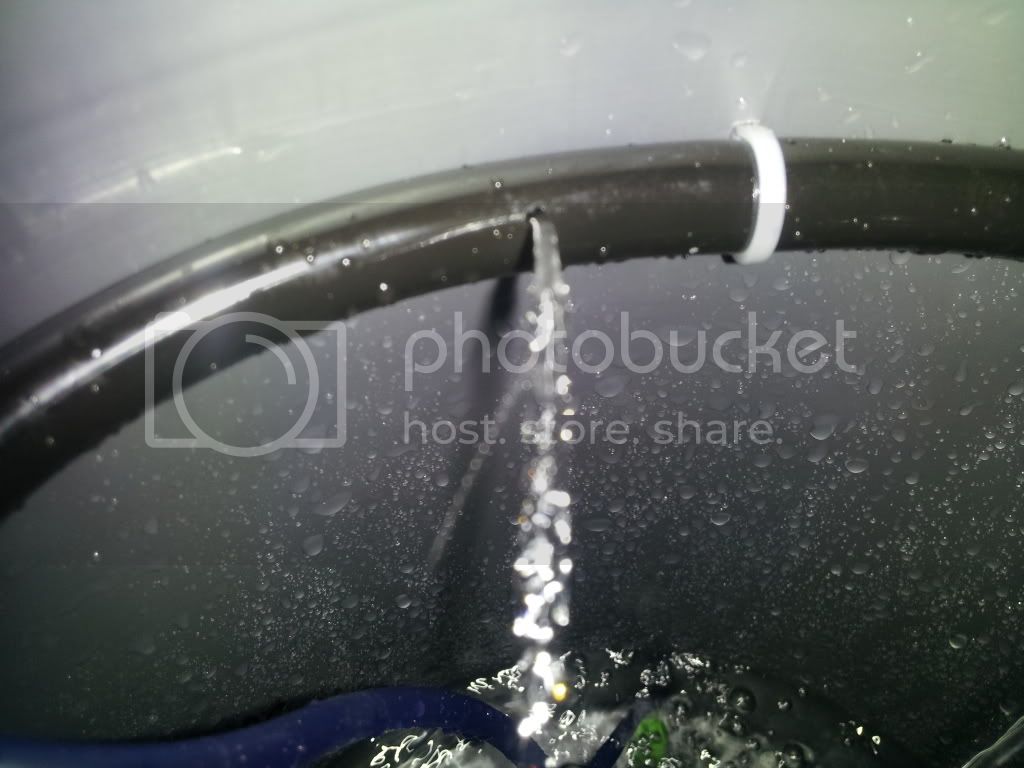
After you get the tubing the right ID size, use a 5/64 size drill bit and drill 11-12 holes spaced as evenly as you can. Anymore, and you will not get sufficient flow if you use a small pump. The one I have for this set up is a ECO AIR 1 PLUS.
Here is a picture from the outside of where I drilled holes for the zip ties.
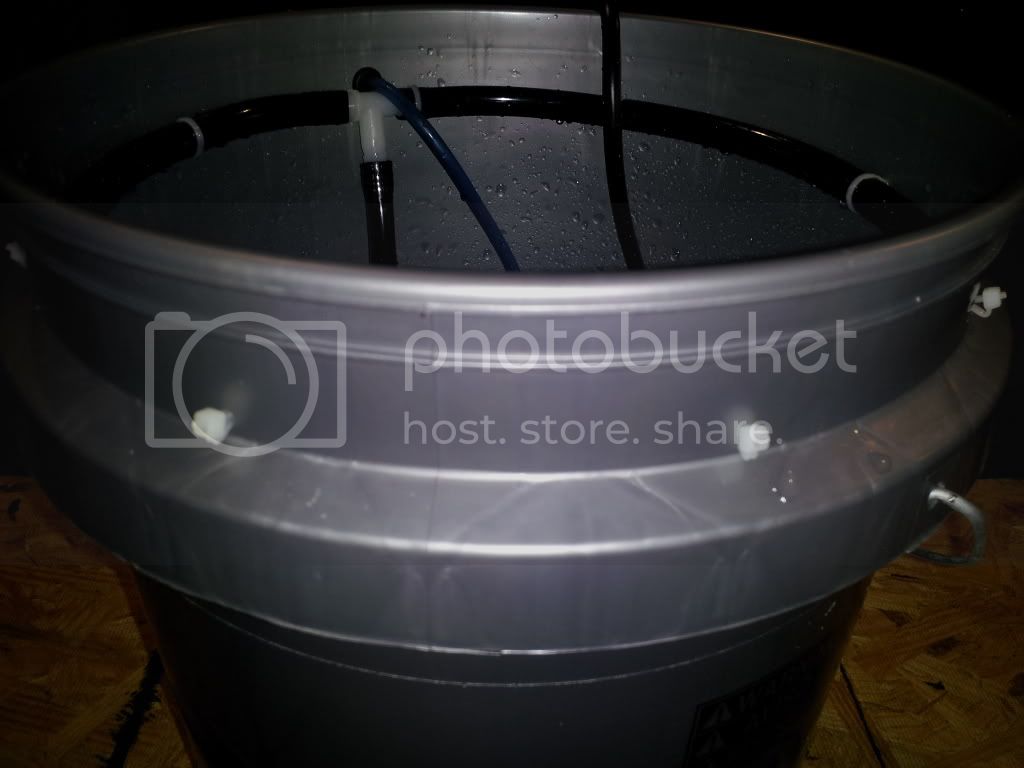
After you get the holes drilled, attach the tubing with the zip ties.
Here is a picture of the "T" and the zip ties, with the tubing attached. I have the airline running through the grommet and a bubble curtain with suction cups at the bottom in the water.
Measure distance from WATER PUMP inlet, to hose barb left on the "T" and connect accordingly. Some trial and error is needed. I always cut my hoses too long and trim to correct length.
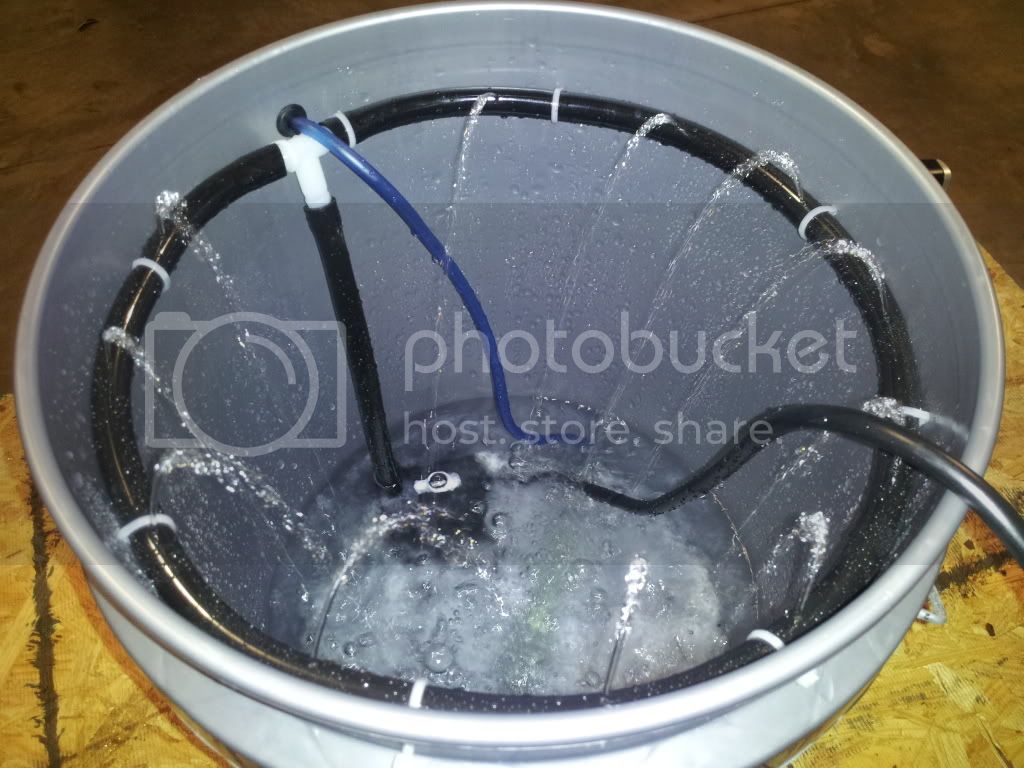
This picture is a close up of a tubing hole w/water streaming from the pump.
Here is the setup with the bubble curtain and pump inside.
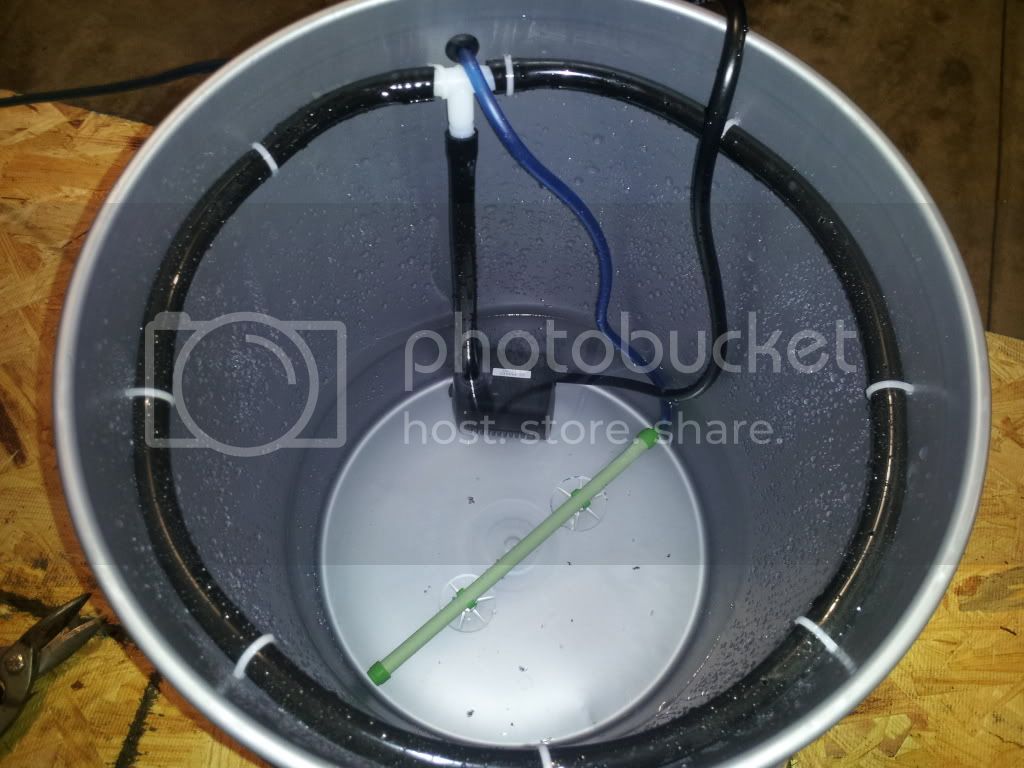
The final picture of the cutting cloner set up with water pump running. You will want the Some pumps have adjustable pressure settings (like mine) and allow you to adjust how strong of flow you have. You want the water to be just above the bucket rim to ensure it hits all the net pots.
Ok...here we go!
First is the basic setup. A simple bucket from Lowes. Make sure it is NOT white, as light can penetrate and cause algae build up.
1.) Start off by measuring the ID of the bucket by connecting one end of the hose to the "T" fitting and making a complete circle on the inside of the bucket. Cut according to circum. and attach other piece to the fitting. You want it to be a tight fit, this way you won't have any areas that aren't against the inside wall. I drilled 9 SMALL holes around the outside for the zip ties to keep the tubing in place. Also drilled a small hole for a grommet to run the air line through. The picture is very self explanatory.
After you get the tubing the right ID size, use a 5/64 size drill bit and drill 11-12 holes spaced as evenly as you can. Anymore, and you will not get sufficient flow if you use a small pump. The one I have for this set up is a ECO AIR 1 PLUS.

Here is a picture from the outside of where I drilled holes for the zip ties.

After you get the holes drilled, attach the tubing with the zip ties.
Here is a picture of the "T" and the zip ties, with the tubing attached. I have the airline running through the grommet and a bubble curtain with suction cups at the bottom in the water.
Measure distance from WATER PUMP inlet, to hose barb left on the "T" and connect accordingly. Some trial and error is needed. I always cut my hoses too long and trim to correct length.
This picture is a close up of a tubing hole w/water streaming from the pump.

Here is the setup with the bubble curtain and pump inside.

The final picture of the cutting cloner set up with water pump running. You will want the Some pumps have adjustable pressure settings (like mine) and allow you to adjust how strong of flow you have. You want the water to be just above the bucket rim to ensure it hits all the net pots.


