Well here I go for my first start from seed  and second season. Finished the grow station this morning. Thanks
  to all here at THP for the tips and info here to come up with the design for a simple small germination and seedling starter. Here are a few pics of the station.
It's framed from Sch 40 PVC (Lowes $20.00) and wrapped with space blankets attached with velco (Walmart $7.00). Platform is 3/8 plywood framed with ripped 2x4 (Lowes $18.00) mounted on top of an old kitchen chopping block on wheels. Remove 8 screws and it breaks down flat on the plywood tray strapped down for storage in the rafters of the garage when finished.

Blanket folds down over the front to increase the light and heat if needed

Lights are 2x 4ft. T8 2 Tube 6500 (Lowes $38.00) I'm sure I could have shopped around more and gotten the lighting a little cheaper, but oh well. There is a ceiling fan just above and in front of the station and puts a gentle breeze on it, would that be enough air??

Hopefully this will do the job for me, any comments or tips would be greatly appreciated. I'm planning on starting only about 30 plants, grow list coming up shortly.
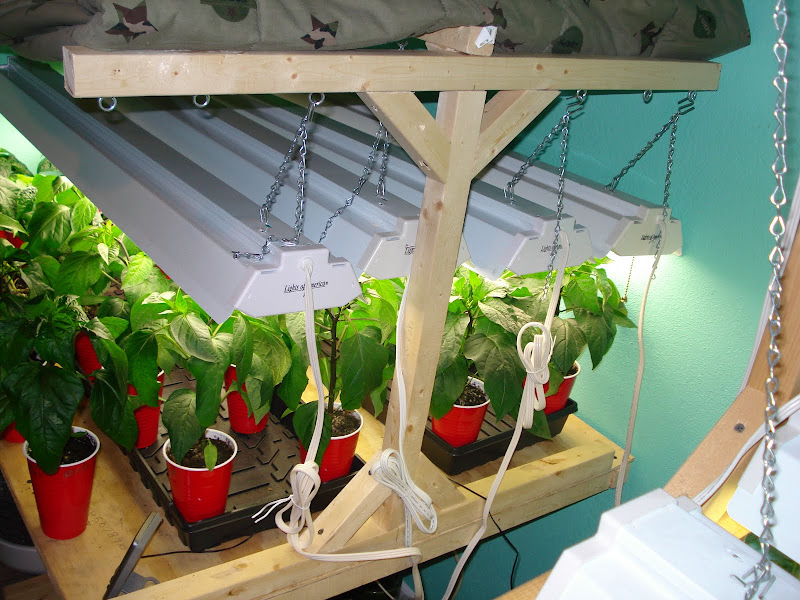
and second season. Finished the grow station this morning. Thanks to all here at THP for the tips and info here to come up with the design for a simple small germination and seedling starter. Here are a few pics of the station.It's framed from Sch 40 PVC (Lowes $20.00) and wrapped with space blankets attached with velco (Walmart $7.00). Platform is 3/8 plywood framed with ripped 2x4 (Lowes $18.00) mounted on top of an old kitchen chopping block on wheels. Remove 8 screws and it breaks down flat on the plywood tray strapped down for storage in the rafters of the garage when finished.
Blanket folds down over the front to increase the light and heat if needed
Lights are 2x 4ft. T8 2 Tube 6500 (Lowes $38.00) I'm sure I could have shopped around more and gotten the lighting a little cheaper, but oh well. There is a ceiling fan just above and in front of the station and puts a gentle breeze on it, would that be enough air??
Hopefully this will do the job for me, any comments or tips would be greatly appreciated. I'm planning on starting only about 30 plants, grow list coming up shortly.