• Blog your pepper progress. The first image in your first post will be used to represent your Glog.

idosimon's 2012-2013 Hydroponic Indoor Bahamian Goat Pepper SCROG

Time to kick off my very first glog! This is going to be something special and the first time somebody has ever done something like this that is was well documented with plenty of high quality pictures! This glog will be periodical and less comprehensive than my glog over at xPonics, but you can still expect a lot of activity on here!

I'm going to be growing this pepper indoors and hydroponically in my room. The setup I will be using is going to be a DWC bubble bucket with a 250w MH for vegetative and a 250w HPS for flowering.

For those of you who don't know what a SCROG is, it stands for Screen of Green. It is a technique used by cannabis growers with the aim of increasing surface area and leveling the canopy. How one does it is to install a chickenwire screen or make your own screen. You top the plant so that it has many main branches. However, instead of letting it grow bushy, you train the branches up into and around the screen, creating a "screen of green". I'm not going to include pictures of cannabis doing this because it may be NSFW for some people, and I aim to keep this thread SFW. But you can do some googling to get an idea of what I am talking about.

By doing this, one essentially creates an even canopy of (in this case) leaves, since I'm assuming the peppers will grow under the screen. This will allow me to bring the light in closer, giving the plants more energy. Hopefully this will give me a higher yield, but it may just give me larger peppers. I will be using a "U" shape screen for this, to maximize my area in relationship to the usable light I have.

I will keep the plant in a vegetative state until the screen is either 60%-80% full (I haven't decided yet, with cannabis it should be 60% because the plant stretches a lot in flowering but I am unsure how much peppers will stretch in flowering. If anyone has any insight to this, it would be greatly appreciated!)

My parts list is as follows:

1. DWC Bucket (1)
2. Hydroton
3. Rapid Rooters for germination (1)
4. Bahamian Goat pepper seeds (3)
5. Botanicare Pure Blend Pro Grow (1)
6. Botanicare Pure Blend Pro Bloom (1)
7. Superthrive (1)
8. Sunblaze 23" 23 watt T5 6500K (1)
9. 18 watt CFL 6500K with reflective fixture (2)
10. 250 watt MH with reflective fixture and ballast (1)
11. 250 watt HPS with reflective fixture and ballast (1)
12. Ponics Pump (1)(A testing unit graciously provided for me by Zero Mile Farms)
13. Nikon D40x and photoshop (1)
14. iPhone 5 and Snapseed (1)

I think that is all of the components to this grow, but I will update it if I forgot anything.

Now for pictures!!

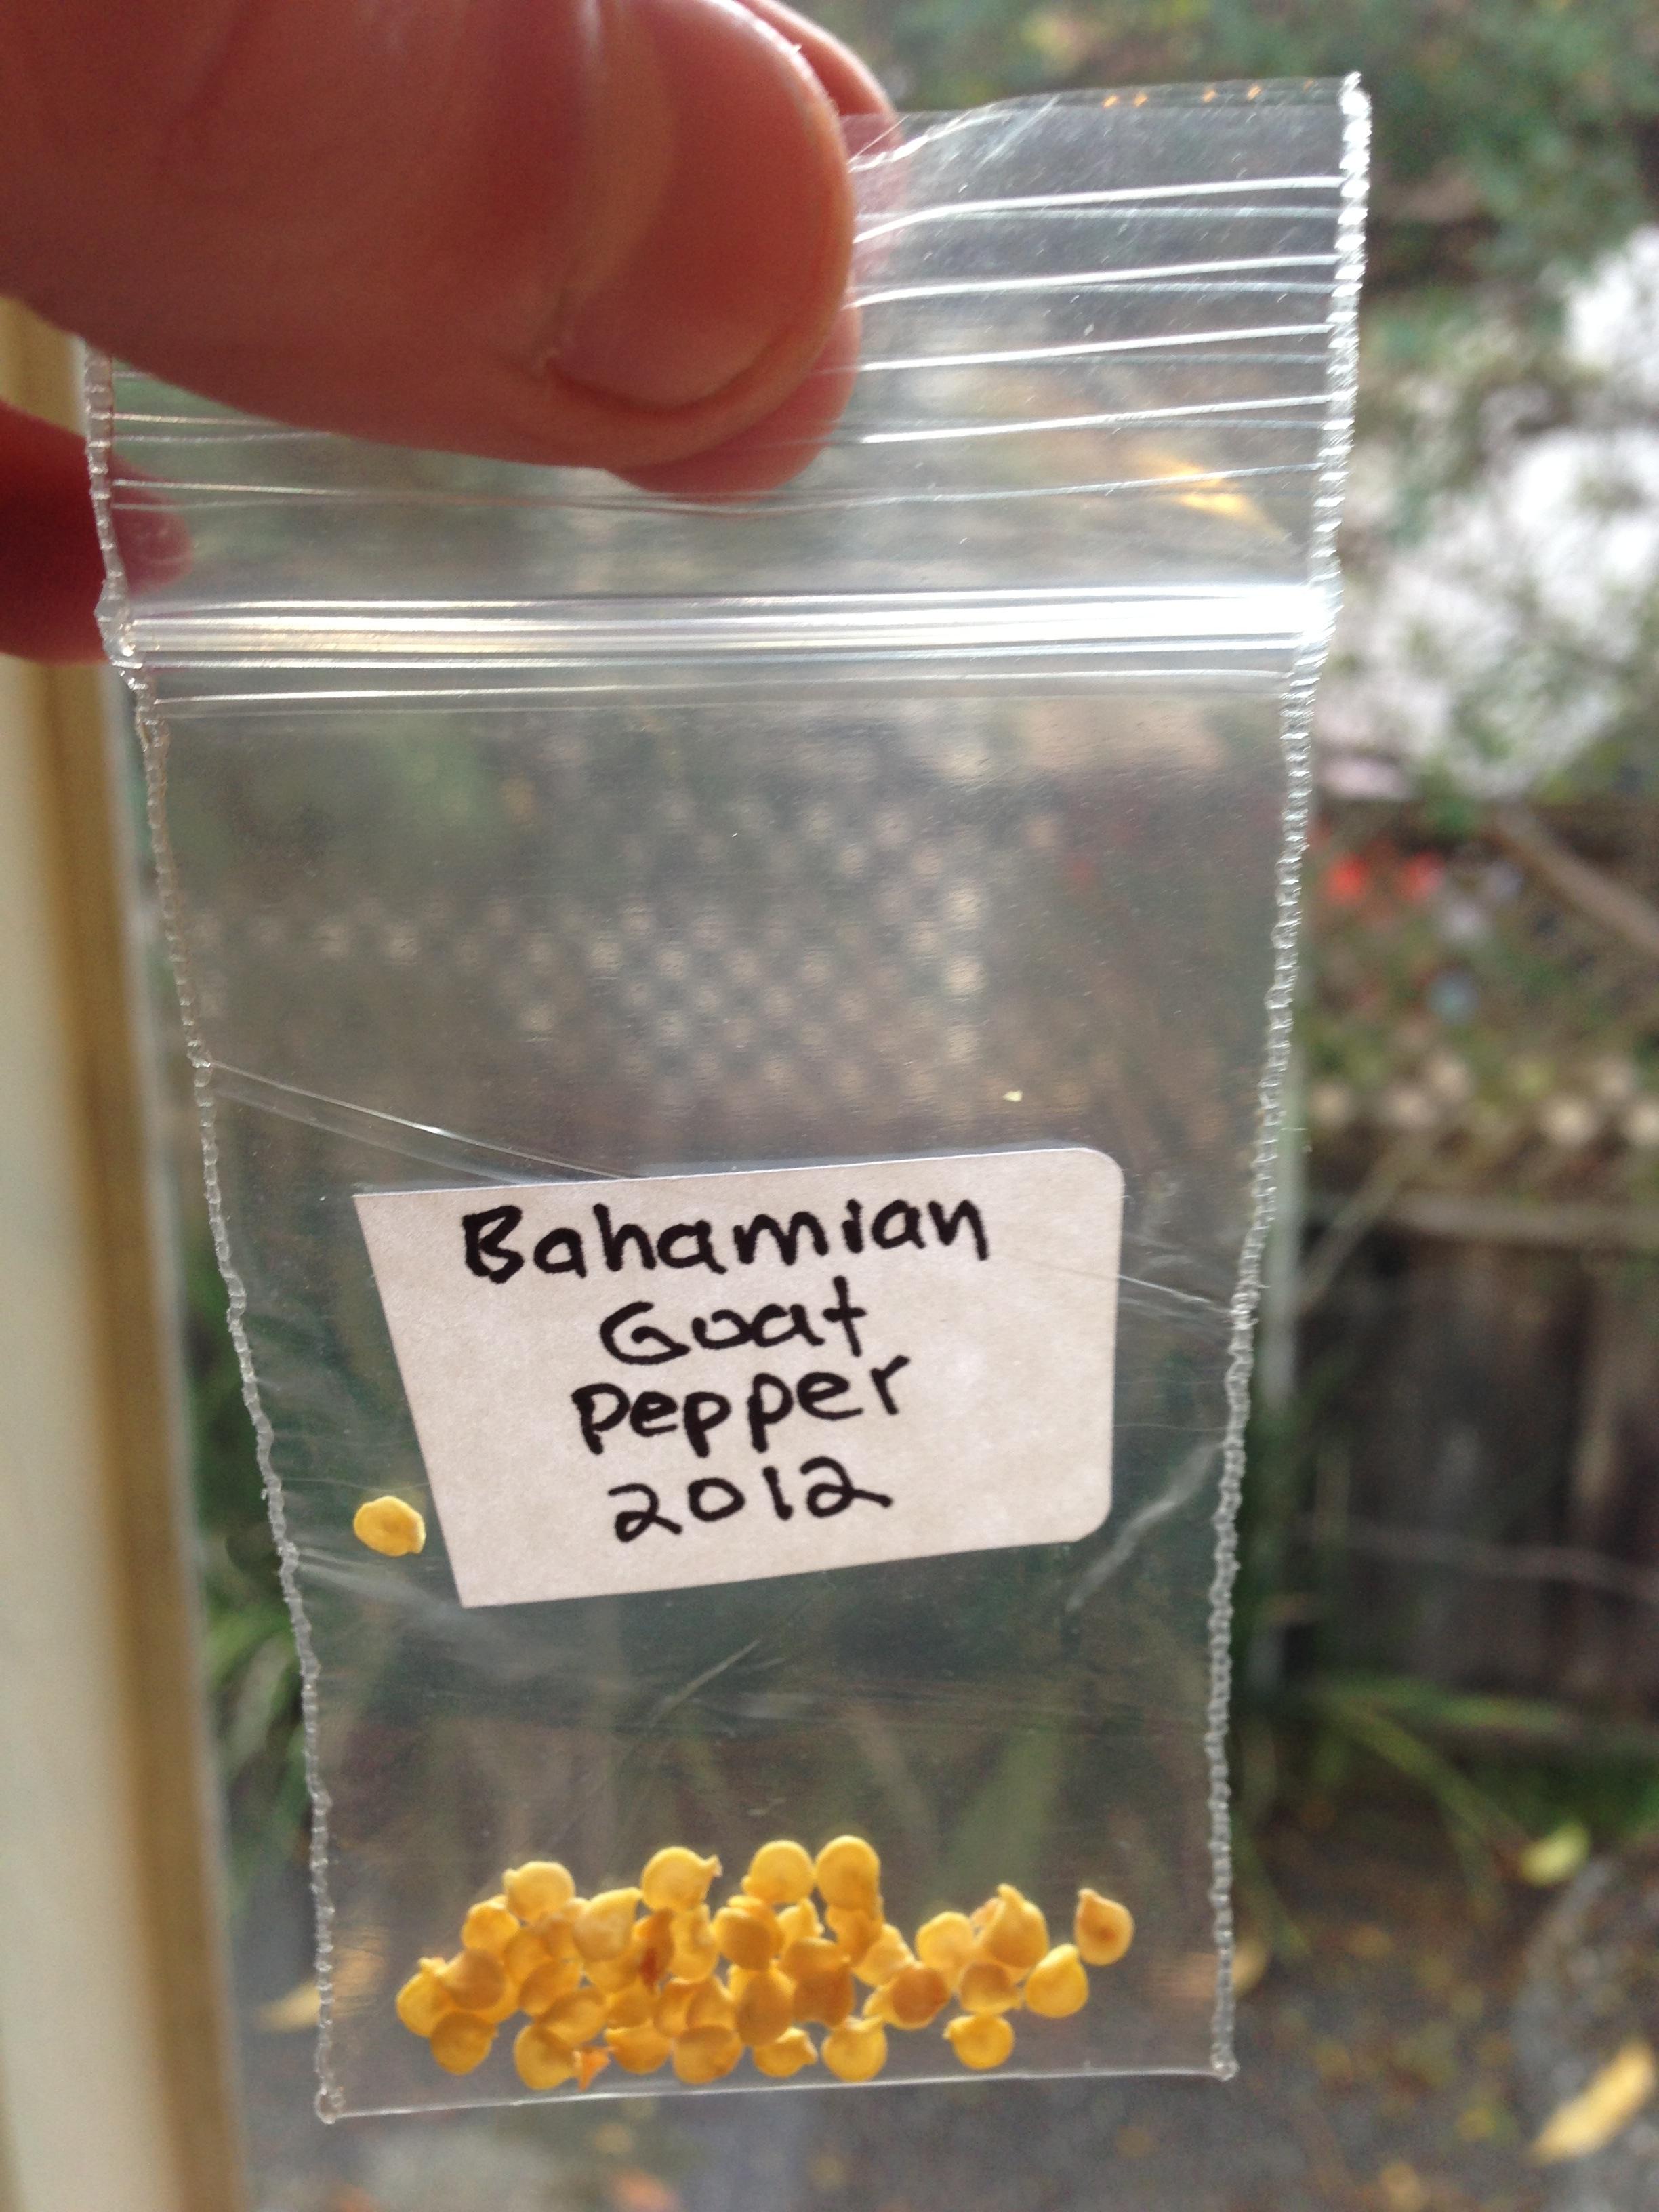
Here are the seeds, provided to me by windchicken:
h7Y3O.jpg


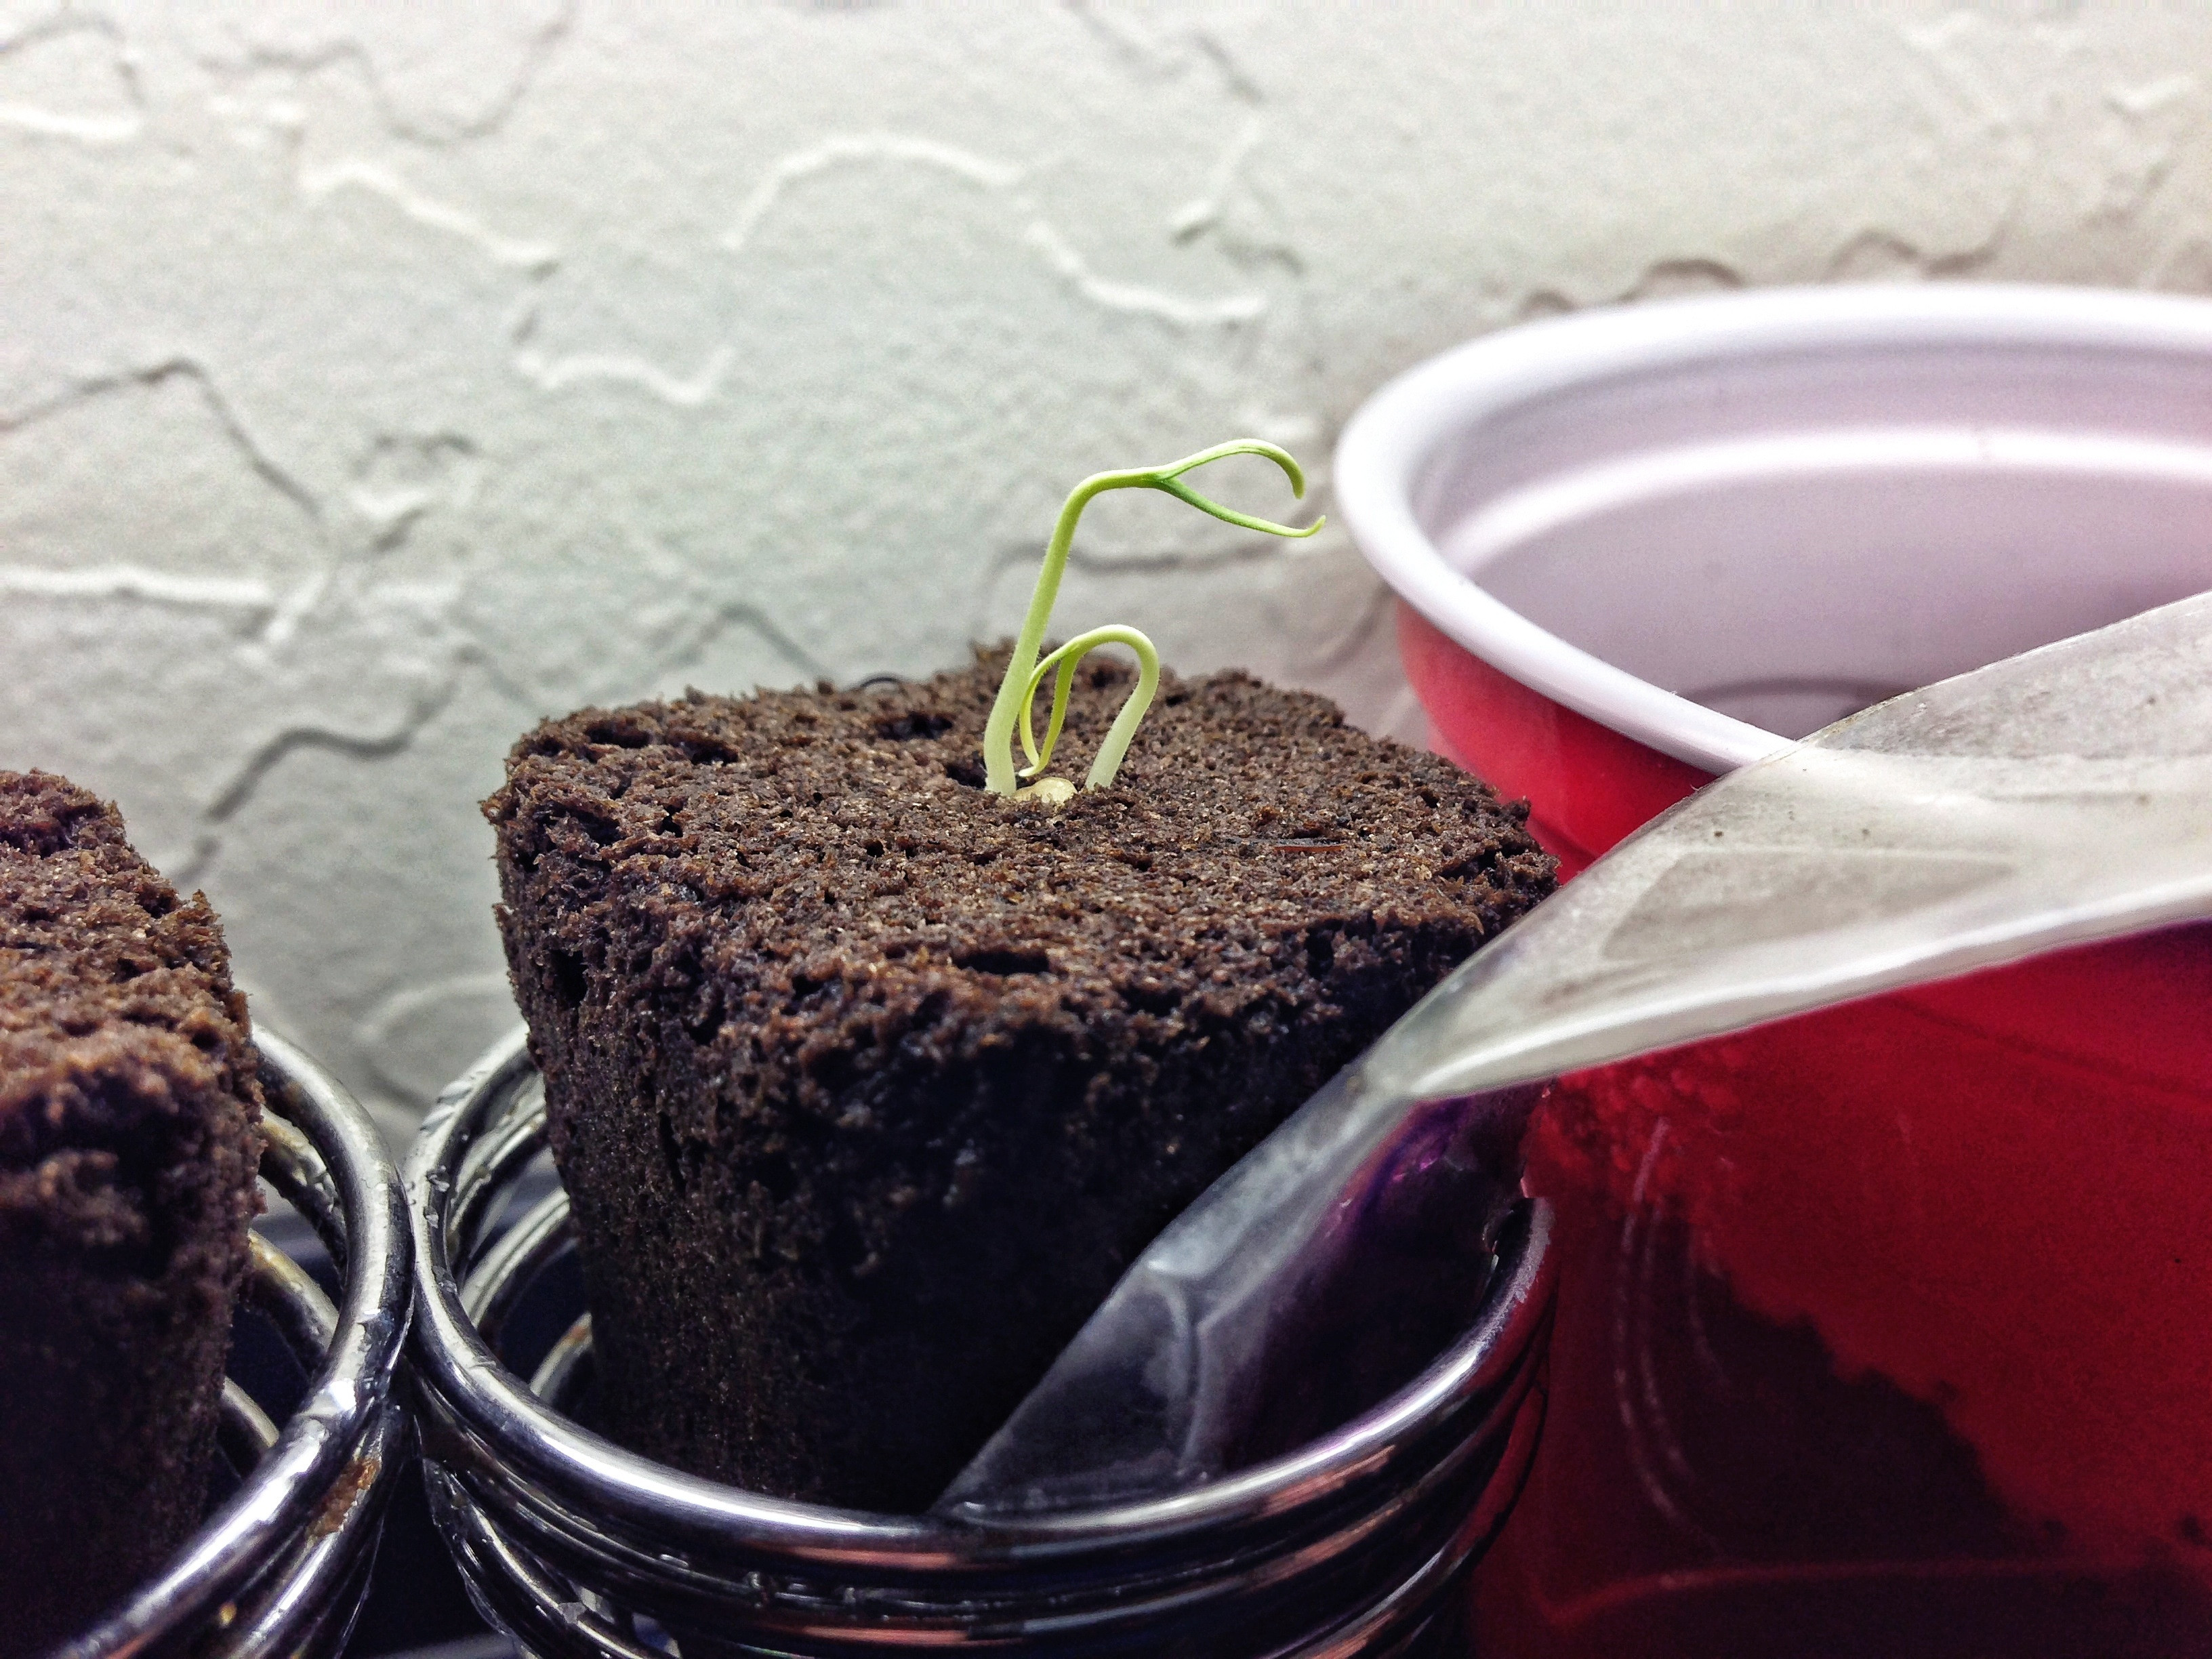
And here are the sprouted seedlings, as of 12/24:

og0MF.jpg
 
UPDATE: TRANSPLANT DAY

Here are more pictures, as of Day 41:

KrycSdw.jpg


5WctrSA.jpg


X6fIjEH.jpg


And here is where I transplant it into my "bubbleponics" style DWC. I filled the reservoir with 9.5L of water, 18ml of grow solution, and 2.5ml of superthrive.

baxmti4.jpg


KHB4fQ3.jpg


I decided to put it directly under the HPS light so it would stretch more and thus fill up my screen faster.
 
Hi,

Very interesting glog you have started and glad you have. We were looking at doing something very similar with one of our tents but don't think it will happen now this season. Will be following you glog and wishing you much luck with it. :P
 
Hi,

Very interesting glog you have started and glad you have. We were looking at doing something very similar with one of our tents but don't think it will happen now this season. Will be following you glog and wishing you much luck with it. :P

Thanks for stopping by! I'm hoping this glog will have a unique result, and if not, at least you guys will know what to expect!

She's a real beauty!

Thank you! But she is quite the slow grower :P
 
UPDATE: I think I have been experiencing some pH problems as of lately, but first, here are some older pictures. Also, this thing has been growing incredibly fast under my 250W HPS!

Feb 6, Day 45:

5orGz0c.jpg


Feb 9:

YjTjnt1.jpg


Feb 18: This is where you can see the leaves are really wrinkly. I changed the reservoir today and added some hydrogen peroxide. My pH was then at 4.5, so I balanced it out to about 6 using baking powder. Hopefully the powder doesn't have any negative effect on the plant, but I will be watching it closely to make sure. Any advice would really be appreciated!

hBulhya.jpg


The roots are also starting to poke out of the bottom of the cup! This is where the real fun begins

b137XNw.jpg
 
Cant help on the wringle factory but hope it works out soon. Seems to have grown a lot in the last few updates so fingers crossed it will pull through for you. Good luck dude
 
Very nice work Ido!

The dimpled leaves appear in your photo appear normal for Goat plants that are receiving a lot of N[sub]2[/sub]. Below is a photo of the plant your seeds came from:

goat.jpg


It's an exceptionally robust variety...almost impossible to kill. At the same time the above photo was taken the Scotch Bonnets and Congo peppers down the hill from this plant were struggling with a nearly fatal epidemic of bacterial leaf spot. Goats never missed a beat!

Awesome, thats great to know! This plant does look like its tough and has some great genetics! The stalk is starting to beef up at a considerable rate. Changing the pH of my reservoir seemed to help a lot.

Here are more pictures of my plant that I took just now. I also installed a scrog net a couple of days ago. It's really amazing how fast this thing is growing

Day 66:
YO6oWrB.jpg


oQWr2E1.jpg


JRtdWgl.jpg


And here is the measurement of height of the plant. It's 5 inches tall, and the net is 12 inches tall. I'm thinking of starting to top it at 7 inches. What do you think?

TDifzF5.jpg
 
That looks cool...The plant is really growing fast now.

I've never trained my pepper plants to a trellis, so I don't really know, but it seems like a cool idea.

I googled "screen of green" and looked at some of the tutorials on the web, so now I get what that's about...I believe you should be able to treat pepper plants the same way...Chinense types, like the Bahamian Goat, will normally fork on their own, and yours should do it soon. I have noticed that when a branch gets broken or cut, and the new growth forms in a little cluster or bushy place at the cut site, that it seems to take a little while to recover...I'm just thinking that maybe it would grow faster if you would let it fork a couple of times on its own, until a couple inches before it reaches the net, then cut those branches. The resulting new growth would be pliant, and easy to train...

Just my thoughts...Maybe a chilehead with Bonchi experience could give his/her thoughts....

Hmm, I'll keep that in mind. If it doesn't fork by itself by 8 inches I'll top it

What are other people's thoughts about this?
 
UPDATE:

I ended up getting algae inside of my reservoir and on my airstone about a week ago. The algae looked like silly putty but had a softer consistency. I scrubbed it out with rubbing alcohol. I checked again today and there was still some algae that regrew on my airstone, but a lot less this time. I ended up putting my airstone in some hydrogen peroxide and eliminating some light leaks so hopefully it won't return again.

The algae caused the tips of my roots to turn brown and kind of shrivel. I think it was the start of root rot, but hopefully that is taken care of now.

I picked up some silica blast on monday and applied it to my reservoir on tuesday, so its been in my reservoir for like 5 days now.

Here are the pictures from today:
p9S2iC8.jpg


pyIjNv5.jpg


And here you can see how much the silica blast really strengthened the stalk. The stalk and leaves are also starting to turn a bit purple, but I'm not sure if its from stress (probably from the fungi/algae) or from genetics.

63oY6FH.jpg


And here you can see how big the plant has gotten. It's at around 7-7.5 inches, and I will be topping it at 8 inches. It did start to fork naturally, but that was at the very bottom so I think I will cut that growth (its really slow) and just go with manually topping it.

HfXU2bo.jpg
 
Look like they're moving along just like a good pepper plant should. Good work.

Thanks!

User cycadjungle asked me to post this because he was having troubles with his internet:

[background=rgb(255, 244, 228)]" I just looked at your glog for the first time so I'm reading all the posts at the same time now. I will try to help a bit on the general idea of what you are doing. You talk about the scrog method that people use on "other plants" Those plants grow and then they flower and produce their product all at the same time. The main reason why people use the scrog method is that the amount of light that gets through the canopy makes all the difference in the world as far as other plants go. The quality of that product is far less where the light can't get past the canopy. Also, there is a lot of apical dominance in those plants. The tops will always be better than the bottoms. You use the scrog so that the entire plant is at the same level and also so that there is no plant material shading the lower part of the plant.[/background]
[background=rgb(255, 244, 228)] Pepper plants are different in several ways. First, hot pepper plants seem to actually like a little shade. They will produce flowers from the ends of the plant whether the ends are close to the top of the plant, or if they are closer to the bottom. The quality of the peppers doesn't vary whether they are at the top or closer to the bottom of the plant. Also if you are going to grow this pepper plant for the rest of the year, at least, you have plenty of time for multiple phases of flowering and podding. You are starting very early in the year. You can have as many as 4 phases of flowers. If you try and fill your frame by the time you get your first phase of pods, what do you do after that? [/background]
[background=rgb(255, 244, 228)] I have dial up and I am having a hard time getting to see all your pictures because by the time it takes to load up half the pictures, I am getting little Xs in the lower pictures, so I have to make comments on this without seeing what you have done here. If you are using 250W MH and/or HPS, then that means they will light up a 3' by 3' area with no problem. I would make your frame at least that size so that you can fill that up and have good light for the entire frame. Having the frame 12 inches high and branching your plant at 7 to 8 inches is a very good idea so that you will have maybe 6 to 8 branches before the plant hit the frame. You will probably get your first flowers and pods at around the time your plant hits the frame and branches out an extra 4 inches in every direction. Your plant will probably grow and extra 4 to 8 inches in every direction and start to flower again. At your second flowering, your plant might have a spread of about 18 to 24 inches. By your 3rd flowering, your plant should use up an entire 3 foot frame. If you want to delay flowering and get more branching, you could cut back the plant on every end to reduce those lengths to 1/2, but then you would probably only get 3 flower phases the entire year. If you let a normal plant grow without cutting anything back, you could get 4 to even 5 phases during a very long season. Anyway, if you don't branch it out after your first cutting back, your plant may use up more than a 3 x 3 space, or if you make the frame too small, your plant will just grow through the top and get tall again and then make your frame useless after the first or second set of flowers."[/background]
[background=rgb(255, 244, 228)]
[/background]

I wanted to reply with this:
I know that the growth is different, but the idea is still the same. By keeping a level height, I am able to move my light closer and thus utilize it more efficiently.

My screen is a bit bigger than 3'x3'. I was planning on not letting it grow past the screen. By pruning it, new flowers should come in where the old ones were, correct?

Anyways, this was also an exercise in how efficiently I could have the plant fill up a large space in my room. I would have less room for it if I had it growing vertically. Lastly, this just seemed like an interesting experiment, so I decided to do it and see if it would help my yield.
 
Glad to see the silica is having a positive effect.

Not only is it having a positive effect, but it is making it harder to prune.

UPDATE:

Day 80: The plant reached a height of 8 inches, so I topped it.
Q3oHtDN.jpg


K54VgcF.jpg


Here it is after pruning. The stem was super thick and hard, and even with Fiskars, I wasn't able to cut through all the way in one cut. I'll come in from a more strategic angle next time.

xtrmsLP.jpg


I decided to try and clone the top that I took off. I was going to give it away, but I think I'll just make it into a mother plant so that I'll be able to give away more cuttings.

tBclI2x.jpg


Day 83:

After 3 days, the axillary buds are finally starting to emerge. I noticed that the other axillary buds that formed before I topped it and had already started growing by themselves now have an increased rate of growth.

mNRtbN4.jpg


MrUuDRy.jpg
 
Sweet...glad I found this. They look to be picking up some steam. My Bahamian Goats didn't hook up for me, so I will be watching yours grow instead! Keep 'em green!

Shane
 
UPDATE: Sorry for not updating in a while, I've been busy with graduation and my senior project. However, I finished my project and I'm graduating in a month, so hopefully I will have more time to update!

Day 98
You can see how bushy the plant has become due to the topping.
kUxZzTU.jpg


pOD6zgp.jpg


Day 100
The plant has finally started growing through the net!

pFKLrZ6.jpg


Day 122
The plant has been growing through the net, and I've been training it up and under the net holes. This is going well, but I wish I would have chosen a faster growing variety, as this one is very slow (its already 4 months old), and the stems are thick which makes it kind of hard to maneuver. Another thing to watch for is when bending the stems, make sure not to touch any of the emerging pepper flowers, as they will easily fall off.
ORD2amR.jpg


You can really see how thick and sturdy the stem has become.

JEb9Bc5.jpg


An shot of the canopy from underneath. If you look at the top right you can get an idea for how I've been training my stems.

i7Wzp6D.jpg


DWwXVI2.jpg


A more top view of the canopy

aXThX31.jpg


A top down view of some of the canopy. You can really see how productive this is going to be, as there are flower sites everywhere! They opened up and started blooming once I upped the blooming part of the nutrients.

2DRHHYR.jpg


It's kind of hard to see from the picture, but I've been experimenting with supercropping. I'm still getting the technique down, but once the plant recovers, it is obvious that supercropping drastically improves the speed at which the supercropped branches grow.

Trimming this is also quite time consuming. It is like a logic exercise, as you have to figure out which leaves to cut off so that the branches can be maneuvered around yet still have the canopy be able to receive plenty of light.
 
Back
Top