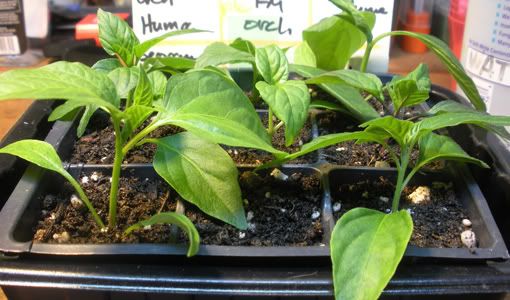
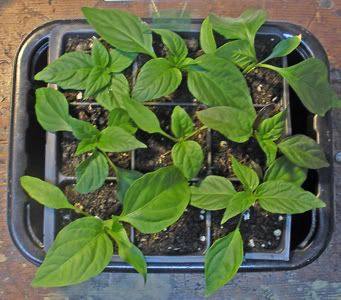
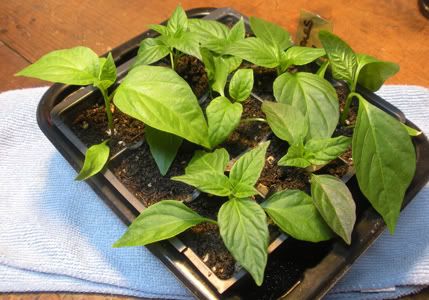
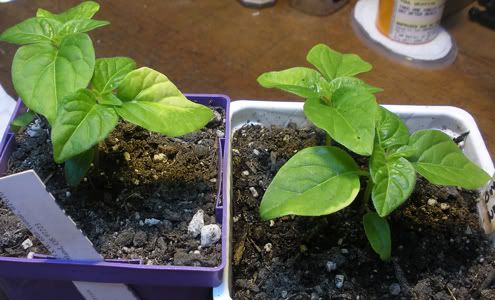
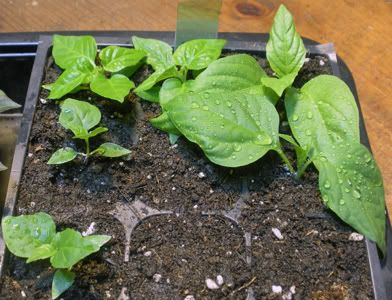
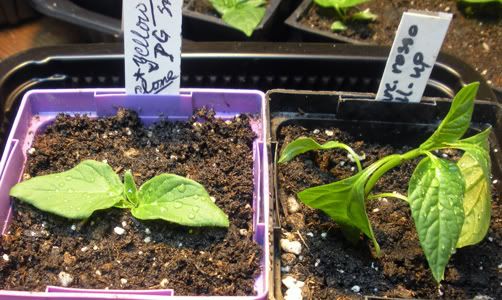
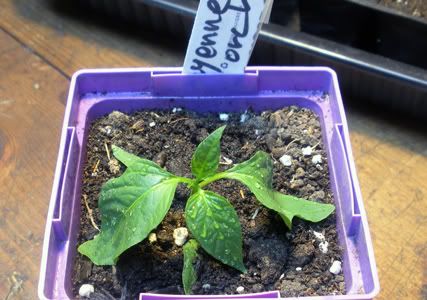
• Blog your pepper progress. The first image in your first post will be used to represent your Glog.

PaulG 2012

I'm chomping at the bit to get started with some new chilli varieties this coming Spring. So far I've just scratched the surface with Poblanos, Jalapenos and Serranos, all of which I really like. I've been egged on by a new Second Generation Mejicano neighbor as we've talked about hot chillis over the back fence! He helped me make some Pico de Gallo with my Serranos and Early Girl tomatoes and has some great recipes from his mother and grandmother. Hopefully I'll be able to share some of them on this forum in the future. I need to grow more Cilantro. Oh yeah!

I've ordered seed from several sources which received at least a few good comments on this forum (6/12 - items crossed out did not germ, or weren't planted this year):

US Hot Stuff:
Bolivian Rainbow
Yellow Peter
Nosegay
Trinidad Scorpion (from Spankycolts)
Devil Tongue

The Hippy Seed Company: Seed Packet Mixes
NuMex Twilight (from Siliman)
Yellow Jellybeans
Tom Thumbs
Wild Texas Tepin

Refining Fire: Seed Packet Mix
Scotch Bonnet
Chocolate Habanero
Jamaican Red Mushroom

New Mexico State University:
Chiltepin
Omnicolor
Red Carribean Habanero
Orange Habanero

Pepper Gal:
Aji Yellow (request from a Peruvian friend of ours!)
Thai Hot

Peppermania:
Inca Lost
Fatali
White Habanero (from Spanky)
Red Savina (cross with Fatali, from Spanky)
Bishop's Crown
Inca Red Drop
Orange Rocoto
Congo Trinidad

I doubt I will be able to try all of these out this year, but I have saved my seeds in small glass jars with tight-fitting lids for storage over the next year. I have been saving seed from other garden produce and have had good luck with germinating them after two or even three years. The jars are stored in boxes in the garage for a cool dark location for them. I have ordered several compact varieties with an eye toward trying to winter over some of my plants this year. Since I didn't even know peppers were perennial, I can say I've already learned something from this forum!


I purchased a small greenhouse from One Stop Gardens (via Harbor Freight) for $300 four years ago. This is one of the greenhouse kits I've noticed in the greenhouse advertsing bar at the bottom of some of the pages on this forum. This picture is from Spring/ Summer 2011. You can see my tomato and pepper starts on the sheves. I winter over some bonsai trees and jade plants as well as geraniums, begonias and Gerbera Daisies. In the winter, I use a small space heater (visible on ground in the picture) to keep the temp at 40F during the few cold weeks we experience here. So far it has worked pretty well. If overwintering pepper plants becomes a reality I'll be making more room in the greenhouse! I've started a thread in the Grow Tech forum to discuss issues which crop up with these units.
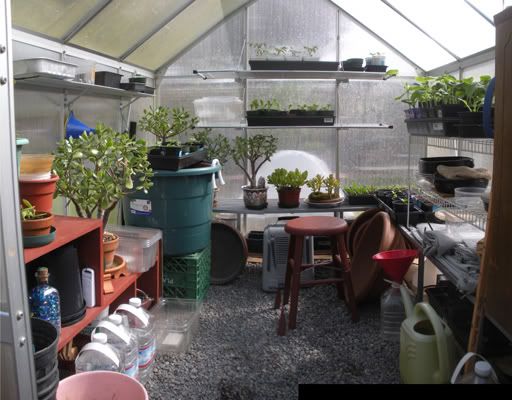
greenhousepan11a.jpg


January 14, 2012:

Composting:

Okay, I need to do something outside. I know, I'll dig out a compost bin. We've had a little dry cool weather, so the worms have burrowed down, and the compost is crumbly, if a tad wet.
DSCN3318sm.jpg


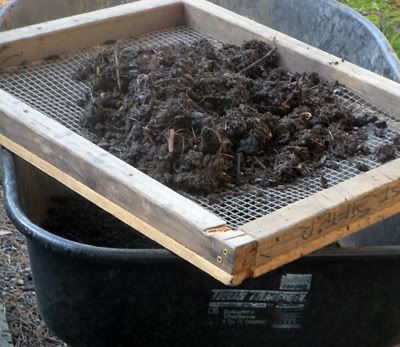
The first step - dig out the bin and sift the material. I use a homemade frame with a layer of 1/4 inch plastic hardware cloth backed with a layer of one inch mesh poultry netting. The fine stuff goes into the wheelbarrow, the coarse stuff into an adjacent compost bin we're still building up.
DSCN3316sm.jpg


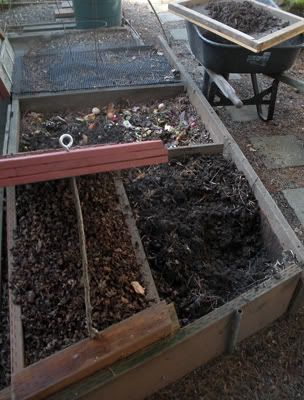
The bin on the left is covered to keep the leafy material dry and fluffy. The dry leaves are an important layer in the compost 'cake'. The bin on the right is the one I'm digging out. Nice, dark and crumbly with lots of worms! The sifter is on the wheelbarrow, and some of the coarse stuff is already on the active compost bin in the middle. The bin in the back is resting for several of months. It has a black plastic hardware cloth cover to keep out squirrels and racoons.
DSCN3321sm.jpg


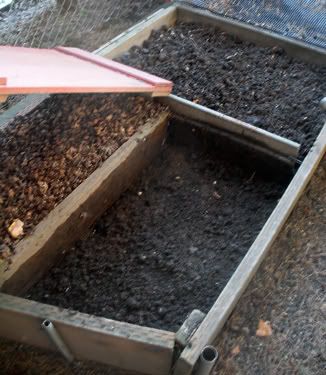
The bin is all dug out. I left about two inches of broken up compost on the bottom of the hole to create a space for the worms to move into. You can see the bin in the middle has a layer of coarse stuff spread out on the top.
DSCN3323sm.jpg


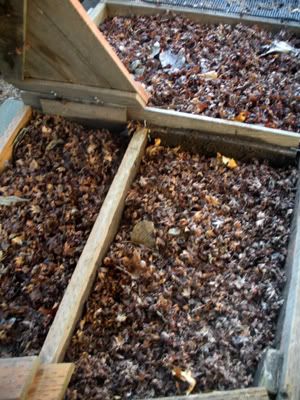
The last step is to put a nice deep layer of dry leaves on the bin we just dug out. Now that bin will rest for a at least several months or more while the earthworms move into the compost/earth interface and do their work. That will make a great base for the next cycle of composting in this bin. I put a thin layer of leaves on the middle bin, too. Now there's a nice layer cake of dirt/compost, leaves. kitchen scraps. All small yard clippings except grass go into the compost bins, even tomato vines and pepper branches and twigs. I don't even chop stuff up too much. I try to have at least 10 or 12 layers of stuff built up before I cover the bin with a layer of dirt/compost and let the worms work for several months. I'm getting about 12-18 cubic feet of compost from these bins a year. My goal is to become 'soil self-sufficient' at some point, perhaps only having to procure horticultural pumice or vermiculite and some peat moss every so often.
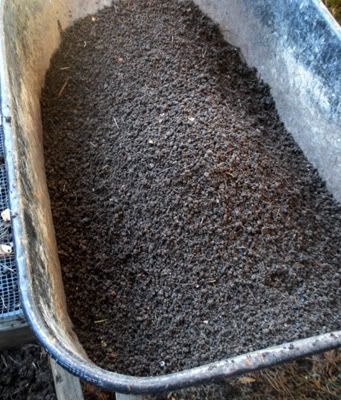
DSCN3322sm.jpg


The good stuff. It will go into a plastic, vented storage bin for at lest eight weeks to cure a bit. Then I mix it with a little peat moss and some vermiculite or pumice for aeration. In my large containers, I add 2 or 3 inches of compost worked into the top of the container only every year. I try not to mix up the soil layers in the big containers very much, letting the nutrients percolate down through the soil as in a natural setting. As the blog continues this summer, I'll include photos of the irrigation system and containers I use to grow my tomatoes and peppers, and a few other things.
 
I separated mine when they sprouted...I just pulled up the extras and stuck them in some soil and they wilted, but popped right back up. If they're further along you can carefully separate by removing most of the soil from the roots and pulling them apart then re-potting. Just be careful...because its better to have one good plant than two dead ones.

Thanks stc, I guess I'll be separating them sooner rather than later.
 
Wow, love the pics! I'm not too far behind you time-wise, but geeze your plants look huge. You let some of them grow pretty big two in a cell/pot. Are you going to separate them out soon? I'm wondering because in some of my cells I've got a few strong seedlings and I don't want to snip them when I could separate them - which would especially help fill in for the few where nothing germinated... I'm also wondering when to back off a bit on the watering, although I don't believe I'm there yet. Anyway, again, I love the pictures - we're in the middle of a snowstorm tonight so pictures of green plants is a good thing :)

I transplanted early-on, maybe too early, we'll see. I will snip them because i just don't have space for more than two of each variety, until setting out, and then it's one good one of each I hope. As for watering, I just dig my finger around in an empty cell/pot and feel if it is damp, then water accordingly. I watered with 1/4 strength AK fish today - bottom watering the tray and letting pots soak it up. I also keep the soil surface sort of cultivated and loose so there's good gas exchange between air and soil.

Thanks for dropping in, Pulpiteer! I see on the weather sites you guys are getting a nice hit of winter! I'm glad the images of green plants brighten your day!

I separated mine when they sprouted...I just pulled up the extras and stuck them in some soil and they wilted, but popped right back up. If they're further along you can carefully separate by removing most of the soil from the roots and pulling them apart then re-potting. Just be careful...because its better to have one good plant than two dead ones.
+1 here, for sure. If you're worried about hurting the roots, just use a sharp knife to cut the rootplug in half. Dust the cut surfaces with a little Rootone, and plant in moist soil mix. The cleanly cut edges will readily send out new root hairs (which is where the real action is) and the plant will be fine. Try it with one or two to practice and see how it works.
Didn't want to hijack Socal's thread...here is a good worm tea link.

http://www.sierra-wo...m/worm-tea.html

I have an old 1 gallon aquarium that I'm going to give it a try in...and I guess we'll see. Smaller container, so I'm thinking a sock for the "tea" bag...
Thanks for including this - you sound closer than I am! Will be interested to see how it goes for you. I'll give it a try at some point. Might be when I start having everything outside. For now will just use good ol' AK fish! Sock is a good idea. I wonder if a dirty one would add some kind of nutrients? :D

Those look great sorry you going to have to cut the weak links. Shane don't worry about hijacking my thread it about sharing ideas and process everyone go through. Dang I love to see how you guys do your tea if you decide to go that route.
Right on, Fernando! It's a great community spirit on THP - the great ideas are seemingly without limit. I will def investigate the tea idea. With so many people doing it in different ways, it has to be a good idea. I've just never been that ambitious, but growing some more exotic, for this climate, peppers seems to require a bit more attention to detail.

2/10: 3x hungarian hot wax - Lilly Miller seed - planted in soil mix, no dome, 2/4 without an overnight soak - 3/4 germinated

I sprayed three yellow-leaved plants with a little epsom salts 2/3 oz. per gal. (1/12 teaspoon per pint US) as a trial:
inca red drop - orchid mix germinated​
omnicolor - soil germinated​
chiltepin - the really scrawny one - soil germinated​

I'll compare them to their 'twins' and see what, if any, difference there is over the next few days. Also raised the lights one inch. Bottom watered everything except small cells with 1/4 strength AK fish. Will post another round of photos after the 'snipping' in a few days.

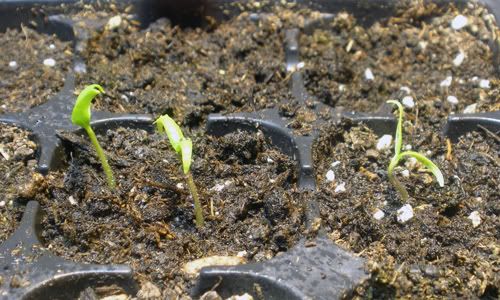
Hungarian hot wax seedlings:
DSCN3531a.jpg
 
Yea the tea has exploded both my cherry tomatoe and purple tomatillos to start budding I wish I could have done a experiment with and without but you live and you learn.
 
No new news from the germination trays. The HHW seedlings are expanding their cotys
and looking good. Still waiting on the new habs and anaheims. I just stuck them in growing
medium and put them under the lights, so we'll see how that goes. Didn't seem to
bother the Hungarians; maybe they're not too persnickety!

I started a little coffee filter and cup germ test with some NuMex Twilight seeds. One set
from THSC and the other from CPI via Siliman (thanks, buddy!) Four seeds in each cup.
Will send a pic when/if anything develops.

The fans seem to be doing their job. Maybe it's my imagination. Perhaps I'll have a better idea
in a couple of weeks or so.

I forgot to include a pic of the Orange Rocoto from Beth at PM (one of her mystery seed packets).
Unfortunately the 2/4 that sprouted sprouted in the same cell, and the second one right next to the
first. I planted them half a cell apart, but the darn things seem to migrate!

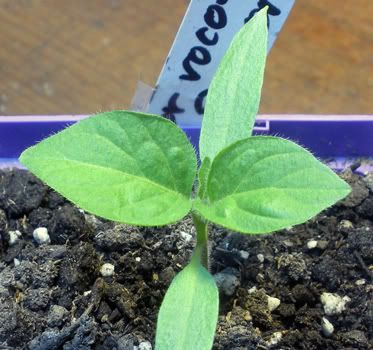
Here's the second one right next to the first. Dang.
DSCN3536a.jpg


And here's the survivor. I'm hopeful I can keep this one going. it's one I'd like to try
to overwinter:
DSCN3539a.jpg


Thanks for browsing - everyone have a great day!
 
Looking good brother! Keep it up! Although I'm not planning on planting anything else this season...I'm definitely going to look into Rocotos for next year.
 
Looking good brother! Keep it up! Although I'm not planning on planting anything else this season...I'm definitely going to look into Rocotos for next year.
If it weren't for Beth's mystery seeds, I wouldn't probably have tried it : )
 
Your plants are looking great Paul. Rocoto seeds were something I meant to get ahold of that never ended up happening. I'll get my fix vicariously through watching yours grow. I read on another site that someone in the U.K. said they routinely overwintered better than any other plants that he grew. I'm guessing the average pacific northwest winter is fairly similar to England's, so I bet you'll be real successful bringing it back for a second year!
 
I really like pubes...well you know what I mean.
Oh you devil :twisted:
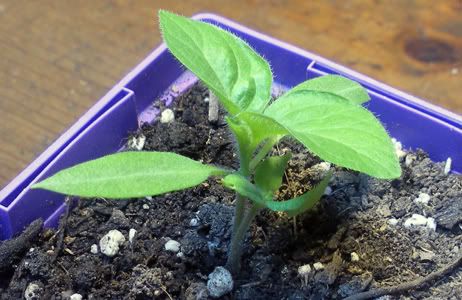
As I was looking at the rocoto, you could really see the little fuzzies;
I'm not sure they show up that great in the photo.
Your plants are looking great Paul. Rocoto seeds were something I meant to get ahold of that never ended up happening. I'll get my fix vicariously through watching yours grow. I read on another site that someone in the U.K. said they routinely overwintered better than any other plants that he grew. I'm guessing the average pacific northwest winter is fairly similar to England's, so I bet you'll be real successful bringing it back for a second year!
Thanks for the vote of confidence, mj, but let's get this little tyke through the Spring first! I was really hoping for another seedling so I would have two to choose from, and for a little insurance. I haven't given up hope on the two other seeds - they're still in there somewhere! I hope you are right about the climate - it would be cool to grow a variety that could acclimate to the weather here. I hope I have something to share going forward that will satisfy you vicariously ;) Maybe I'll get far enough to have a few seeds to share with you for next season!

Loving the ingenuity. Another good one to follow
Thanks for the kind words, guy. I appreciate you dropping in.

Good luck with your own season!
 
Seeing that losing seedlings to thinning is distressing, and noticing that some of my pepper
seedlings are putting out new growth at the leaf nodes, I decided to perform a little
cloning experiment. I took cuttings from some of the seedlings and am trying to get them
to take root. So, here for your consideration, is the first round of pics:

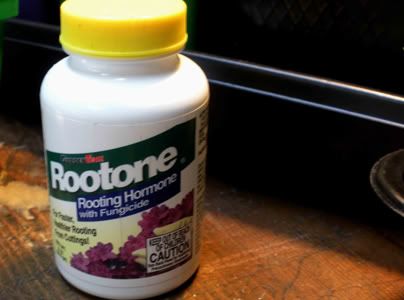
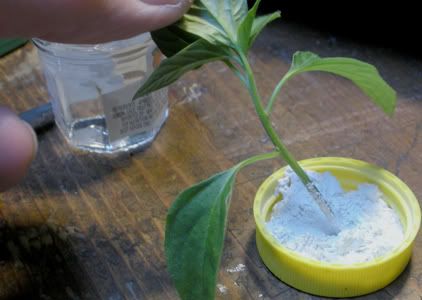
The rooting powder:
DSCN3546a-1.jpg


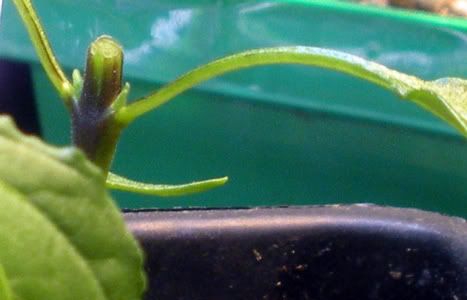
You can see the new growth at the leaf nodes. The growing tips should
accelerate growth rate now that the main stem has been cut off cleanly:
DSCN3545a.jpg


The clone is dipped in water and then into the rooting powder:
DSCN3548a.jpg


Make a little hole in the dirt, and poke the dusted stem down
into the dirt, gently:
DSCN3550a.jpg


Push it all the way in and gently pack a little:
DSCN3551a.jpg


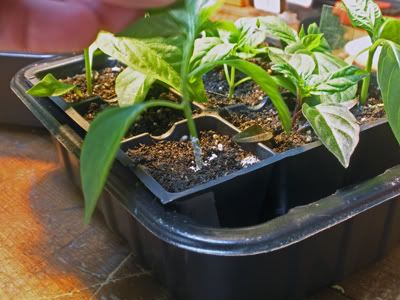
Here's the little flat of clones:
DSCN3552a.jpg


Top View:
DSCN3553a.jpg

top: serrano, cayenne, marconi rosso
middle: serrano, early jalapeno, bolivian rainbow
bottom: early jalapeno, empty cell, serrano

I placed the cell pack full of planting mix in a tray of water, and let it soak
the whole cell before I took the cuttings. I wanted plenty of available water for
capillary action to start taking it up the stem. I won't water it again until the
cells are pretty dry on top. The first evening, I left them on my work bench in
the dark to avoid heat stress. They will need to just kind of settle in before going
back under the lights. I've done this with a variety of plants, but never with
peppers. I expect some shock and wilting, but hope that "life finds a way"
and that the cuttings pull through! I don't see why this shouldn't work just like
with any tender perennial or herbaceous plant.

Any comments or thoughts about this experiment.?
 
Paul you are more generous with your coke than I. I see you have jumped into this head first. Half measures avail us nothing. Good luck pal.
 
Awesome looking growth on those plants. I never tried cloning before sound like a great experiment I hope you have great results.
Thanks, Fernando. They all made it through the night!

Paul you are more generous with your coke than I. I see you have jumped into this head first. Half measures avail us nothing. Good luck pal.
So that's why I have so many bumps on my head! I try not to get too much rooting powder up my nose! It's actually a safe bet - the seedlings were going to the compost pile when I thinned them anyway; this way they serve a purpose! Wouldn't it be funny if I wound up keeping the clones and not the original plants? This should work.

Paul Looks great! and i love the willingness to try new stuff and see if things work out. Keep it up.
Thanks, Beehunter! A good experiment is always fun to watch - one of the things I love about THP
Lookin good, spray the clones with a mister, and ya might wanna trim off excess leaves...
Thanks, SST - I'll keep a close eye on that. If it looks like they are struggling, I'll prune some leaves. I'm torn between lessening the load on the clone and having leaves available to feed root growth. I'l definitely keep them misted between waterings. Good to have a reminder...

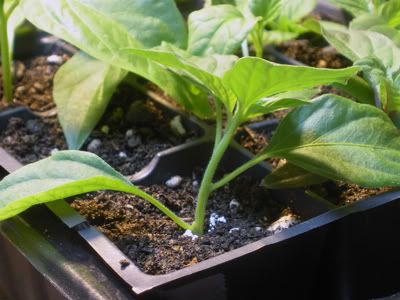
Thanks for the comments everyone, and for following along. Here's a pic of the clones this morning, day 2. The serrano in the right corner was wilty last night, but now is up and at 'em. The others have shown no wilting, yet:
DSCN3558a.jpg
 
You have a great thing going Paul. I read through the entire (well ALMOST) 7 pages of GLOGiness. Everything looks awesome with what you have to work with. The close attention to germination and all of the data is cool. I like how you have things set up. I will have my own semi ghetto grow going soon enough. Well my mini grow is set up. (Day 4 on germination, nothing popping up yet. I've been trying to keep my soil temps around 80-85 degrees. There's a few tiimes it went above 90+ degrees.)

I think I should try and follow more closely so I don't have to try and catch up on 7 pages of updates...lol. Good luck Paul!

I can totally relate - and more grow logs showing up all the time! You have a high threshold of pain to sift through all seven pages! Anyway, thanks for the good thoughts, much appreciated. Your seeds will start popping pretty soon, I bet - the slight brush with 90F probably won't hurt them - keep the faith, bro'!

I sprayed some of my yellow-y baccatums with a dilute epsom
salt (1/4 teaspoon per pint H[sub]2[/sub]O) solution on the 10th. I gave the
test plants another spray after these pics of them and the controls
were taken today:

OmniColor - test on right, control on left.
DSCN3559a.jpg


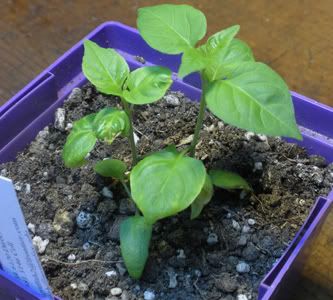
Chiltepin - The small plant on the left is the test. It was deformed and yellow
compared to the control.
DSCN3561a.jpg


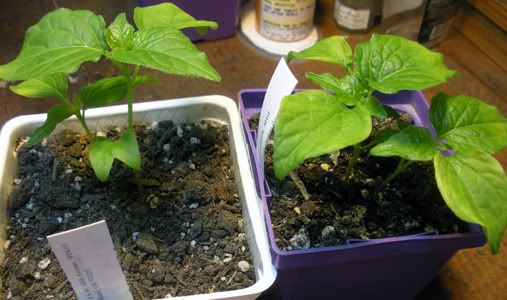
Inca red drop - Test plant in purple pot, control in white.
DSCN3562a.jpg


I'll photograph and spray again in a couple of days. I am using a really dilute
solution, equivalent to 1/3 ounce per gallon. Maybe that's an insignificant amount.
 
Thanks for looking in, Matt. I appreciate everyone's contributions to the
conversation; that's what makes it fun to do. Aside from the agony of
waiting for seeds to germinate :lol:

Since I was on a roll, I decided to go ahead and thin out the transplants.
I cloned just about all of the cuttings just to continue the experiment I started
yesterday. We'll see which ones are able to get a toe-hold! Here are the pics
right after taking the cuttings. I left one seedling in each pot for the most part.

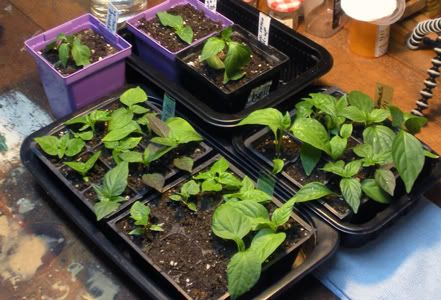
This is all of them. The ones cloned yesterday are at the right; trays A and B
are at left front; Cayenne, Yellow Aji, and Marconi Rosso in pots. I will try to
photograph them the same way every time for comparison:
DSCN3565a.jpg


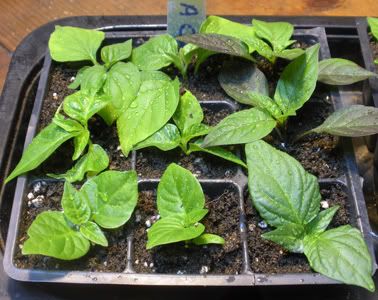
This group of all clones is tray A.
DSCN3569a.jpg

Back row: Bishop's Crown, Bishop's Crown, Bolivian Rainbow
Middle row: Red Caribbean, Red Caribbean, Bolivian Rainbow
Front row: Congo Trinidad, Chocolate Habanero, Poblano

This group of all clones is tray B.
DSCN3570a.jpg

Back row: Fatali, Fatali, Early Jalapeno
Middle row: Tepin, empty, Early Jalapeno
Front row: Tepin, empty, empty

On the left is a Yellow Aji clone, on the right, a Marconi Rosso transplant I just
kind of pulled out cuz the roots were pretty loose in the soil (I just checked them -
the Marconi is standing upright already!):
DSCN3571a.jpg


Here's a Long Red Cayenne that I pulled up the same way as the
Marconi (also looking a little perkier now):
DSCN3572a.jpg


I'll try to update these every couple of days - at least a 'group picture : ) -
to get a running record posted of how the different varieties react to the
cloning process, and how the other two survive the 'root plucking' :scared:
Enjoy and thanks for visiting...
 
Back
Top