• If you need help identifying a pepper, disease, or plant issue, please post in Identification.

tutorial Beginner's guide to AACT/Compost Tea

Introduction:

Although I am new to this method of gardening, I have gathered some useful information and tips in regards to those wanting to start their own compost tea brewing.

AACT or actively aerobic compost tea is when, you, as the gardener, replicate the benifical microbes that plants utilize during growth. Plants utilize these microbes in the fact that these microbes break down organic materials within the soil and make the nutrients within these organic compounds readily available to the plants.

These microbes also compete with harmful bacterium and fungi in the soil that may be harmful to your plant and prevent breakouts of disease.

Another plus of compost tea is that it can be applied as a foliar spray to aid your plants. The compounds utilized within the brewing of compost tea act as a form of "food" for the leaves as well as providing a beneficial layer of organic compounds which leave behind a "biofilm". Along with the added effects of food for the plant leaves, the "biofilm" coats your plant and makes a natural barrier which thwarts would be pests and harmful microbes from attacking your plant. This can ultimately eliminate the need of pesticides and acts as the most natural disease and pest suppressant that you can find. Furthermore, the beneficial microbes brewed within compost tea also colonize on the surface of the plant leaves and continually compete with harmful microbes to prevent disease outbreaks.

There are many other benefits of compost tea, however, the above benefits are the most intriguing to me.

Many commercially available products and compost tea kits exist on the market today. While these kits are effective, they can sometimes be very costly. Therefore, in this guide, I will show you not only how to build your own compost tea brewer from many readily available items, but also share some tips picked up along the way.


Let's Make Tea:

1. For your main brewer equipment you will need: a 5 gallon bucket, an aquarium pump, an air stone, and some aquarium tubing.​


2. For your tea making ingredients you will need:​

unsulphured liquid molasses​

compost - mushroom, homemade, or bagged* (vermicompost or worm castings is usually a common staple and multiple
types of composts can be combined and added together) (UPDATE: Click on either link to see how vermicompost/worm castings aid in disease suppression for your plants)​

green plant clippings such as fresh green grass clippings​

chopped fish/fish flakes/fish emulsion​

liquid kelp emulsion or kelp powder​

various guanos (such as bat, chicken, and sea bird)​

a source of mycorrhizae* (the symbiotic fungi which makes this little brew the true gem it is). <<<Mycorrhizae products can be found at garden stores and readily available on-line for purchase>>>​

IMG_0388.jpg

IMG_0390.jpg

IMG_0389.jpg


3. You will need a fabric medium to contain each of these above ingredients so that straining will not be necessary if using
via a sprayer, but also to aid in the suspension of your ingredients inside your brewing bucket* (More about suspending your ingredients farther down). These include: muslin bags, cotton socks or shirts, painter's bag, pillow cases, etc.


IMG_0384.jpg
 
4. To make your tea...de-chlorinated water must be used as the chlorine contained in the water will kill the beneficial microbes which you are trying to grow. City water users, I recommend filling up a bucket with water and allowing it to set out uncovered for at least 12 hours to "off-gas" the chlorine or you can take your newly bought aquarium pump with airstone and aerate the water for about an hour to remove the chlorine.​

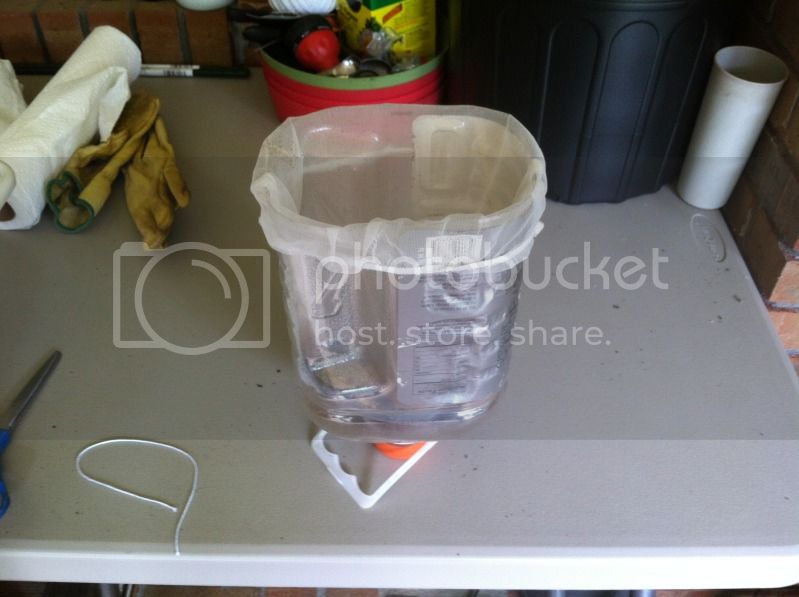
5. Next, you will want to take your "goodies" and place them in your fabric container as stated above. In this example, I will be using a painter's bag. Tip #1 - to make this easy on you, take a 1 gallon gatorade or milk carton and cut off the top leaving the bottom in tact. Take your bage or cloth and drape it into the container with the sides secured to the outside of the milk or gatorade carton.

IMG_0391.jpg

This just allows you to utilize both your hands to add your "goodies" withou the possibility of tipping it over.
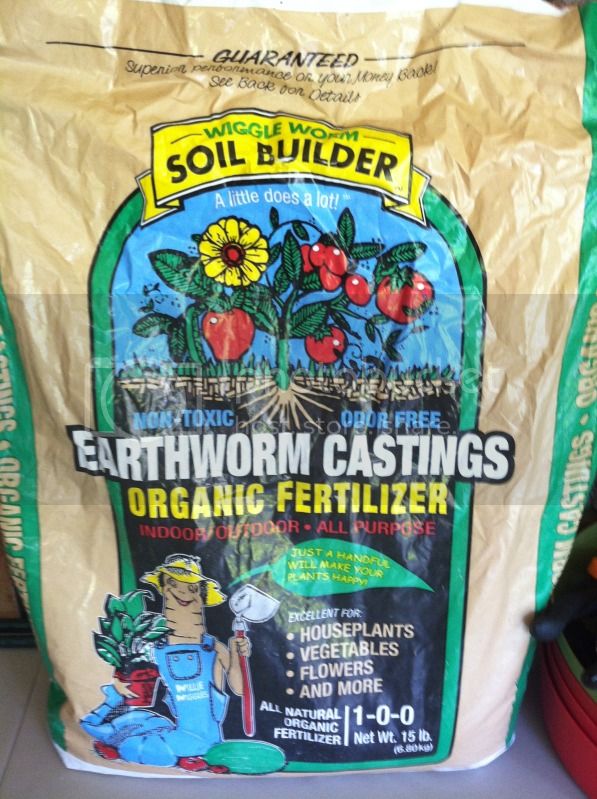
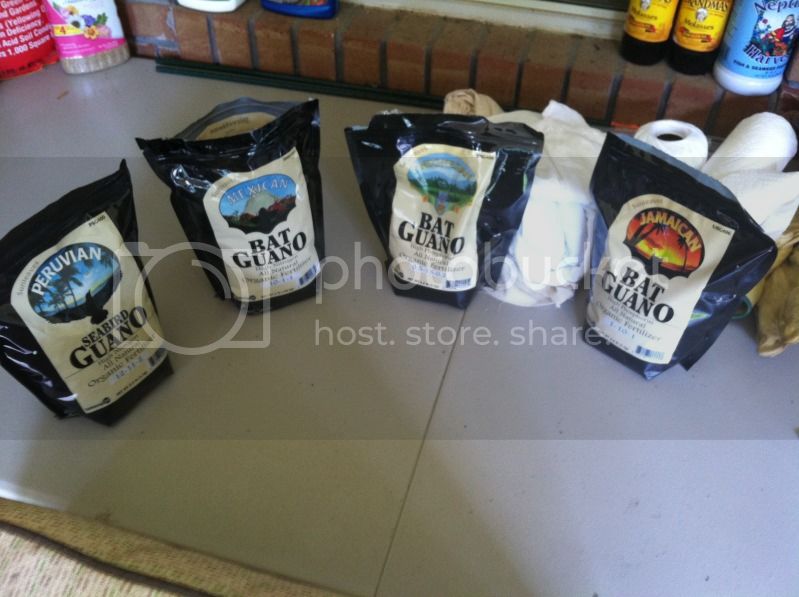
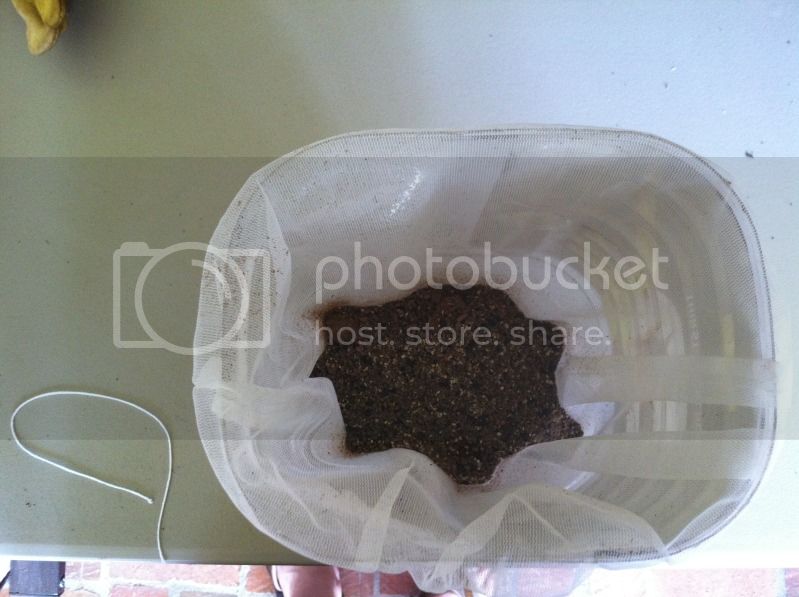
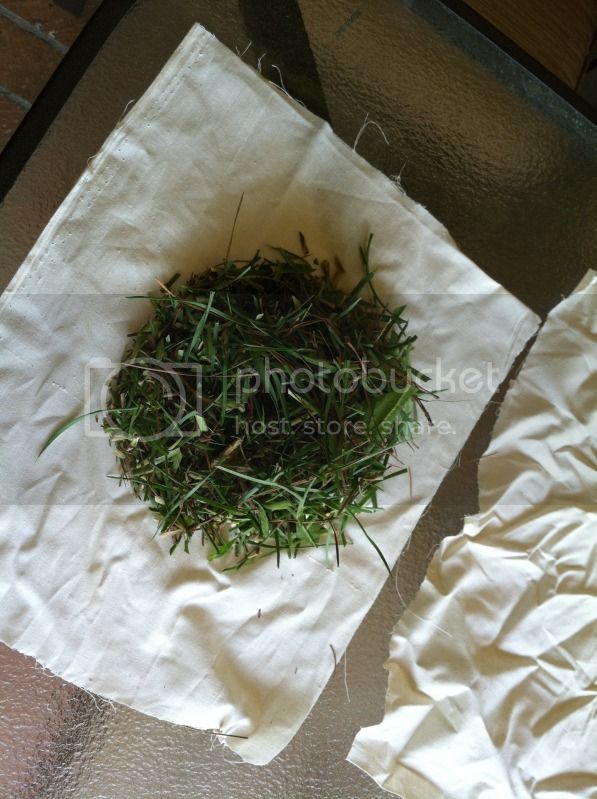
Recipes for teas vary tremendously, but here is my personal recipe: 1 - 2 cups organic worm castings, 4 TBSP of molasses, a handful of green grass clippings, 1 TBSP of Fish and Kelp Emulsion, 1/4 cup each various guanos (I use at least 3 types), and 1/2 cup mushroom compost.​

IMG_0392.jpg

IMG_0361.jpg


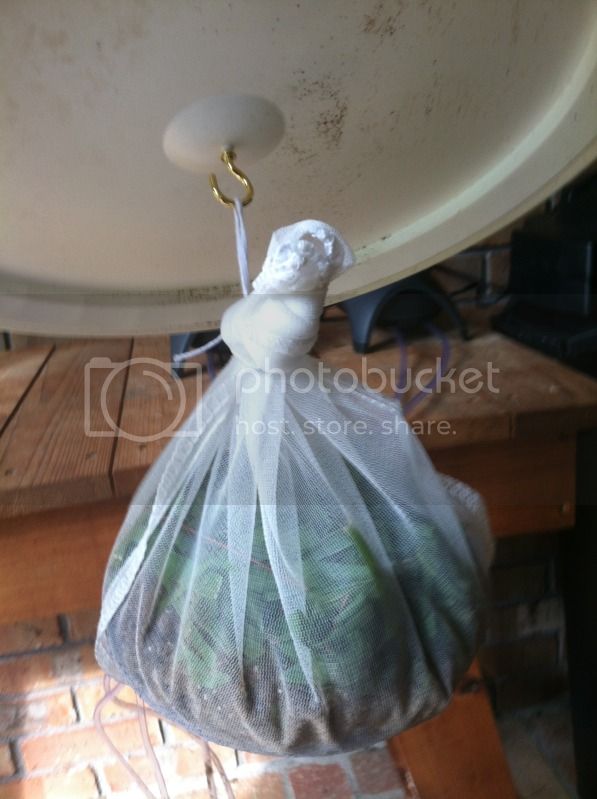
6. Once you have your goodies placed within your bag, it's time to tie them up. For this task I bought some cheap yarn from wal-mart. I double over and overhand knot most of my bags and then tie them with the yarn (tell you why the yarn is needed later ; )​

IMG_0393.jpg


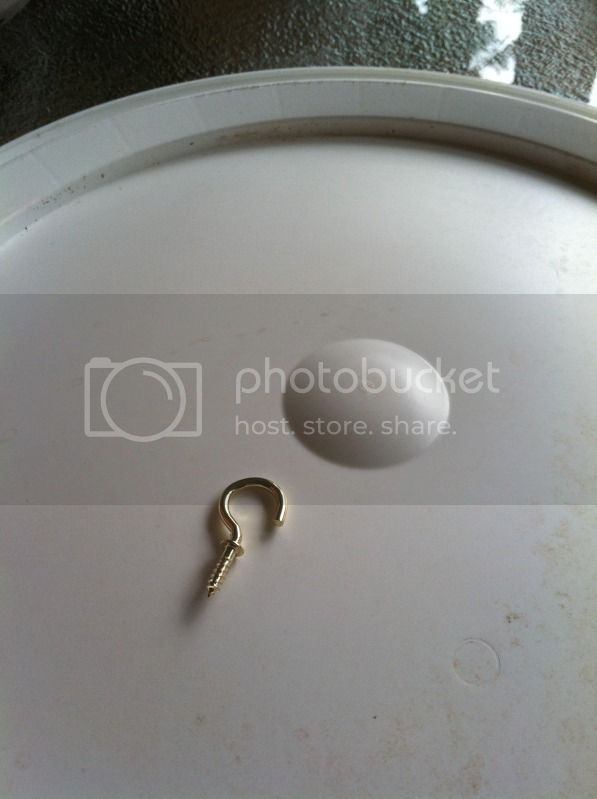
7. Next, you are about ready to fully assemble the brewer, but first, Tip #2: Go to HD or Lowes or any hardware store and buy some 3/4" brass self tapping hooks.


IMG_0385.jpg

Take one of these hooks and screw it into the bottom part of your 5 gallon bucket lid like so:

IMG_0386.jpg

This hook will now be the anchoring point where you suspend your bag of goodies into the water. This suspension allows more air bubbles to agitate and shake up the "goodies" allowing the beneficial microbes to release themselves from your "goodie bag" and disperse within the water.

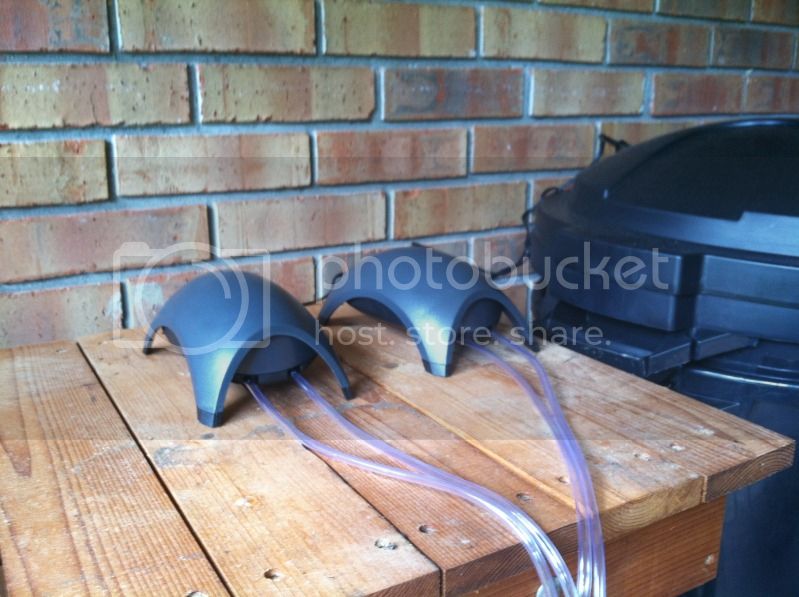
8. With the hook placed,you can now take the loop of yarn previously tied around your "goodie bag" and hang it through the hook. Now the fun part - pour your molasses into the water and give it a good stir. Hook up you aquarium pump to 1 or 2 air stones (depending on your pump) and allow the length of aquarium pump tubing to be long enough to reach the bottom of the bucket.​

Tip #3: Air stones naturally want to go to the surface of the water as the air is pumped through them - to correct this, go and buy a few washers. Take your aquarium tubing and run it through the washers before place on your air stones. The washer slides down the tubing freely and holds down your air stone in the bottom of the bucket.

After your airstones have been situated in the bottom of the bucket of water/molasses mixture, turn them on and let the water begin to churn. <<A footnote on aquarium pumps and airstones - the $5 base aquarium pump and $0.88 air stones from walmart are adequate and have made me great teas - however, more power and stones can be added to your setup to prevent Anaerobic (without air) pockets from forming which can lead to the growth of bad microbes and bacterium.>>

My current setup includes 2 pumps designed for 60 gallon aquariums with 4 individual airstones.​

IMG_0381.jpg


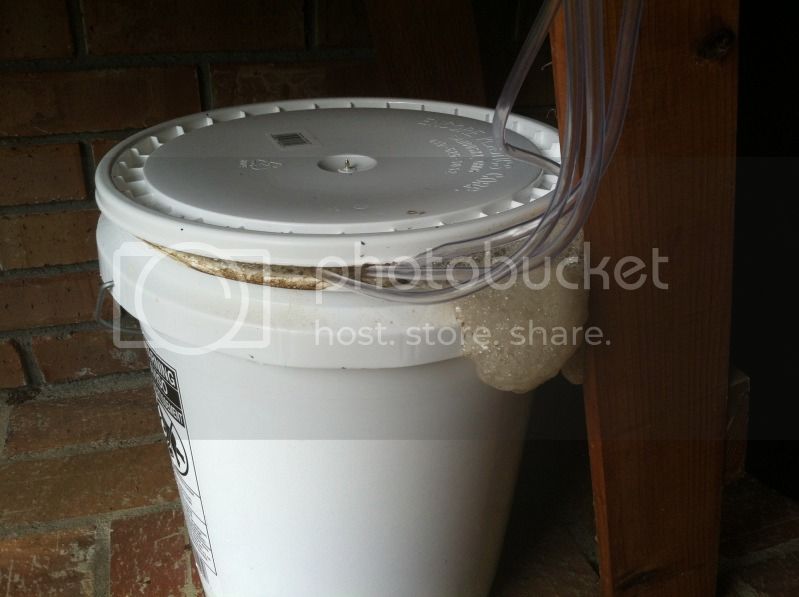
9. Take your bag of microbial goodies and attach it to the hook of the bucket lid. Place the lid on the bucket - naturally the lid will be vented from the aquarium tubing being draped in the bucket and this is what you want. Now you wait for magic to happen...​

IMG_0362.jpg


10. Your tea will now brew from anywhere in the ballpark of 12 - 48 hours depending on what microbial colonies you desire. 12 - 24 hours is usually a more fungal tea and 30 - 48 a more bacterial brew. Both brews are highly beneficial, however, peppers and vegetable plants generally utilize bacterial brews better.

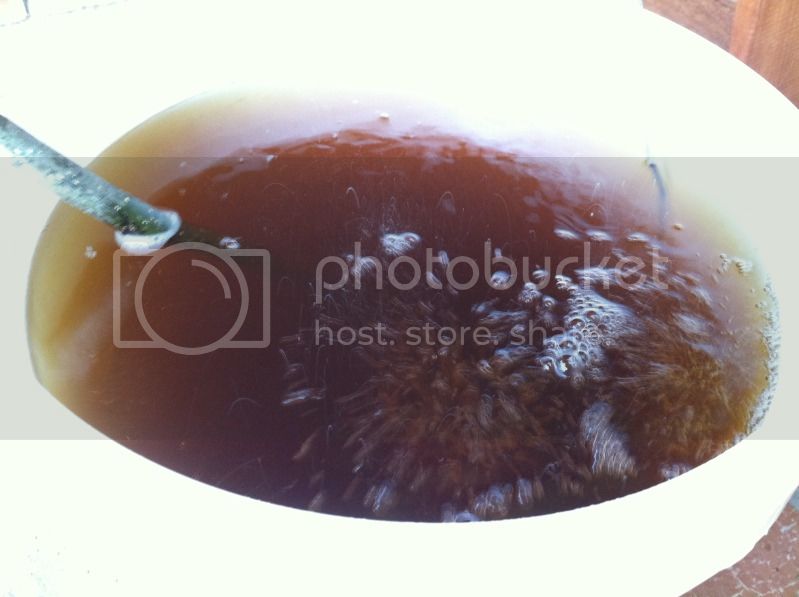
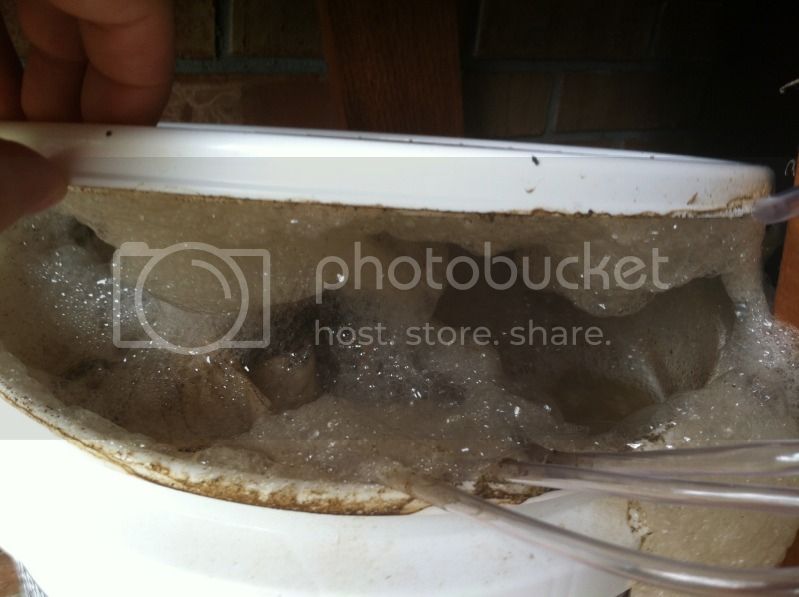
What you will be wanting to see in your tea is a frothy head like that of a beer. This head indicates that those beneficial aerobic (air loving) microbes are multiplying exponentially---->one video stated complete microbial doubling per every 20 minutes of brew time!!!

An example of what you want to see:​

IMG_0380.jpg

Frothing out of the bucket = a great sign for your plants!

IMG_0382.jpg

Nice n thick and almost soap suds like....

11. Once your tea is frothing and you are ready to noursih your babies...I mean plants :rolleyes: ....you can do this several ways. You can put the tea into a watering can and water the roots of the plants or you can put the mixture into a sprayer for foliar feeding.

I practice both ways of nourishing my plants, however, when feeding to your foliage buy a wetting agent (ie; Coco-wet). This wetting agent acts as a surfactant and breaks up the surface tension found on your plants leaves. This allows the mixture to be more readily absorbed by the leaves instead of running off onto the ground. When applying to the foliage, make sure to spray the underside of the plants leaves as well as the stems, tops of leaves, blooms, pods, etc. The bottom of the leaf is where primary nutrient uptake occurs with foliar feeding, plus you want to spread those beneficial microbes everywhere you can.

Generally foliar feeding should be done in the early morning or at night when the stomata (nutrient uptake centers on the underside of the leaf) are maximuly expanded for full absorbtion. If done mid-day, you run the risk of causing sunburn due to droplets forming on the leaves, as well as decreased uptake as the stomata are narrowed to preserve plant moisture and water content.

12. Often times it is brought up how often to dose the plants and how often to foliar spray and how much should you dilute...yada yada yada. The answers to all the questions is....it depends. As long as you are brewing solid quality tea and are not replicating harmful microbes within the brew, then once a week dosing is not detrimental. Also, as long as you are not adding things to the tea that can potentially burn and damage your plants leaves and roots, then once a week can also be done. Dilution: I think that depends on the above statement as well as how far do you need the tea to stretch. I have seen recommendations to cut the tea at a 1:5 ratio. That means your 5 gallon batch can make you an upwards of 25 gallons of tea if needed :dance:

IMPO - in establishing the beneficial microbes within the soil and on the plants, I would dose (to the roots and through foliar feeding) once a week for 4 weeks and then once every 30 - 45 days. I also dose after heavy rain to boost the numbers of bacteria on the leaves and to prevent opportunistic leaf spot.

13. Another common question I see is how long can you store the tea - After roughly 4 hours without active aeration, the beneficial microbes begin to die off. Not only is this detrimental to your hard work, but allows the potential for bad anaerobic microbes to proliferate.

Hope you Guys enjoy and can use this to your benefit....​

UPDATES: Aerated compost tea is a relatively new approach seen within gardening and therefore reputable studies and information can be hard to find. The following links provided will redirect you to various webpages illustrating some of the benefits of aerated compost tea as well as a study carried out by the Minnesota department of Agriculture indicating detailed results as a use of AACT.

The Minnesota department of Agriculture study provides some decent data regarding compost tea versus conventional methods of growing.

Information about compost tea provided by the EPA

Oregon State University

A study on plant disease suppresion carried out by Vern Grubinger of the University of Vermon Extension agency.

A National Geographic Green Living article
 
Why mix quanos, each has it's own unique components which are applicable to the lifecycle of a plant....seedling.....vegetative....or fruiting. By using the appropriate quano you target the lifecycle of your plant. You do not use such scattergun approach to feeding.

Just a thought
 
Peppers grow naturally in a vegetative state as well as flowering and budding. Mixing these guanos allows for a wide organic array of N - P - K sources. By providing each source with the addition of the bacterium and micros...your plant will utilize what it needs for optimal growth and flower/pod production via bacterial breakdown of the organic matters contained within your soil and within your tea. You're not spraying your plants down with literal N/P/K as with synthetics.

This is why the bacterium are so beneficial. Without them, the organic compounds remain unchanged and your plant can not absorb the contained nutrients as efficiently. This is why it is harder than hell to burn your plants with compost tea.

The only time I have seen the vegetative versus flowering growth patterns be truly influential is with hydro growing and light selection. Your peppers should be growing and putting out flowers and pods simultaneously.

i never got the froth. is that good or bad?

You need the froth...this ensure aerobic bacterial colonization has occurred and is occurring.
 
well i dont understand how i could have screwed up then

Just wait until it builds that head. It will some times it will take longer. You got many variables like PH, sugar content, carbon content. If mine doesn't turn then I may add a little more molasses.

I say kick back, drink a Beer, and check it every couple hours.

As for using multiple types of stuff, I say go for it as it should just broaden the smorgasbord of microbes. I don't use all that because I cant afford it.
You certainly don't need all that, but I would think its a good thing to have the variety.

Think of it as an arena, and you are filling it up with animals. Only the strongest will survive and flourish. So the more types of animals you add, the probability of stronger animals goes up. lol... that's how I like to think of the situation.

For me the hole organic thing was a way to save money and get good results. I had the pump and set up from a old DWC I made, and buckets galore. So all I needed to buy was the worms. As time goes by, I learn more and more about how symbiotic relationships benefit the plants and how important the soil food web is when it comes to providing micro and macro nutrients. I also have learned a bit about the industry and its corruption like Monsanto.

Every one is different, and sometimes we like to do things our own ways, and if makes you happy to spend a lot of money on your plants, or grow with hydro, or synthetics, or with bat shyt. Well good because that's what its all about, having fun... unless you grow for profit, in witch case I say, "do your home work." And vote no on S510
 
Noted.

Differing opinions.
I'm glad you do have a differing opinion...I won't claim to an expert when it comes to this stuff and I don't have a degree in horticulture either....the only thing that I will claim about the tea is that it works :party:

I only add that many different guanos because I have them, they are available to me, and they add another layer of organic material for which my microbes to eat...yum, yum! ------>>> but, I can't stress enough that you don't need these fancy guanos to make a successful brew. I made a protozoal loaded tea the other day with grass and plant cippings, worm castings, Myco, and molasses....

well i dont understand how i could have screwed up then

Don't stress about it yet my friend...there are lots of variables to consider like Cayenne said. Hardest part about this stuff is to wait. Water temp, ambient temp, direct sunlight, aeration, etc. can all influence the tea.

When did you start your batch?
 
Guys,

Thanks sincerely for all the kind words and likes...

I am going to be editing the initial posting to make it more readable and to properly share links and give credit where it is due.


yesterday at 530

been a warm day today. i brewed it outside. it was about 95 today
- it wasn't sitting in direct sunlight was it? I did that with my first batch and had to toss it....warm water is good for the bloom of microbes, but only to an extent and then it kills them off. I hope you haven't dumped your tea just yet, I'd give it at least 3 days before giving up...

here you go bigbodybussey

Just wanna share my Brew

Thank you very much!
 
Great sticky guide. Glad others are manning up and making these guides! Way to go. As for the questions regarding guanos... using a wide variety of them incorporate different micro organisms into the brew. AACT is NOT fertilizer. He doesnt need much for this purpose. Also, peppers are not "veg and bloom" plants that rely on photo period for fruiting. SOOOO... when you DO fertilize, (not aact) a level nutrient regiment is optimal as the plants will vegetate and fruit simultaneously. Not opinion...fact. :) Enjoy! Great guide :)
 
Great sticky guide. Glad others are manning up and making these guides! Way to go. As for the questions regarding guanos... using a wide variety of them incorporate different micro organisms into the brew. AACT is NOT fertilizer. He doesnt need much for this purpose. Also, peppers are not "veg and bloom" plants that rely on photo period for fruiting. SOOOO... when you DO fertilize, (not aact) a level nutrient regiment is optimal as the plants will vegetate and fruit simultaneously. Not opinion...fact. :) Enjoy! Great guide :)

Thank you. I'm not one to usually create a guide or showcase what I am doing, but this process is too simple and amazing for people to not know about. I only wish that I had taken pictures of my plants before dosing with the various AACT's to show a time lapse of their progress and amazing growth. Thanks for sharing your knowledge with me and the other users of THP - i'd still be dosing with a certain product right now if you hadn't, haha.
 
Back
Top