I've had so many requests for this I thought it would be easier to make a thread of it. Chili Monsta and I put it together and tried to cover as much as we could think of to cover. If you have questions feel free to ask.
Fermenting Peppers 101
By RocketMan and Chili Monsta
Starters
In fermenting peppers we use microaerophilic bacteria called Lactobacillus. The Lactobacillus eats the sugars in the mash then poops Lactic Acid and farts CO2. The Lactic Acid which is produced lowers the PH of the mash making it an acidic environment in which other bacteria such as botuline toxin, which would contribute to ruining the mash, cannot exist. As such the use of acids like as vinegar and lime or lemon juice are not needed but may be used in a sauce for the flavor.
There are several different ways to start a pepper mash fermenting and all will result in the same finished product. I will focus on 3 of them here.
A couple of things in common to all methods are that once the lid is on and the fermentation is going gas (CO2) is given off. Some people like to attach an Airlock to the lid so that the gas can escape while others just place the lid on loosely. Either way the idea is to prevent Oxygen from getting in and maintain the CO2. This helps to prevent any bad bacteria from getting in. The fermentation jar cannot be stuffed full of peppers or you will have pepper juice everywhere. The peppers will rise and fall within the liquid they are fermenting in initially so some space, say 1 to 1 ½ inches needs to be left in the top of the fermentation jar to allow for the pepper to rise. Some like to add weights to hold the peppers down. Some of the cheese cloth with glass beads will work very well for this.
1. Wild Fermentation. For a wild fermentation you are going to collect the wild yeast that is in the air and use it to ferment the peppers. To do this you first need to add enough salt to the mash so that the bad bacteria can’t infect your mash before the good bacteria get going. Typically this is somewhere between 6 and 10 percent of weight. Some add a little Ascorbic Acid as well to retard mold. Place your mash into a container and cover the top with several layers of Cheese Cloth to keep out any dirt but to allow the bacteria to get in. Once you see that mash bubbling away you can loosely add a lid and allow the fermentation to continue.
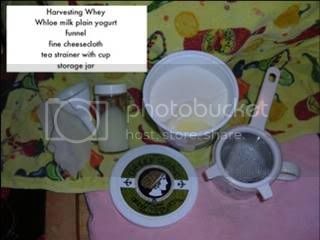
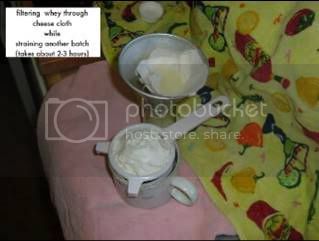
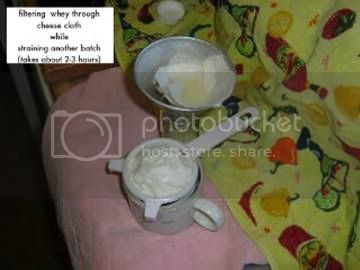
2. Whey Starter. Whey is the liquid that is seen in a tub of yogurt when it is allowed to sit for a while. The whey is collected as shown in the pictures here. Thanks Chili Monsta.
The whey is then added to the pepper mash and helps to kick start the fermentation process. Less salt is needed in these mashes as there is no delay waiting for the Lactobacillus to be collected and a good fermentation can be seen within a couple of hours.
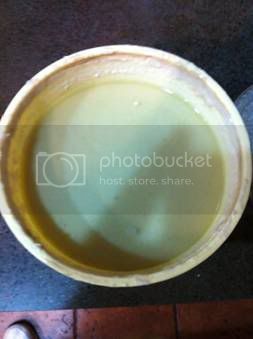
3. Sourdough Starter. Some like to use the hooch from a sourdough starter. This is the method I use. As with the Whey method the hooch is added to the mash and there is less of a salt requirement. Fermentation can be seen starting within a couple of hours. I like this method best as I don’t have to buy a tub of yogurt each time I want to start some peppers and I get to enjoy some of the best homemade bread around. I have included a very simple recipe for making a sourdough starter that can be used within 2 weeks to start some pepper fermenting or making bread.
Hooch
4. Other Starters. The juice from Sauerkraut and Kim Chi can also be used to start fermentation.
The Mash
Peppers are naturally low in sugars and as fermentation works from the sugars can be hard to start. Many like to ferment just the pepper in their mash while others like to add the other ingredients. I typically mash all of the ingredients of a sauce recipe so that there are more sugars for the bacteria to work on. Most all recipes will include Carrots, Onion, and Garlic. With these added there will be ample sugars for a good fermentation.
Setting up the Fermentation jar. Using the above ingredients, shredded the carrots and ran all of the peppers with the seeds and ribs if you want the added heat, onion and garlic, through a Food Processor then put it all into a glass jar big enough to hold it all. Add the Starter and gave it a stir. Dissolve 2 tablespoons salt into 2 cups warm water and poured it over the top till all veggies are under water. A word here about salt. Pickling salt is the salt of choice here as it is just salt. Other salts such as kosher salt include an anti-caking ingredient and may have Iodide. While these will not harm the fermentation or the consumer they may change the look of the final product.
Fermentation time. I would typically not run a fermentation for less than 30 days. Mine usually go for 45 to 90 days. Now, that said there are some that will let them go for years. Tabasco is reputed to ferment their peppers for a 3 year period. The time you decede to go with is totally up to you.
Fermentation is complete.
This is the point where cleanliness becomes your best friend. Everything that touches your sauce now needs to be sanitized. This is easily accomplished using unscented bleach and water. Using the big pot you plan to boil the sauce in fill it with hot water and a couple of tablespoons of bleach. Allow everything that will touch the sauce to soak for 15 minutes then place them into an area you have designated as your clean zone. Next comes your bottles, caps and reducers. These can be run through your dishwasher with the heated dry turned on. When done place them into the clean zone.
It is now time to make some sauce. Pour all of the contents from the fermentation jar into a big pot and bring it to a boil for 30 minutes. Very carefully then run them through a Blender in batches until is smooth then back into the pot. Bring it to a boil again adding some water if it is too thick for another 20 minutes. Then run the entire batch through the blender again. Now you should have a very smooth sauce. Return the sauce to the pot and heat to 195 degrees F for 15 minutes then carefully funnel into the bottles. Add a reducer and a cap and place it upside down for another 15 minutes to allow the caps to sterilize.
Other.
Helpful Links.
Fermenting pickles and peppers
http://www.grist.org/article/2009-09-18-real-deal-pickles-pickled-pepper-hot-sauce-apickling-made-simple
Steps to fermenting peppers
http://www.nathalielawhead.com/candybox/ferment-your-own-hot-sauce-raw-tabasco
Several good recipes and instructions
http://nourishedkitchen.com/fermented-hot-chili-sauce-recipe/
Get Cultured (Nourished Kitchen free e-book)
http://issuu.com/nourishedkitchen/docs/getcultured?mode=embed&layout=http%3A%2F%2Fskin.issuu.com%2Fv%2Flight%2Flayout.xml&showFlipBtn=true
Bob Hurt Hab Mash
http://www.scribd.com/doc/27415695/How-to-Make-Habanero-Pepper-Mash-and-Hot-Sauce
Nice fermentation blog
http://okanagandailyspecial.blogspot.com/2010/09/home-made-tobasco-sauce.html
Q/A about mash process
http://en.allexperts.com/q/Food-Engineering-Manufacturing-2446/2010/12/pepper-mash-1.htm
Kitchen Gardens blog/ 5 step HS recipe
http://kitchengardeners.org/recipes/make-your-own-hot-sauce
A very simple to make a starter.
Small russet potato
2 Cups Flour
2 Cups Water
1 packet (3 tsp) Active Dry Yeast
Put the whole potato into a pot with enough water to cook the potato down to mush. Once it is falling apart put it into a blender with 2 cups of the water. It’s ok to add water if there is not enough left and blend until it’s smooth. Let cool till warm and pour into the container you r going to hold it in. Add 2 cups flour and the dry yeast. Mix well but lumps are ok as they will work out. Place this on a pie pan or something that will hold anything that boils over.
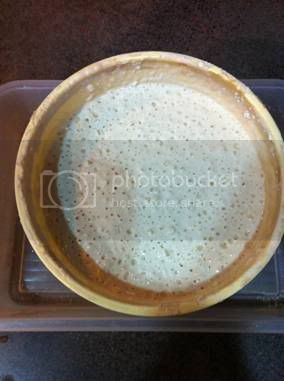
A good working starter after feeding
For the next 3 days every morning add 2 Tbs Flour and 2 Tbs Water. After the 3rd day just let it work for another 3 days. When it starts to settle clean the container if it boiled over any and place into the fridge for another 6 days. Now you should have a good amount of hooch built up and be ready to ferment some peppers. You’ll only need a couple of tablespoons of hooch for a quart jar of peppers, I typically run a gallon jar at a time and use ¼ cup, the rest I mix back into the starter. After you have the peppers going it’s time to make the bread. This is a simple recipe I use for a San Francisco style Sourdough bread. It’s great toasted for breakfast or sliced in half for a Sub sandwich or a Panini.
And since you now have a good Sourdough starter
Sourdough Bread
Ingredients
• 4 3/4 cups bread flour
• 3 tablespoons white sugar
• 2 1/2 teaspoons salt
• 1 (.25 ounce) package active dry yeast
• 1 cup warm milk
• 2 tablespoons margarine, softened
• 1 1/2 cups sourdough starter
• 1 extra large egg
• 1 tablespoon water
Directions
In a large bowl, combine 1 cup flour, sugar, salt, and dry yeast. Add milk and softened butter or margarine. Stir in starter. Mix in up to 3 3/4 cups flour gradually, you may need more depending on your climate.
Turn dough out onto a floured surface, and knead for 8 to 10 minutes. Place in a greased bowl, turn once to oil surface, and cover. Allow to rise for 1 hour, or until doubled in volume.
Punch down, and let rest 15 minutes. Shape into loaves. Place on a greased baking pan. Allow to rise for 1 hour, or until doubled.
Brush egg wash over tops of loaves.
Bake at 375 degrees for 30 minutes, or till done as it may take another 10 to 20 minutes if you use stoneware like I do.


 from PA.