• Blog your pepper progress. The first image in your first post will be used to represent your Glog.

Next to My Chair Again

Baby plants again!  Down on the floor again next to my chair in my little library.  Here's how it looks right now.  I've got seeds in the germinator moving to cups every day now, will end up with another dozen or so seedlings under the light.   
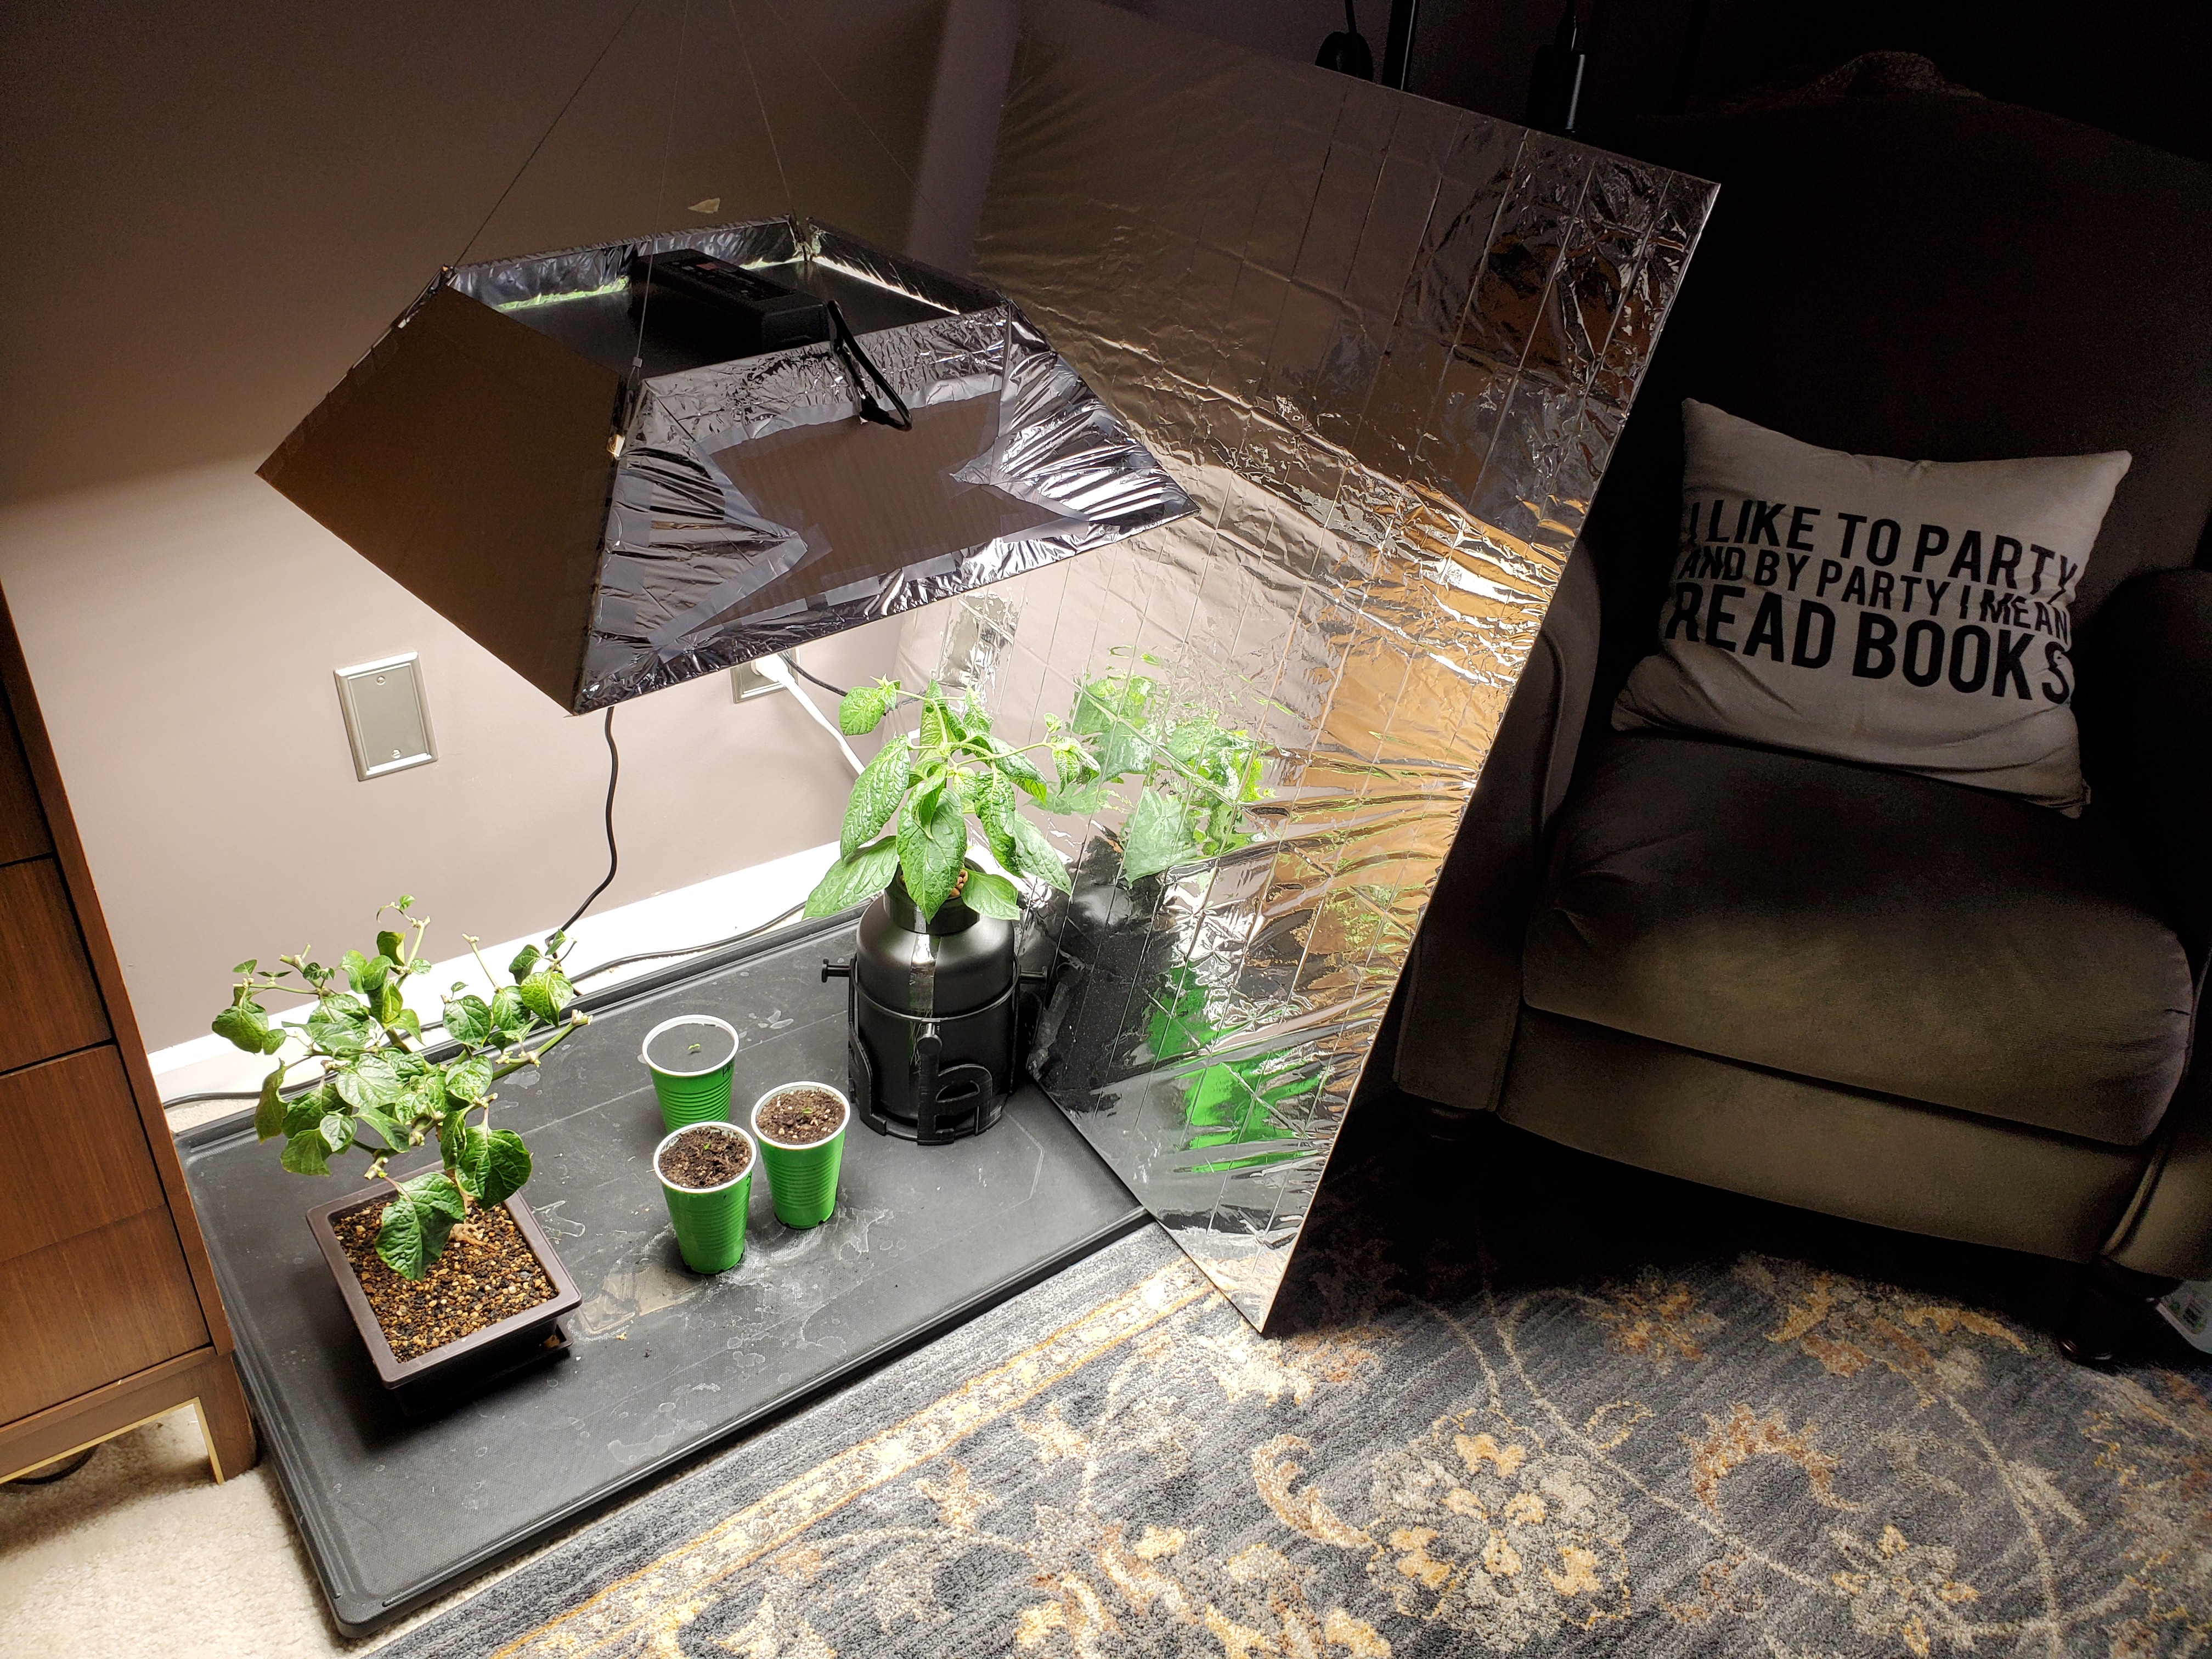
 
20200222-085909.jpg

 
I'm scaling back from the 20+ plants I had last year to seven or eight plants, some in Kratky containers of various sizes, others in fabric pots with dirt.  The list: 
 
10G D - Sugar Rush Peach - WDC
10G D - P. Dreadie - CD
5G D - JPGS - WHP
5G D - 1208 Red - UE
5G K - 1208 Red - UE
5G K - 7 Pot Jonah - WHP
32G K - Haskorea - PtMD989
1G K - Rocoto Arequipa Giant Red - CD
Bonchi start - 7 Pot Yellow - BB
 
Kratky will be Botanicare CNS17 Grow and bottled spring water at first, tap water later.  Dirt will be a mix of pine bark fines, potting soil, and perlite with fish pellets.  Dirt will occasionally be watered with Kratky solution. 
 
I'll be growing out on the deck again on the north side of my house.  I'd love to have a wide open space with southern exposure, but this will have to do. It works. I've got a decent means of hanging shade cloth ready to go. I'm good. 
Thinking about sticking a plant in the ground over where the ill-fated Siv's Plant once made a valiant effort to survive a completely unfair transplant, too..  Will see.
 
Any and all comments or criticisms are very welcome and I thank you all most warmly for having me and schooling me and reading my noodlings!
 
Siv said:
Do it... do it... do it...
 
I'm actually seriously thinking about ditching the grow bags for next year and building a bunch more raised beds. Better for the back!
 
Siv!  A duck with something to teach me!   :clap:   Excellent!
 
The only problem I can think of with ditching the grow bags would be losing the mobility they afford.
 
That box is probably a little more spiffy than I'd want to lay out for..  Where do you get the corrugated stuff?
 
Uncle_Eccoli said:
 
Siv!  A duck with something to teach me!   :clap:   Excellent!
 
The only problem I can think of with ditching the grow bags would be losing the mobility they afford.
 
That box is probably a little more spiffy than I'd want to lay out for..  Where do you get the corrugated stuff?
 
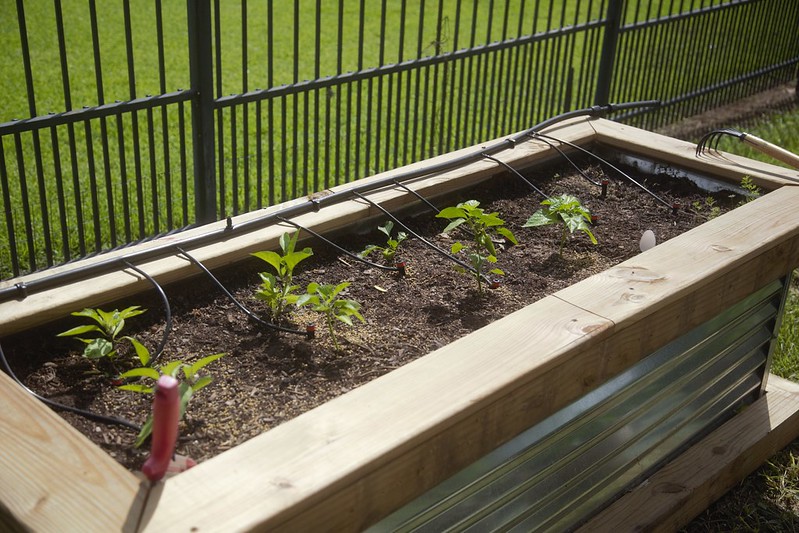
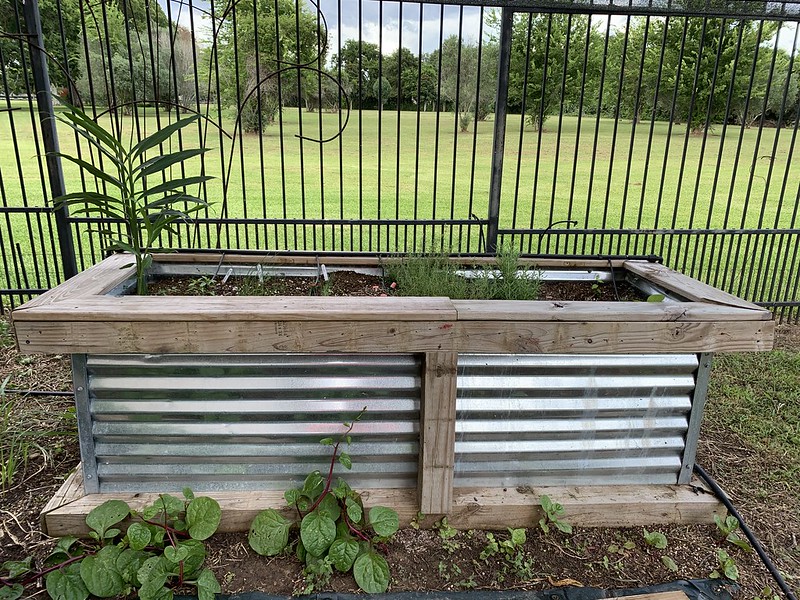
So I built that grow bed (two actually) with corrugated roofing from Lowes. The wood was from a friend's deck that they were throwing out so is pressure treated lumber.
 
This is the panel: https://www.lowes.com/pd/Union-Corrugating-2-16-ft-x-12-ft-Corrugated-Metal-Roof-Panel/3317584
 
I bought three; two were cut in half to make 6' sides and the other was cut into 2' lengths for the ends. Then I used this flashing for the corners: https://www.lowes.com/pd/Amerimax-4-in-x-120-in-Galvanized-Steel-Step-Flashing/3363762
 
So the box is essentially all galvanized metal screwed together using self tapping roofing screws. The wood was added to give it some extra rigidity, to create a lip at the top to hide the sharp ends and for looks.
 
I'm working on a plan for next year since mobility isn't that important for me. There are a bunch of YouTube videos with examples of how to build something similar. I'm thinking of using some kind of composite decking instead of wood for durability and looks if I'm building several. It'll cost a bit more but it should look nice and also last as long as I'll be at this house.
https://www.youtube.com/watch?v=YtnArAl617k
https://www.youtube.com/watch?v=fljVhyXRrhM
https://www.youtube.com/watch?v=OgA1EJt1SLE
https://www.youtube.com/watch?v=VZPqt1GlbRU
 
Siv said:
 
So I built that grow bed (two actually) with corrugated roofing from Lowes. The wood was from a friend's deck that they were throwing out so is pressure treated lumber.
 
This is the panel: https://www.lowes.com/pd/Union-Corrugating-2-16-ft-x-12-ft-Corrugated-Metal-Roof-Panel/3317584
 
I bought three; two were cut in half to make 6' sides and the other was cut into 2' lengths for the ends. Then I used this flashing for the corners: https://www.lowes.com/pd/Amerimax-4-in-x-120-in-Galvanized-Steel-Step-Flashing/3363762
 
So the box is essentially all galvanized metal screwed together using self tapping roofing screws. The wood was added to give it some extra rigidity, to create a lip at the top to hide the sharp ends and for looks.
 
I'm working on a plan for next year since mobility isn't that important for me. There are a bunch of YouTube videos with examples of how to build something similar. I'm thinking of using some kind of composite decking instead of wood for durability and looks if I'm building several. It'll cost a bit more but it should look nice and also last as long as I'll be at this house.
https://www.youtube.com/watch?v=YtnArAl617k
https://www.youtube.com/watch?v=fljVhyXRrhM
https://www.youtube.com/watch?v=OgA1EJt1SLE
https://www.youtube.com/watch?v=VZPqt1GlbRU
 
Ah, I see - the wood structure at the top is just sitting there.  Cool.
 
Awesome, thanks for the links!
 
Yeah, that composite stuff is nice.  Would like to replace all my decking with it, but $$$...
 
Siv said:
 
This is the panel: https://www.lowes.com/pd/Union-Corrugating-2-16-ft-x-12-ft-Corrugated-Metal-Roof-Panel/3317584
 
I bought three; two were cut in half to make 6' sides and the other was cut into 2' lengths for the ends. Then I used this flashing for the corners: https://www.lowes.com/pd/Amerimax-4-in-x-120-in-Galvanized-Steel-Step-Flashing/3363762
 
So the box is essentially all galvanized metal screwed together using self tapping roofing screws. The wood was added to give it some extra rigidity, to create a lip at the top to hide the sharp ends and for looks.
 
What did you use to cut the panels?  Would be nice to miter cut them so the edges would close..
 
Uncle_Eccoli said:
 
What did you use to cut the panels?  Would be nice to miter cut them so the edges would close..
 
The panels are so thin I just used tin snips. I've seen people use special cut-off wheels in circular saws or angle grinders but the tin snips worked just fine. In fact my son and I cut them in half in the Lowes car park with tin snips so we could strap them to the roof of the Jeep. Miter would be nice but tricky (maybe a circular saw and an edge guide) but it's so floppy that the cut would have to be supported well. It's kinda redundant anyway as the corners are hidden with the flashing on the outside and the inside is covered with dirt!
 
I used 4x4s because that's what I had but I think 2x4s would have been better. Had my table saw been up to it, I would have cut them in half. I'm still debating on whether I should try composite or cedar. I would prefer the composite for durability but it will be the most expensive. Cedar would be rot resistant and very easy to work with but not as clean. I wouldn't use PT lumber again since it looks a bit janky.
IMG_2937.JPG
 
Siv said:
 
The panels are so thin I just used tin snips. I've seen people use special cut-off wheels in circular saws or angle grinders but the tin snips worked just fine. In fact my son and I cut them in half in the Lowes car park with tin snips so we could strap them to the roof of the Jeep. Miter would be nice but tricky (maybe a circular saw and an edge guide) but it's so floppy that the cut would have to be supported well. It's kinda redundant anyway as the corners are hidden with the flashing on the outside and the inside is covered with dirt!
 
I used 4x4s because that's what I had but I think 2x4s would have been better. Had my table saw been up to it, I would have cut them in half. I'm still debating on whether I should try composite or cedar. I would prefer the composite for durability but it will be the most expensive. Cedar would be rot resistant and very easy to work with but not as clean. I wouldn't use PT lumber again since it looks a bit janky.
attachicon.gif
IMG_2937.JPG
 
What keeps the dirt from running out the gaps when it rains?
 
Uncle_Eccoli said:
 
What keeps the dirt from running out the gaps when it rains?
 
You know I never really thought about it. I just went outside and took a pic:
50149619687_d08957b283_c.jpg

 
I'm guessing the dirt fills the gaps and stops the dirt behind it from coming out? It doesn't look like any dirt has come out the sides. It probably works the same as a regular plant pot - the dirt doesn't fall out the drainage holes in the bottom so the gaps must be small enough to work in the same way.
 
In the raised bed that I used to make, there were always small holes, cracks, ... let's say "small openings" :) When I filled the raised beds with compost (100% mushroom compost; temperate climate!), I soaked them with water. There always flowed some compost/water out of the openings, but once the compost settled, the openings were "closed". The ground level of the raised beds slightly decreased over time, but I believe that was because of compacting of the compost. 
 
Raised beds are a pleasure to work with, but mind the materials you will be using. Wood can rot, stone warms up, metal... ? And if you have a snail problem, rest assured they will hide in crevices :lol:
 
Uncle_Eccoli said:
About $430 for an 8x4 version, materials, dirt, and compost. This seems plausible. The wife didn't run me out of the room, anyway. Hell, she didn't even pull a face. 
:think:
 
Edit: Make that $350. Found a way to split a bulk compost delivery. 
 
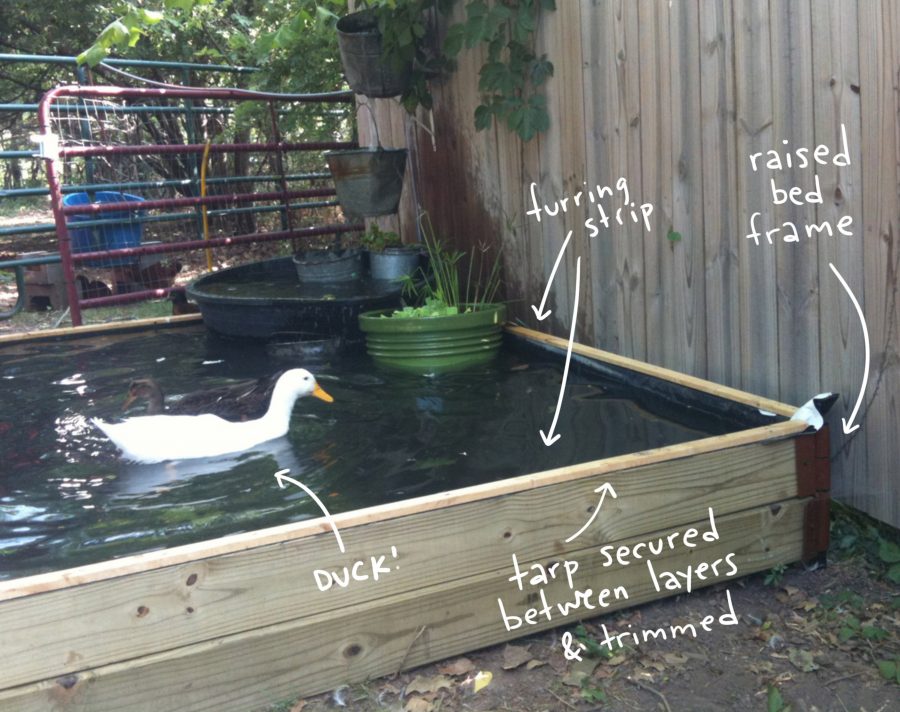
Allow me to let you in on a secret. The bottom half of the bed is not filled with compost. Mine has leaves, grass cutting and the limbs of some old trees - basically anything organic. It breaks down over time and adds nutrients back into your soil. I guess it's a type of hugelkultur.
 
You can see the stonking 6ft tall plants that people achieve with just a 12" raised bed - you don't need to spend that much money on filling the whole thing with good compost. I filled mine (and my grow bags) with the cheapest I could find - it was something like $3 per bag on sale in autumn, with some blood and bone meal and perlite thrown in then added a couple bags of the good stuff on top. Once you get some worms in there, you'll be golden. There will be some settling as it rains and the stuff underneath breaks down - this year I added a couple bags to each bed to top them off.
 
Siv said:
 
Allow me to let you in on a secret. The bottom half of the bed is not filled with compost. Mine has leaves, grass cutting and the limbs of some old trees - basically anything organic. It breaks down over time and adds nutrients back into your soil. I guess it's a type of hugelkultur.
 
You can see the stonking 6ft tall plants that people achieve with just a 12" raised bed - you don't need to spend that much money on filling the whole thing with good compost. I filled mine (and my grow bags) with the cheapest I could find - it was something like $3 per bag on sale in autumn, with some blood and bone meal and perlite thrown in then added a couple bags of the good stuff on top. Once you get some worms in there, you'll be golden. There will be some settling as it rains and the stuff underneath breaks down - this year I added a couple bags to each bed to top them off.
 
I considered reducing my dirt/compost cost by filling as much as the bottom 25% with organic stuff, but it doesn't save me all that much, especially with the bulk compost. I've got several months to think about it. 
 
That really sucks aboot your Haskorea [emoji2959]That thing was huge lol [emoji2959].


Sent from my iPhone using Tapatalk
 
Back
Top