A common question that pops up from time to time has to do with posting pictures. I personally had no clue what I was doing when I first joined the forum. As a result, I am hoping to create a crude guide to do so. There are basically three steps. First, you need to find a site to host your pictures at. There are a large number of sites that provide this service for free. A quick google search turned up the following;
http://imageshack.us/
http://tinypic.com/
http://www.flickr.com/
http://photobucket.com/
...and the list goes on and on.
The only one that I have experience with is Photobucket and therefore I will be using this host in my guide. You may find that another host fits your particular style or needs. Feel free to shop around so to speak. I chose Photobucket simply because it was the first one that was suggested to me.
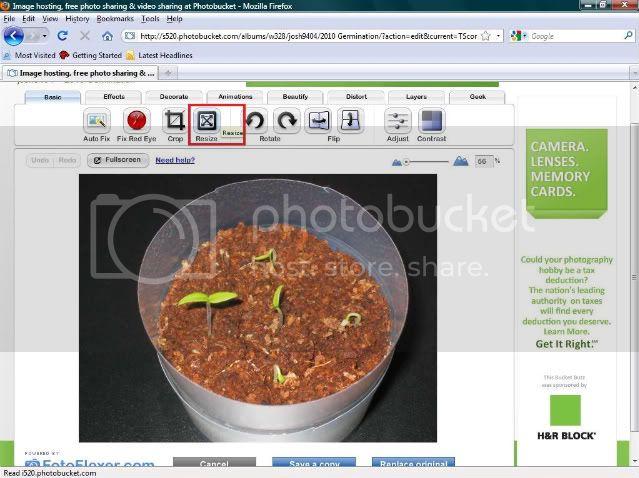
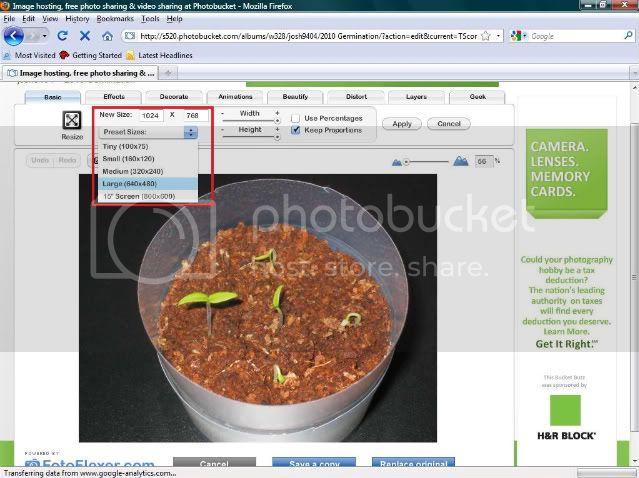
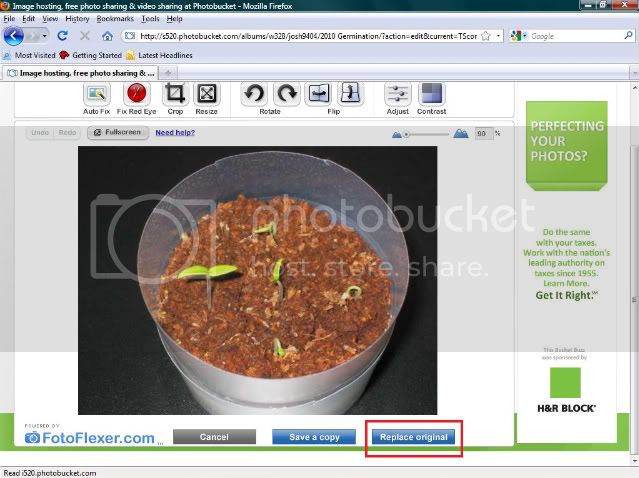
Once you have chosen a host you can then upload your images. These sites tend to provide you with some type of basic editing platform, which will allow you to crop, re-size, etc.
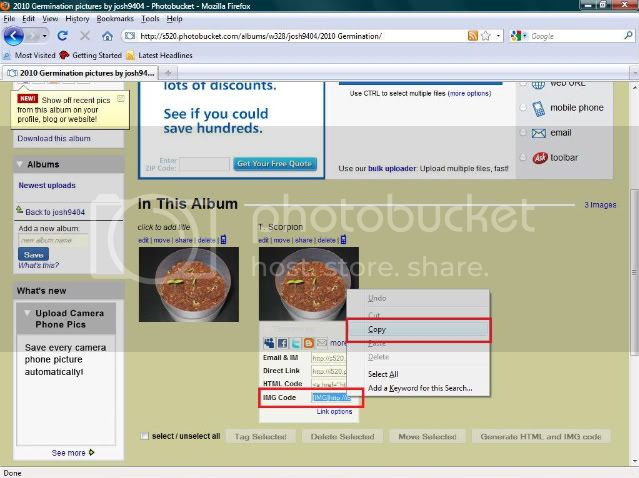
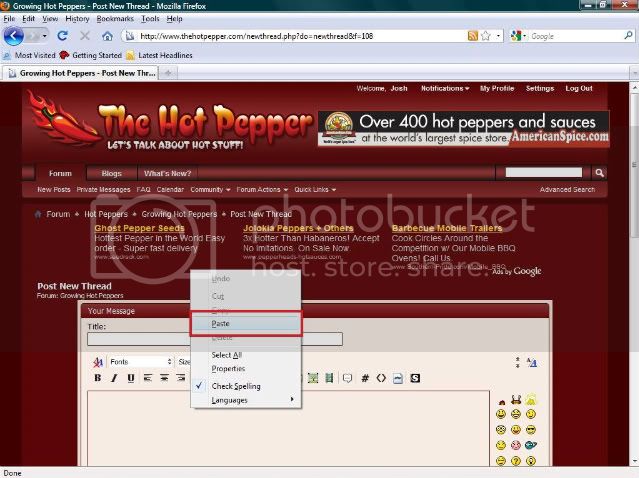
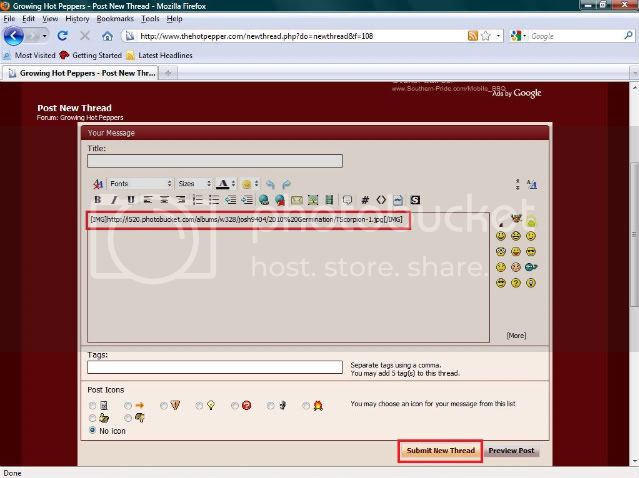
After uploading your images all you have to do is post them onto THP.
Let's get started.
The first step is to register at the image hosting site you have chosen. As I previously stated, I will be using Photobucket. To register go to http://photobucket.com/ and click on any of the "Join Now!" tabs. They will bring you to the screen below.
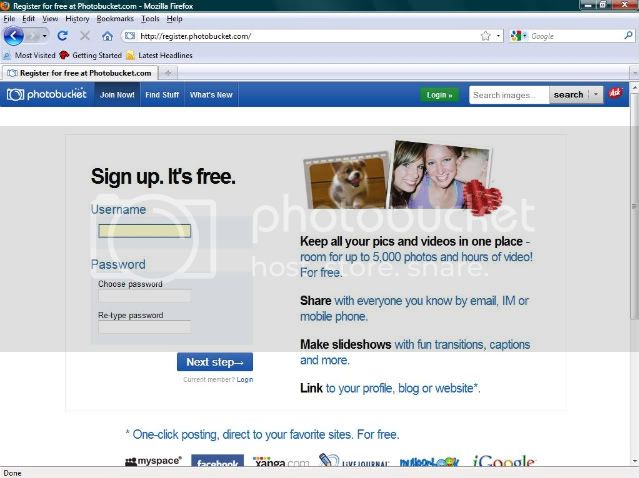
From what I remember, the registration process was fairly straight forward. If you have any difficulties feel free to Private Message me or post a question here.
Once you have registered you can begin uploading images. Using your E-mail or username along with you password you can log into your account. We will get to the uploading process in a minute but I think there are a few important things that should be pointed out. I would recommend creating separate Albums within your account to keep things organized; however, this is not necessary. If you want you can upload everything to the same location. This can become problematic if you ever decide to organize your photos. If you move the image, even within your account, they will no longer appear here on THP. You will understand why a little later on.
When you sign in you will see a screen similar to the one below. You want to first make sure that "My Computer" is selected under the word "From:." It should be set as the default. You can then click on the "Upload images and videos" tab.
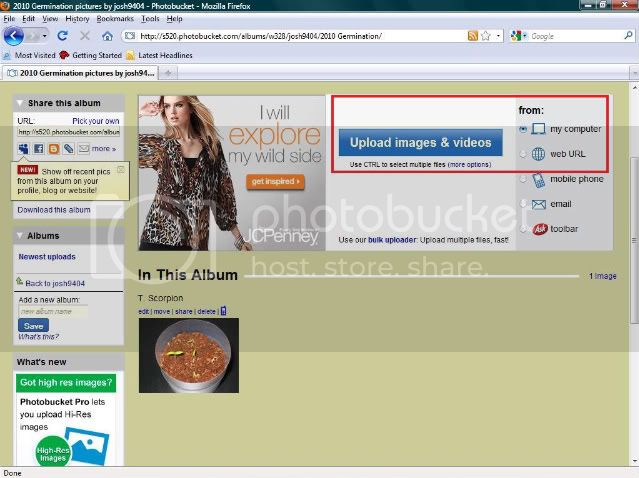
A new window will pop up as seen below.
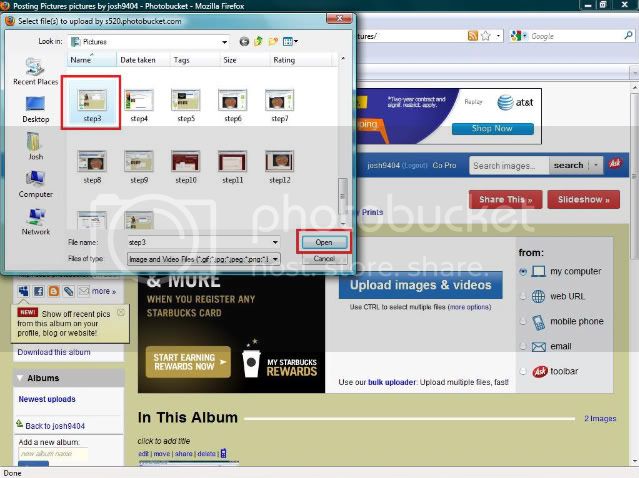
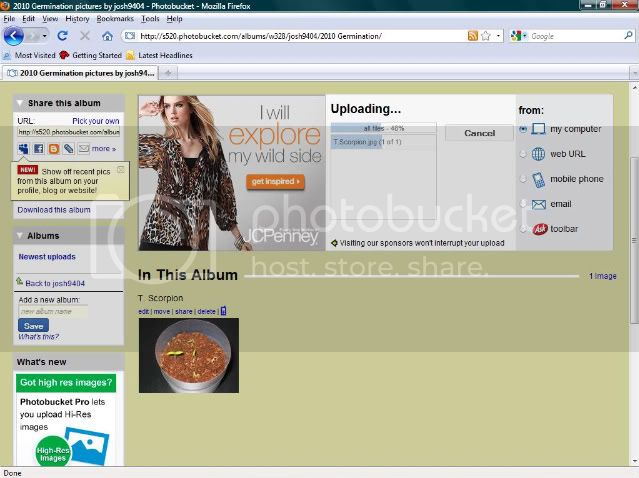
Do not be alarmed if the new window does not display the images you wanted to post. You may have to navigate through your computer files, via that window, to find where you saved your images. Once you have found the images you can click on them and hit "Open" on the bottom right-hand side of that window. The images will begin to upload as seen below.
You can upload images individually, but I prefer to select several at once. To do this simply click on an image file with your mouse, press and hold the "shift" key, and select the other images by either clicking on them or selecting them with the directional buttons.
http://imageshack.us/
http://tinypic.com/
http://www.flickr.com/
http://photobucket.com/
...and the list goes on and on.
The only one that I have experience with is Photobucket and therefore I will be using this host in my guide. You may find that another host fits your particular style or needs. Feel free to shop around so to speak. I chose Photobucket simply because it was the first one that was suggested to me.
Once you have chosen a host you can then upload your images. These sites tend to provide you with some type of basic editing platform, which will allow you to crop, re-size, etc.
After uploading your images all you have to do is post them onto THP.
Let's get started.
The first step is to register at the image hosting site you have chosen. As I previously stated, I will be using Photobucket. To register go to http://photobucket.com/ and click on any of the "Join Now!" tabs. They will bring you to the screen below.
From what I remember, the registration process was fairly straight forward. If you have any difficulties feel free to Private Message me or post a question here.
Once you have registered you can begin uploading images. Using your E-mail or username along with you password you can log into your account. We will get to the uploading process in a minute but I think there are a few important things that should be pointed out. I would recommend creating separate Albums within your account to keep things organized; however, this is not necessary. If you want you can upload everything to the same location. This can become problematic if you ever decide to organize your photos. If you move the image, even within your account, they will no longer appear here on THP. You will understand why a little later on.
When you sign in you will see a screen similar to the one below. You want to first make sure that "My Computer" is selected under the word "From:." It should be set as the default. You can then click on the "Upload images and videos" tab.
A new window will pop up as seen below.
Do not be alarmed if the new window does not display the images you wanted to post. You may have to navigate through your computer files, via that window, to find where you saved your images. Once you have found the images you can click on them and hit "Open" on the bottom right-hand side of that window. The images will begin to upload as seen below.
You can upload images individually, but I prefer to select several at once. To do this simply click on an image file with your mouse, press and hold the "shift" key, and select the other images by either clicking on them or selecting them with the directional buttons.