I've been working towards 2015 for a bit now, so I figured I might as well get the glog fired up.
Quick recap: I'm a pastor was moved by the denomination last summer (happens every so often in my profession), so 2014 was not great. The soil in the new garden spot needs a ton of work. So this year is a year I hope to move forward.
One benefit of the new place is a 10 by 10 (or so) area in the basement that I can use as a plant room. I've been working on that lately.
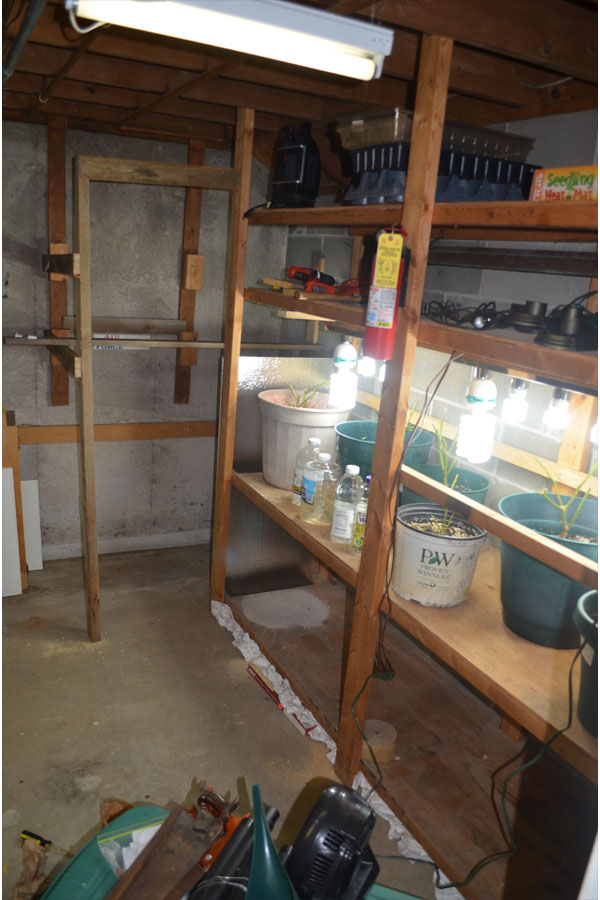
The room was previously used as a small wood shop, so it has a large table and a simple, homemade wooden shelving set up. Here is a shot of it with the lights temporarily in place for my over winters. I've already taken out one level in order to have a large growing area in the middle. Also, on the far end, you can see I began a simple extension. I wish I had a picture of how it was when I first started. There were narrow shelves on that far wall. I tore all of that out. Also, there was a ton of paint and stuff on the shelving unit, that I had to move elsewhere.
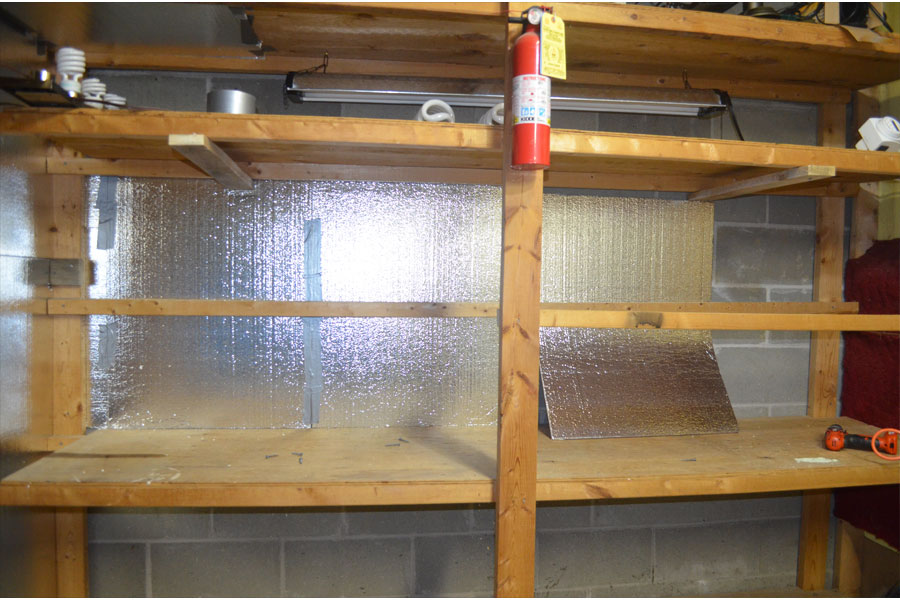
I got some insulation from a big box store (Menards), and began cutting and duct taping it in place.
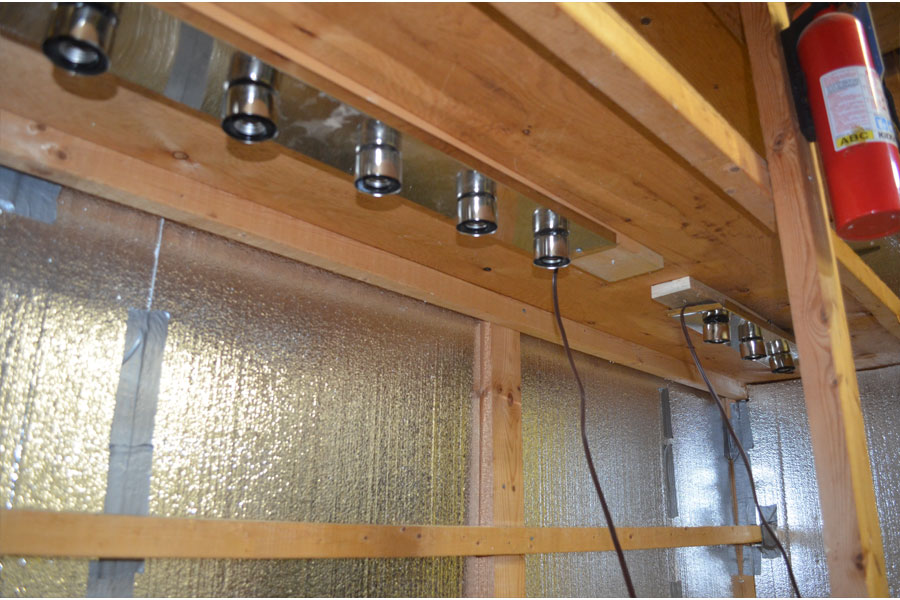
I attached the vanity lighting to 1 1/2 by 3, then screwed it in from the top so the screw head was flush with the upper level, and the lighting was as far up as it would go.
Insulation in, lights on. On the top level I have 2 four foot t8 bulbs. 6500k color. The heat from the CFL's on the mid level make the top compartment warm. I hope warm enough for seeds to sprout.
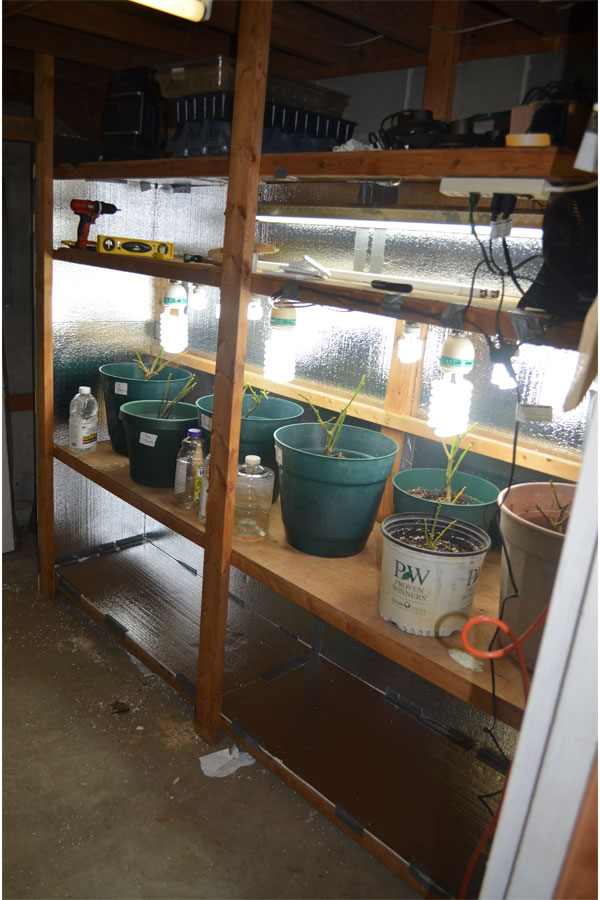
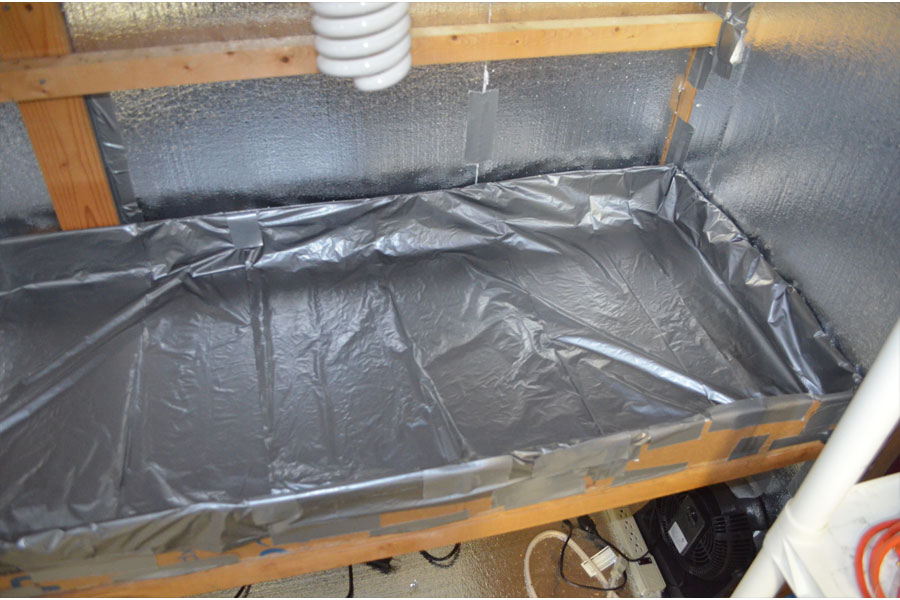
Since I want to be able to have loose plants on the mid level, but don't want water seeping into the wood or down into the lights on the bottom level, I took some cardboard from our packing boxes and made a custom fit box for that second level. I then lined the box with 2 garbage bags I sliced up the sides in order to make plastic sheeting.
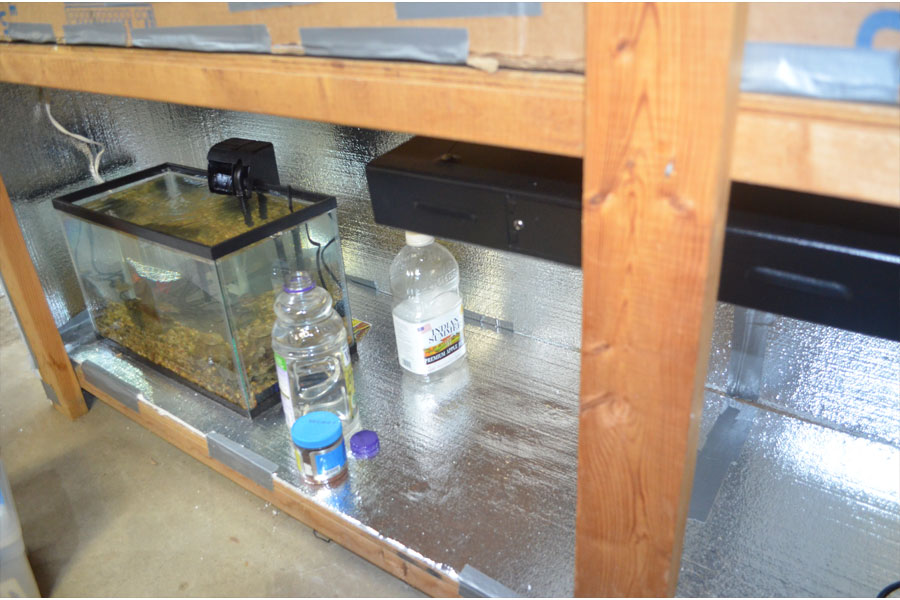
For the bottom level, I added insulation on the floor, since I figured cold air would come up from that. I also bought an 8 bulb, 4 foot, T5 grow light, which you can see hanging from the top of that bottom level. Finally, I thought I'd put a little 10 gallon fish tank in the bottom. This will provide humidity and when I get water from it to water the plants, it'll be full of nitrogen. Oh, and in the tank are 2 Firemouth cichlids.
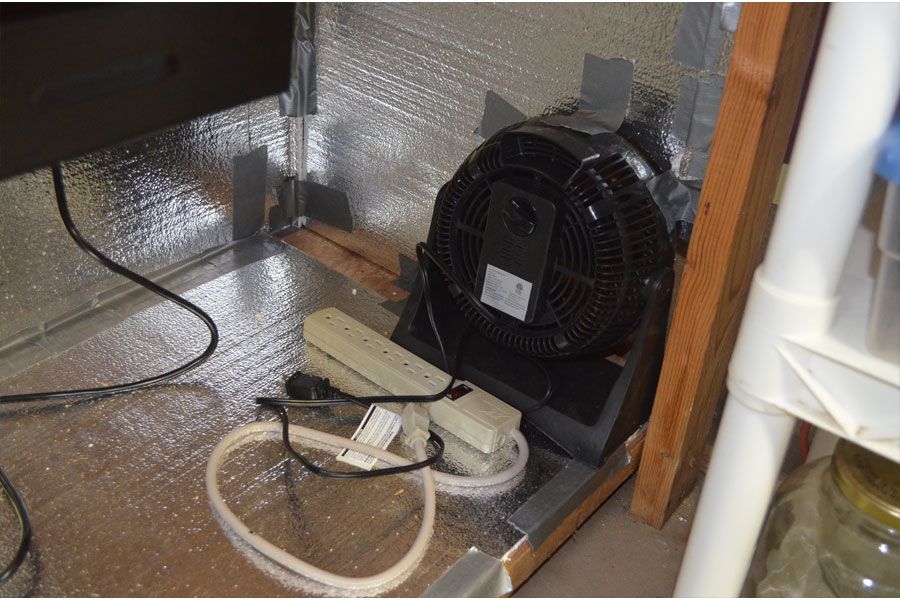
Also on the bottom level, to the right, I put in an exhaust fan. I got 2 of these little fans. They were on sale because they were out of season. I cut a custom hole in the insulation and stuck it in. I know, it looks factory made, right?
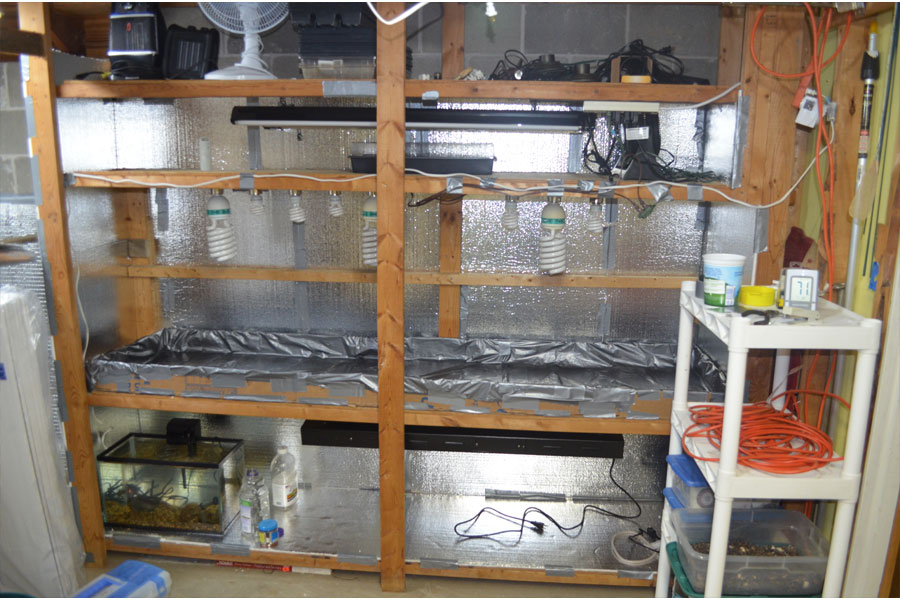
And here is the whole set up. Maybe you can see the second exhaust fan. I put it in the upper level to the right to blow across the seedlings when the come up. Also, my thought was that I could push the hot air to the left where there is a gap running down the side wall, and maybe the bottom fan would pull it all the way to the lower level and push out the cold air.
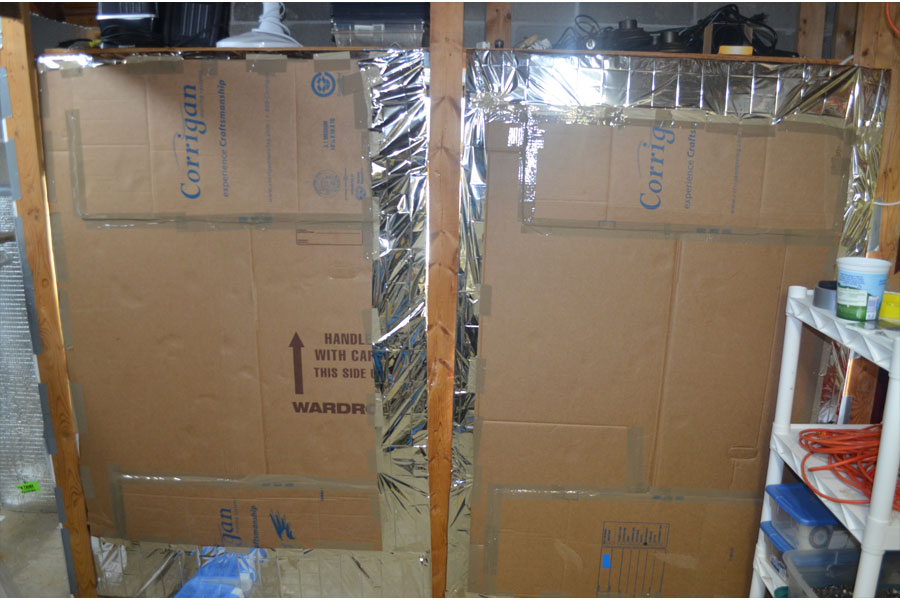
Of course, you need to cover the front in order to keep the heat in. I took some large cardboard boxes and covered the front with Mylar emergency blankets.
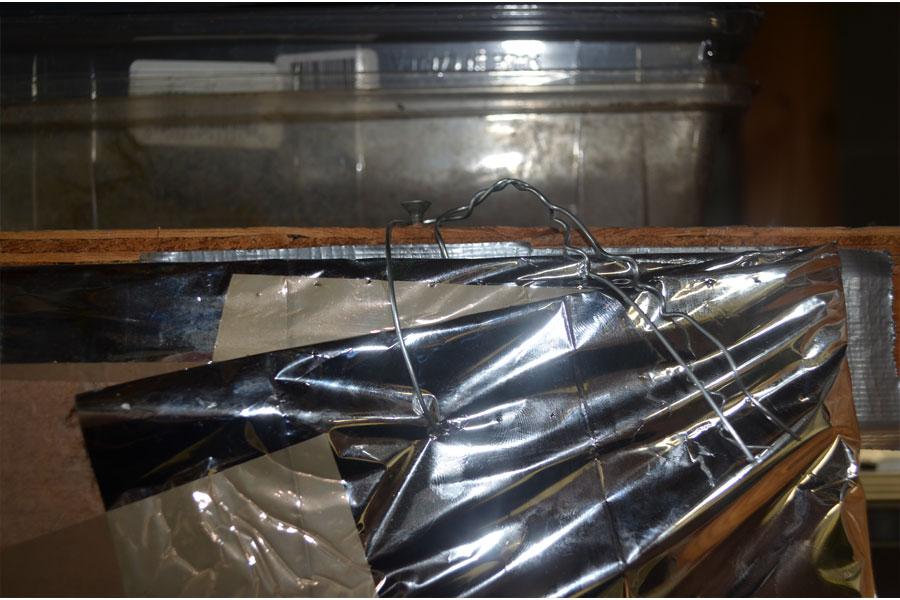
I put two screws on each side on the very top, and ran some wire through the top of the card board wall. And I hang them on that to hold it up.
Ok that's my 10 picture limit. I'll try to make it back tomorrow to cover my overwinters and the seeds I just put down, as well as the soil rehab project.
It's been fun to get this going. Hopefully it'll pay off.
Thanks for stopping by!
Quick recap: I'm a pastor was moved by the denomination last summer (happens every so often in my profession), so 2014 was not great. The soil in the new garden spot needs a ton of work. So this year is a year I hope to move forward.
One benefit of the new place is a 10 by 10 (or so) area in the basement that I can use as a plant room. I've been working on that lately.
The room was previously used as a small wood shop, so it has a large table and a simple, homemade wooden shelving set up. Here is a shot of it with the lights temporarily in place for my over winters. I've already taken out one level in order to have a large growing area in the middle. Also, on the far end, you can see I began a simple extension. I wish I had a picture of how it was when I first started. There were narrow shelves on that far wall. I tore all of that out. Also, there was a ton of paint and stuff on the shelving unit, that I had to move elsewhere.

I got some insulation from a big box store (Menards), and began cutting and duct taping it in place.

I attached the vanity lighting to 1 1/2 by 3, then screwed it in from the top so the screw head was flush with the upper level, and the lighting was as far up as it would go.

Insulation in, lights on. On the top level I have 2 four foot t8 bulbs. 6500k color. The heat from the CFL's on the mid level make the top compartment warm. I hope warm enough for seeds to sprout.

Since I want to be able to have loose plants on the mid level, but don't want water seeping into the wood or down into the lights on the bottom level, I took some cardboard from our packing boxes and made a custom fit box for that second level. I then lined the box with 2 garbage bags I sliced up the sides in order to make plastic sheeting.

For the bottom level, I added insulation on the floor, since I figured cold air would come up from that. I also bought an 8 bulb, 4 foot, T5 grow light, which you can see hanging from the top of that bottom level. Finally, I thought I'd put a little 10 gallon fish tank in the bottom. This will provide humidity and when I get water from it to water the plants, it'll be full of nitrogen. Oh, and in the tank are 2 Firemouth cichlids.

Also on the bottom level, to the right, I put in an exhaust fan. I got 2 of these little fans. They were on sale because they were out of season. I cut a custom hole in the insulation and stuck it in. I know, it looks factory made, right?

And here is the whole set up. Maybe you can see the second exhaust fan. I put it in the upper level to the right to blow across the seedlings when the come up. Also, my thought was that I could push the hot air to the left where there is a gap running down the side wall, and maybe the bottom fan would pull it all the way to the lower level and push out the cold air.

Of course, you need to cover the front in order to keep the heat in. I took some large cardboard boxes and covered the front with Mylar emergency blankets.

I put two screws on each side on the very top, and ran some wire through the top of the card board wall. And I hang them on that to hold it up.

Ok that's my 10 picture limit. I'll try to make it back tomorrow to cover my overwinters and the seeds I just put down, as well as the soil rehab project.
It's been fun to get this going. Hopefully it'll pay off.
Thanks for stopping by!


