• Politics are not permitted. There's plenty of places to discuss that elsewhere, and a hot pepper forum is not the place. Thank you for respecting the community!

Spicy Chickens Barn Conversion. Extreme Makeover Farm Edition.

Thanks siccy, Just went through your glog, Jealous for sure. wow nice property, plants, chicken, turtles and truck!! :) Oya lets not forget your weather. lol
 
Choose to drive the load of sand in before the footings were dug, big chore throwing the sand in a shovel full at a time from the outside.  ;) 
 
 
2014_Addition_011.jpg

 
Footings dug and 2 I-joist set to hold the frost walls on both sides.
 
2014_Addition_012.jpg


2014_Addition_013.jpg

 
Had to add a special pic of this dump trailer again, it sure has been a life saver! :party: 
 
2014_Addition_014.jpg

 
2014_Addition_015.jpg

 
Back to removing rocks and topsoil and replacing it with sand for the front porch. Ok this is really getting old now.  :rolleyes: 
 
2014_Addition_016.jpg

 
Welded 1/2 inch [SIZE=18.1818180084229px]rebar[/SIZE] to to make triangle for the footings, 35 feet long.
 
2014_Addition_017.jpg

 
2014_Addition_018.jpg

 
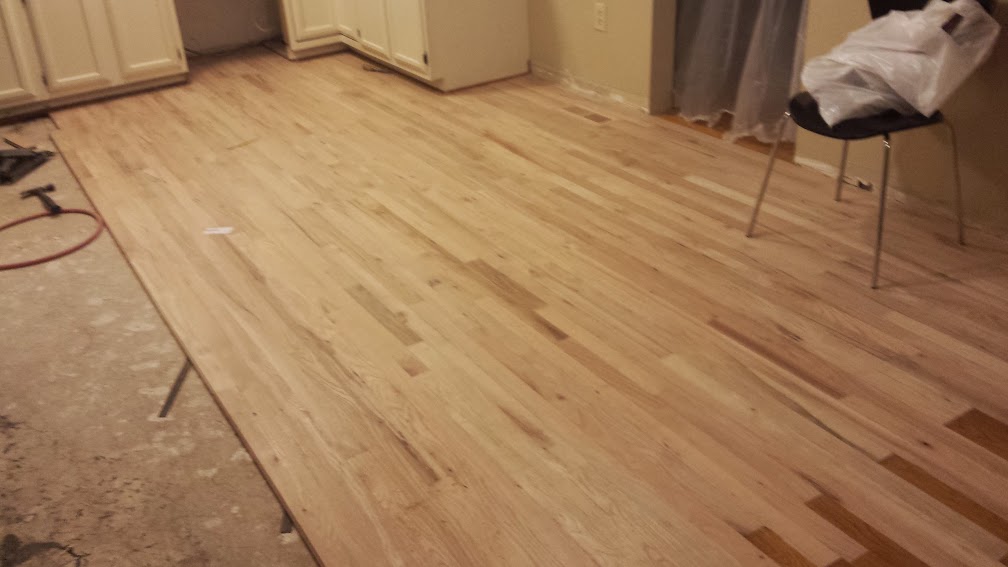
Footings poured, sand leveled, [SIZE=18.1818180084229px]10 mil[/SIZE] plastic down and floor joists going in with 2 inch high density styrofoam in between.
 
2014_Addition_019.jpg

 
2014_Addition_020.jpg

 
Thanks for stopping by!!
 
Just getten er done. :-)
 
Cheers - Jeff 
 
Need a pump please.
 
Damn Jeff. How long did that slab take to bust out with that little electric hammer??? Looks way too thick for that hammer to effectively bust up.
 
Jeff H said:
Damn Jeff. How long did that slab take to bust out with that little electric hammer??? Looks way too thick for that hammer to effectively bust up.
 
A couple of weeks with removing topsoil and all, the hammer isn't really that small, it weighs like 90#'s and quite a chore lifting it hundreds of times to the next cut. lol
 
2014_Addition_021.jpg

 
Finally a gravy job, laying the deck down. :dance:
 
2014_Addition_022.jpg

 
Deck is down and protected with plastic, since we were unsure of the locations of windows and doors I [SIZE=18.1818180084229px]decided[/SIZE] to beam both side walls out and cut everything in later, [SIZE=18.1818180084229px]getting[/SIZE] the roof on was top priority.
 
Since I am doing this with no help, I built a platform for setting the rafters, still pretty scary lifting 2 rafters up in mid air and fastening the peaks. ;) 
 
2014_Addition_023.jpg

 
Once 2 rafters were set, I just slid the platform down the wall another 2 feet.
 
2014_Addition_024.jpg

 
2014_Addition_025.jpg

 
2014_Addition_026.jpg

 
Due to trying to get it covered in for our annual corn roast in case it rained; I didn't get any pics of progress [SIZE=18.1818180084229px]until[/SIZE] this stage. 
 
I stopped the roof line flush with the wall for now but it will extend out another 14 feet for our covered deck, next years project.
 
What is covering up the gable wall is all [SIZE=18.1818180084229px]temporary[/SIZE] to help keep the water out and will be [SIZE=18.1818180084229px]balloon[/SIZE] framed when the time comes.
 
2014_Addition_027.jpg

 
Here you can see the porch roof and some wall framing, think this will be a nice area when finished with cedar posts and pavers.
 
2014_Addition_028.jpg

 
2014_Addition_029.jpg

 
2014_Addition_030.jpg

 
[SIZE=18.1818180084229px]A few more to come, thanks for looking!![/SIZE]
 
[SIZE=18.1818180084229px]Cheers - Jeff[/SIZE]
 
Looks amazing Jeff. Wife just said we need to go find a barn and have you down to consult and design after showing her all your progress here. Keep up the great work.
 
2014_Addition_031.jpg

 
[SIZE=18.1818180084229px]Quite a number of years ago I built some doors and sidelights for a commercial application, installed them and then the customer never paid, so we ripped em out and now after all this time I found a use for a couple. Really nice heavy doors a full 7 foot tall and 36 inches wide. Side lights are 2 foot wide and 6 foot nine inches tall. not meant for exterior applications but took steps to make em weather worthy. [/SIZE]
 
[SIZE=18.1818180084229px]Mortised commercial door hardware......Nice :dance:[/SIZE][SIZE=18.1818180084229px] [/SIZE]
 
2014_Addition_032.jpg

 
2014_Addition_033.jpg

 
2014_Addition_034.jpg

 
2014_Addition_035.jpg

 
Well I hope you liked it so far, not real fast having to do everything by myself but I plug away at it.
 
That is all for now, will finish closing in the end for winter and now it is time to get back inside and finish the pantry and well room.
 
Thank you all for your time, I hope it wasn't wasted.  :rolleyes: 
 
Take care!! Cheers - Jeff
 
Outstanding work Jeff. As always. The scope of the projects you tackle by your self at your age are astounding. Absolutely astounding.
 
I'm doing a hardwood floor in the kitchen, at 41 years old. Tomorrow, I'll be on a steady dose of advil all day. :rolleyes:
 
20141004_201212.jpg


On my comment about the demo hammer, those electric ones just don't hit that hard. Years ago when I put the addition on my house I rented one to take out a little patio that was in the way. After hours of hammering, all I was doing was drilling holes in what I thought was 4" concrete patio. As it turns out, the patio was 16" thick..... :rolleyes: :rolleyes: :rolleyes: I ended up renting a ram for the Bobcat. Even the ram took a while. Yours looks almost as thick. :shocked:  That shit sucks.
 
Jeff H said:
Outstanding work Jeff. As always. The scope of the projects you tackle by your self at your age are astounding. Absolutely astounding.
 
I'm doing a hardwood floor in the kitchen, at 41 years old. Tomorrow, I'll be on a steady dose of advil all day. :rolleyes:


On my comment about the demo hammer, those electric ones just don't hit that hard. Years ago when I put the addition on my house I rented one to take out a little patio that was in the way. After hours of hammering, all I was doing was drilling holes in what I thought was 4" concrete patio. As it turns out, the patio was 16" thick..... :rolleyes: :rolleyes: :rolleyes: I ended up renting a ram for the Bobcat. Even the ram took a while. Yours looks almost as thick. :shocked:  That shit sucks.
 
Ya that shit sucks!! lol
 
Luckily for us the concrete was real old and the mix was weak. ;)
 
Man that floor is going to look sweet when finished, are you going to stain it or natural?
 
Before I posted I went to trader.com and purchased a few stocks in the Advil company, so feel free to take as many as you need.  :rofl: Keep us posted!!
 
As always Jeff a pleasure! Cheers
 
P.S. still laughing :-)
 
Spicy Chicken said:


Man that floor is going to look sweet when finished, are you going to stain it or natural?
 
 
Well, I'm lacing it in with an existing floor in the dining room, so it will be stained to match. Truth be told, the hard work wasn't laying the floor, it was the damn lacing...Sucks as much as sanding drywall, grouting tile or jack hammering concrete.
 
20141004_201226.jpg


Not to clog up your great thread with my photos. Keep posting your progress. I'll have updates in my glog one of these days when I get time to do it.
 
Jeff H said:
 
Well, I'm lacing it in with an existing floor in the dining room, so it will be stained to match. Truth be told, the hard work wasn't laying the floor, it was the damn lacing...Sucks as much as sanding drywall, grouting tile or jack hammering concrete.
 
 
Not to clog up your great thread with my photos. Keep posting your progress. I'll have updates in my glog one of these days when I get time to do it.
 
Wow,  nice job buddy!! I take it that you had to drive all those in? Nice job with the width match, that sometimes can be a real issue; not a lot of tolerance forgiveness in that stuff. We normally have to get it custom milled just to match width. Sanding will be a treat.  :party:  Unless there is some new trick out there you will have to sand the old floor as well? If so I think most of the stain should come off. 
 
differently want to see some progress pics!! ;)  
 
besides finishing the pantry and working on the kitchen area, I decided to build a CNC router, not a big one; just 6x4 footer and maybe go up from there next year.
 
I used the free version of google sketchup CAD program and it took about 8 hour to design it but overall I think it turned out decent.
 
Didn't put all the little bearing and things on in the design but will when the time comes.
 
Think it will be a fun and interesting build, it's my first and with limited talent it may be quite a challenge. 
 
If there is anyone out there that has one or runs one; would be great to hear from you. :-)
 
CNC1.png

Thanks for stopping by!! Cheers - Jeff
 
For anyone who has seen the cnc concept I drew up, well that went right out the window, will be doing an enclosed unit for noise and dust issues. 

Stay tuned this will be a really cool build. (y) :-)

 
Scored some 9 ply birch plywood from Menards home center, not the baltic birch I would have prefered, but in this case I think adequate for the project.
 
CNC_Project_001.jpg


Started the table first, it will have a vacuum clamp system incase you were wondering what all those holes are for.
 
CNC_Project_002.jpg

 
Once the Table had its main stringers I used it to build the 2 side uprights. Used 2x6's ripped down to 4-3/8ths and S4S. staggered the corners; Glued and screwed tight.
 
CNC_Project_003.jpg


Put some casters on the bottom of the 2 outside main supports and built the lower platform,
 
CNC_Project_004.jpg


Wanted to get the table in place before all the lateral supports went in so I had room to fasten the table to the main upright supports. Glued a sheet of 3/4 high density particleboard to the base and clamped it,
 
CNC_Project_005.jpg

 
Here I banded and doubled the carrying joists around the midsection with a second layer of oak plywood
 
CNC_Project_006.jpg

 
Thanks for stopping by!!
 
Cheers _ Jeff
 
I will be following this build for sure.  I do not know a lot about building a CNC Router, but the idea and concept is very interesting.  Will be watching how you go about this.
 
Thanks for sharing
 
Update:
 
Choose to 45 the plywood for the rails and epoxy the aluminum channel instead of just laying it horizontal with one edge up and one down. felt there was more surface area.
Once the epoxy set the excess aluminum was planed off with a thickness planer.
 
CNC_Project_007.jpg

 
CNC_Project_008.jpg

 
Created a channel in the bottom of the box for dust collection. will drill a 4 inch hole in the bottom and mount and flanged gate valve.
 
CNC_Project_009.jpg

 
Rough framing on the table almost done, just the top to complete with dust collection holes all the way around.
 
CNC_Project_010.jpg

 
Top of the table getting the holes cut. sure would be nice to have a cnc router to do this. :-)
 
CNC_Project_011.jpg

 
Finished the duct holes, glued and screwed down plus added 1×2’s the the main supports to flush em up with the oak plywood banding and leaving a channel to run wires for stepper motors limit switches and lights in the top.
 
CNC_Project_012.jpg

 
Thank you for stopping by!!
Cheers – Jeff
 
Coming from a guy who has a hard time closing up a card board box, for what it's worth, I think your skills are amazing. Just the fact that you decided to do this project as a hobby just blows my mind. I wish I knew someone like you that lived near me so I could try to soak in just a little of that kind of knowledge.
:clap: :clap: :clap: :clap: :clap:
 
Update:
Time to get back at er.
I decided just for cosmetics to paint the dust collection holes before the formica went down, had the paint wouldn't of made a special trip to town for it. lol
 
CNC_Project_013.jpg

 
Testing the rails and roller bearing for clearance and mounting option.
 
CNC_Project_014.jpg

CNC_Project_015.jpg

 
Came up with a box idea to fit between the main posts, gives me the option to move the rails up and down, in and out and tilt, once everything is set 4 – 4 inch heavy torx washer head screws on both ends of the box should hold everything in place quite nicely and can easily be readjusted if necessary.
 
CNC_Project_016.jpg

 
CNC_Project_017.jpg

 
Added a couple oak pieces just above and below the roller bearings. just didn’t like the way it looked with the open bearing, lol form and function. :)
 
CNC_Project_018.jpg

 
Extremely happy right now, built the two bearing support boards for the gantry and clamped a board across the top to see how it would roll and I think I need to give myself a pat on the back. lol that thing rolls so smooth its unbelievable with no slop that I can tell whatsoever. Can you tell I’m smiling. :)
 
CNC_Project_019.jpg

 
Here is a close up of the bottom gantry support with the bearings, Drilled holes in the bottom and tapped for a standard 3/8th inch thread. the hole goes all the way in the bearing bolt hole which is slotted up and down an extra 5/16 inch. 

A 5/16×1-1/2 inch spring was loaded into the hole before the bolt threaded in, this is not to hold constant pressure on the bearing but to give all the bearing equal pressure before tightening, plus if the track ever wears a quick loosen and retighten of the nuts and all slop will be removed.
 
CNC_Project_020.jpg

 
And just a couple of quick shots of both ends. Can’t wait to start constructing the gantry for real. :-)
 
CNC_Project_021.jpg

 
CNC_Project_022.jpg

Mama thinks I should be spending more time building her kitchen and less time on the CNC. Hmmmm BOOOO. lol Just kidding she is worth it.
My next entry might take a little longer unless I burn more midnight oil. :0
Hey thanks for stopping by and having a look! Suggestion, comments and questions are welcome
Cheers – Jeff
P. S. I’m really having fun with this!!
 
Looking sweet Jeff.
 
Question: Have you thought about making  some allowances for adjustment in the lower gantry carrier rollers in case you get some wear on aluminum and a little slop is introduced?
 
Back
Top